* There are 3 tools for managing Exchange. 1. The Exchange Management Console, 2. The Exchange Management Shell, and, 3. The Exchange Control Panel, which is accessed through Outlook Web App (OWA)
* We will first look at the use of the EMC and explore its various nodes, panes, and actions we can perform
* Then we’ll look at the purpose of PowerShell and the EMS, focusing on how commands are formed using cmdlets and how they are made more complex and useful through pipe-lining.
The EMC has 4 primary interface elements:
- Console Tree
- Result Pane
- Work Pane
- Action Pane
The EMC is based on MS MMC 3.0 and the GUI version used for Exchange.
Organization Configuration
Server Configuration
Recipient Configuration
Under Server Configuration, when you click on Mailbox, Client Access or Hub Transport, you’ll notice that there are two middle panes. A results pane and a work pane.
The Actions pane can be turned off by clicking Show/Hide the action pane button on the toolbar. When you turn it off, you can still perform functions by right-clicking on objects.
One thing to note in the Console Tree is that you have by default the “Microsoft Exchange on-Premises.” It is designed so that you can manage Exchange Servers in the cloud.
The Exchange Management Shell is a requirement for Exchange Administrators (and there are questions about it in exams). Learning PowerShell is not an option, it is a necessity.
The EMS is built upon PowerShell (PS)
- PS is both a command-line tool and a scripting platform.
- Exchange 2010 requires PowerShell v2.
- PowerShell commands are built using cmdlets
- Through PowerShell commands, you can manage EVERY aspect of Exchange, whereas the EMC you can manage ALMOST every aspect of Exchange
Local Shell and Remote Shell
- The EMC allows you to make configuration changes to the Organization or to individual Servers. In Exchange 2007, you could only run the POwerShell compone3nts on the local machine.
- With Exchange 2010 you can connect to a remote session on a remote Exchange 2010 system.
- When you open the EMS it connects to the closest exchange session
- you cannot connect remotely to an Edge Transport Server
- Remote Sessions are created using the New-PSSession and Import-PSSession cmdlets
What are CMDLETS?
- Simple verb-noun structure
- Common verbs are : Get, Set, Remove, Test, Enable, Disable, Install, Uninstall, New and Move
- Pipelines | help to string cmdlets together
- Examples:
- Get-Mailbox
- Get-MailboxStatistics <Mailbox>
- Get-Mailbox -OrganizationalUnit Sales
- Get-Mailbox | Set-Mailbox -prohibitsendquota 500MB (this will take every mailbox in the organzation and set the prohibit send quota to 500MB – manually would take forever!
The Exchange Management Shell contains modules we need. You can import them into PowerShell, but the EMS already is loaded.
Try for example:
>get-excommand – quite a number of different cmdlets! To investigate how to use one of these commands?
>get-help test-systemhealth
This outputs
Name:
Synopsis:
Syntax: (might want to port out to txt and print)
Description:
Related Links:
Remarks: (Examples)
>Get-Service -> shows all the services running on our system
>Get-Mailbox -> shows all the mailboxes on the server – names, where they reside, quota.
To narrow down to the sales org unit use:
>get-mailbox – OrganizationalUnit Sales
>Get-MailboxStatistics jason.coltrin
shows last login time, storage stats, etc
>get-mailbox -OrganizationalUnit Sales | Set-Mailbox -ProhibitSendQuota 500MB
To give a number of users mailbox with one line of code you can do the following:
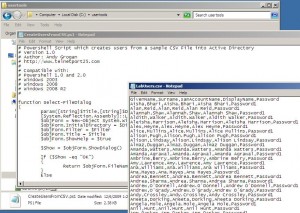
Andy Grogan created a script to create (fake) users on a domain. You can create several hundred users.
Go to UserTools, and you can see a .csv file which contains basic info for creating users. You can change these, and use your real names and create an entire domain of your users.
The script will create an Organizational Unit called “Exchange Users”
You can download the script here:
and here is a screenshot of the script and .csv files:

- Click image to enlarge
Run the powershell script within powershell, and you should see the users scroll down the screen as they are created.
Now that the users have been created, go to your Mailbox server and go to Organization Configuration -> Mailbox -> “MailboxDatabase” is the database where we will be placing our new users. We will use the ExchangeUsers OU to help build mailboxes for our lab users.
Under Recipient Configuration, we do not yet have users listed. We do not have mailboxes for them.
Go to the EMS and type in the following command:
> get-user -OrganizationalUnit ExchangeUsers | where-object{$_.RecipientType -eq “User”} | Enable-Mailbox -Database “MailboxDatabase”
Now that your users have been given mailboxes, goto OWA at https://yourdomain/owa , log in as one of the users and test sending/receiving to the administrator.


