This how-to procedure for mapping network drives pertains to Windows 7 PC’s that are not joined to a domain, but are members of the same network Workgroup. This how-to map network drives is not the same as using the Windows “HomeGroup” feature – this tutorial is a little more advanced – but the method works for me consistently.
- Make sure that both computers are on the same network and subnet. This should be already done in most cases as your computers should pick up IP addresses and network settings from a DHCP server/router/modem. Things might get weird if each PC trying to reach one-another are on different connections, i.e. one is on WiFi and one is on an Ethernet cable. Essentially both machines should have IP addresses that look similar, something like 192.168.0.5 and 192.168.0.6. You can find your IP address by right-clicking on the Network icon in the taskbar, down by the clock, or go into the Control Panel > Network and Internet > and choose: Network and Sharing Center > Change Adapter Settings > Right-click on Local Area Connection (the adapter which is connected to the network and internet) > Status > Details… button > IPv4 Address.
- Each computer should be able to ping one another by IP address and by hostname. In a command prompt (Start button > All Programs > Accessories > Command Prompt) you can test this with the following command to ping by IP address:
ping 192.168.0.5
You should receive “Reply from 192.168.0.5…” and not “Request timed out.” Again, this should be done from each computer to the other.
- Next determine what the computer name is for each computer. Do this by Right-clicking on the Computer icon in Windows File Explorer and choose Properties.
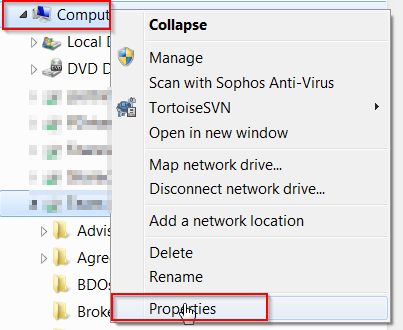
Windows 7 Computer Properties Look for “Computer name:” – use this computer name to do another ping test. From a command prompt, type in:
ping computername
where you replace ‘computername’ with the name of the other computer you want to ‘talk to’. Again, you should get ‘reply from…’, not ‘error/no host/time-out’. If you get replies when you ping the IP address but not the computer name, then you can still map the drive/share from your computer, but it won’t look pretty.
- If you can ping by IP address but not computer name, for testing purposes, make sure the Windows Firewall is turned off (temporarily), and that both computers are members of the same Workgroup. In the same Computer Properties as above, where you found the Computer name: … you should see the “Change settings” link to the right of the Computer Name:. under the Computer Name tab, click on the “Change…” button > select Workgroup: and then enter the same workgroup name on both of the computers that will share files. Most people do Workgroup: WORKGROUP. Once you’re able to ping each computer from one another (at least by IP address), you should be ready to share out a folder and then map a drive letter to that share.
- Next, make sure that the folder you want to access on, for example, Computer Name: PC1 is actually shared out by the PC1 computer. In PC1 Windows file Explorer, Right-click on Computer and choose Manage.

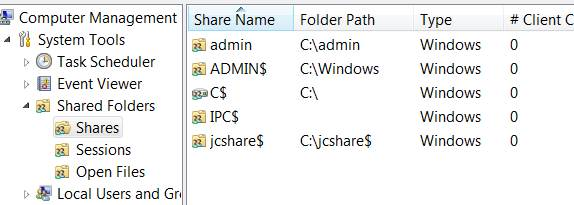
6. In the management tool, expand Shared Folders and then click on Shares:
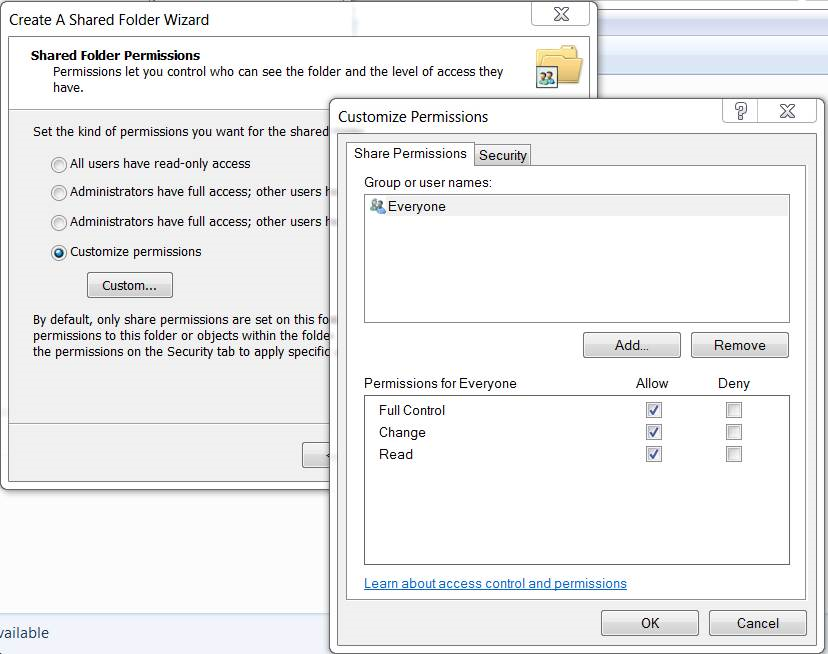
7. If you don’t see the folder you want to share listed, click on More Actions > New Share > follow the wizard (don’t worry about the offline settings.) Typically if you’re in an environment where you trust everyone, you can set the share to be accessible (read/write/execute) by Everyone (Everyone is the name of an actual user group that resides in all Windows computers). Do this by selecting “Customize Permissions” then place check-marks in Allow: Full Control, Change, Read > OK:
If you’re wondering what the $ is for in the shares I have on my machine, the $ is used to hide a file share. If the folder name has a $ at the end, it’s hidden from people browsing the computer’s IP address or UNC name (explained later), but since you know it’s there you can still get to it. For example, in my shares screenshot above, I could browse to the share by typing in \\jasonPC\jcshare$ . But had I only typed in \\jasonPC\ then it would not be displayed.
8. Now that the share is available, from PC2 you can browse to the share by the UNC computer name (Universal Naming Convention used by all windows computers – in Apple/Mac’s it’s actually weird and to browse to a share on a Mac you would use smb://jasonPC/share.)
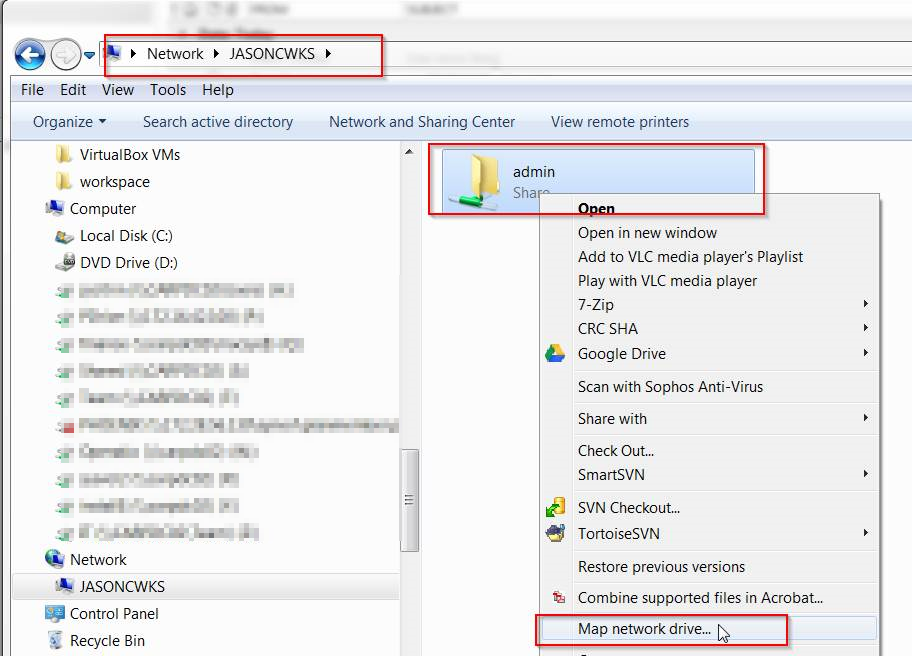
Open Windows File Explorer, in the address bar, type in the computer name that has the share you want to connect to preceded by two back-slashes (\\) and then followed by another backslash. So for example \\JASONCWKS\ and then hit the enter key. In the event if you could not ping the other computer by the UNC computer name, you can do the same action but replace the computer name with the IPv4 address, for example: \\192.168.05\ .
9. You will see a list of shares available on the computer. Next, right-click on the share and choose Map Network Drive.
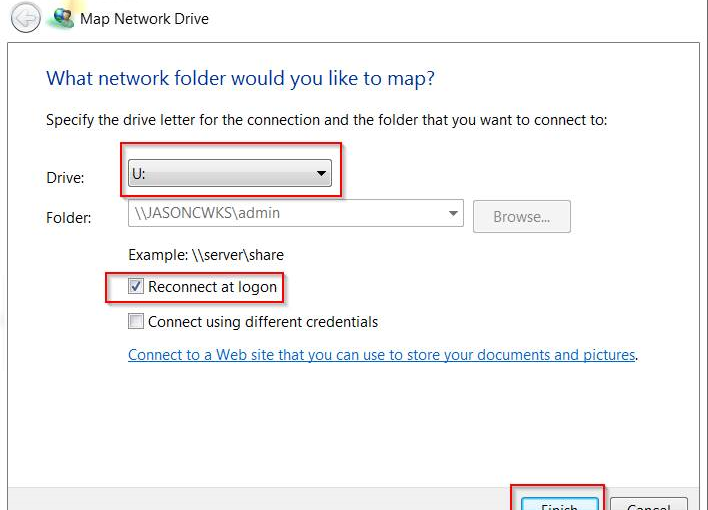
10. Now provide the drive letter you want, place a check-mark on Reconnect at Logon and then Finish
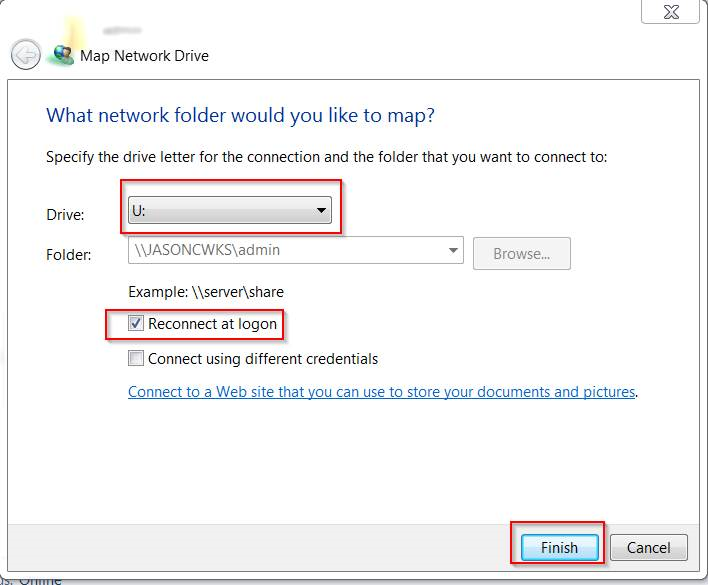
That’s about it! Your other computer should now have the drive mapped with full read/write permissions.

