Recently after cloning a system using Clonezilla, I found all the empty space on the drive was located on the end of the disk. The System Recovery partition was between the empty space and the c: drive. We want the primary partition to extend and include the empty space, but the Disk Management utility built into windows cannot do this for us. First I tried a gparted open-source utility but the live USB failed to load and see my system drive. So I did a little looking and found a utility made by MiniTool – MiniTool Partition Wizard Free will do exactly what we need to do. The good thing about MiniTool’s utility is we can run and perform our partition operations inside of a running Windows 10 system.
How to move and extend partitions using MiniTool’s Partition Wizard Free utility
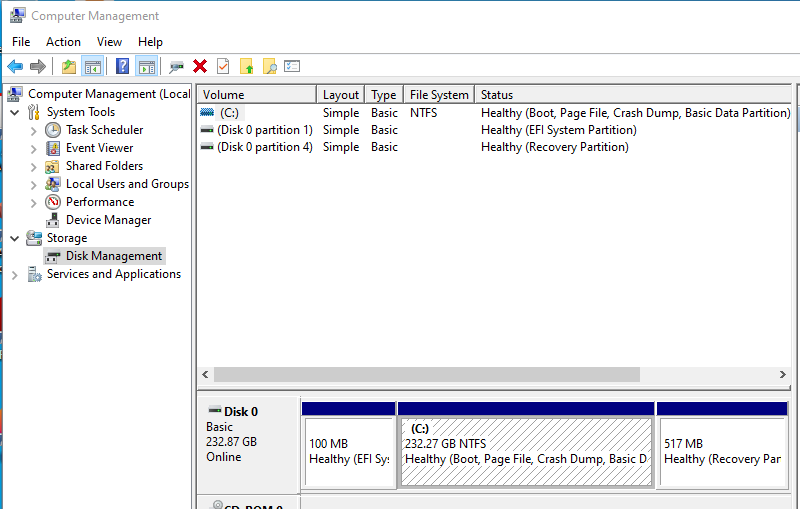
When we look at our Windows Disk Management, we see our empty space is on the wrong side of our Recovery Partition:
We want the 509 MB Recovery partition to live to the “right” of our 65GB of empty/unallocated partition. Once we have the 65GB Unallocated partition next to our C: drive so we can then extend/resize the C: drive to use the empty space.
- Make a backup of important data. Because this is a fresh install/clone, I’ll skip this part.
- Install MiniTool Partition Wizard Free (during install, I confirmed I only want to install the free edition, and chose not to install the “Shadow” backup application.)
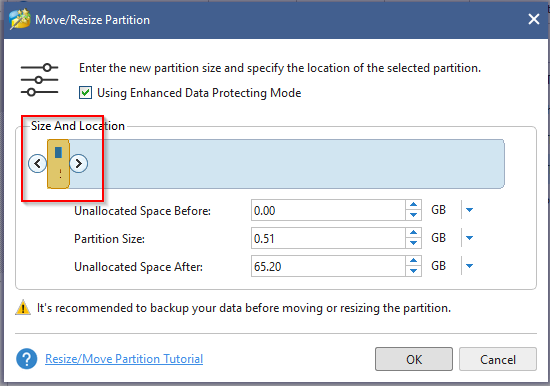
- Once opened, select the Recovery Partition we want to move, and then click Move/Resize
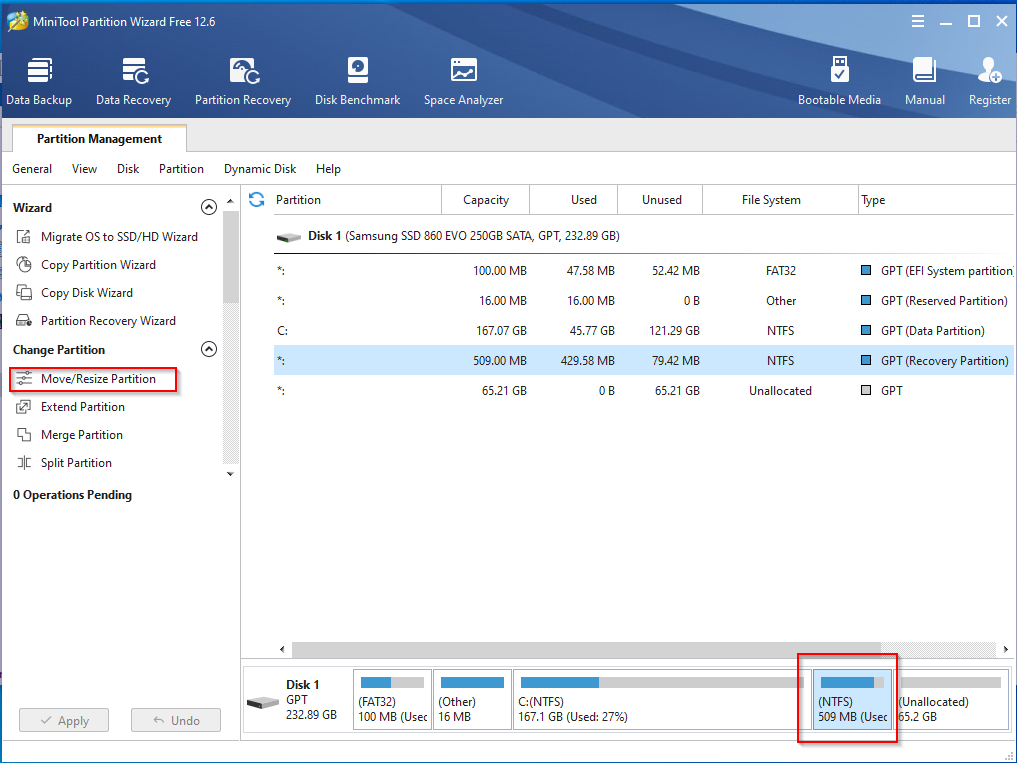
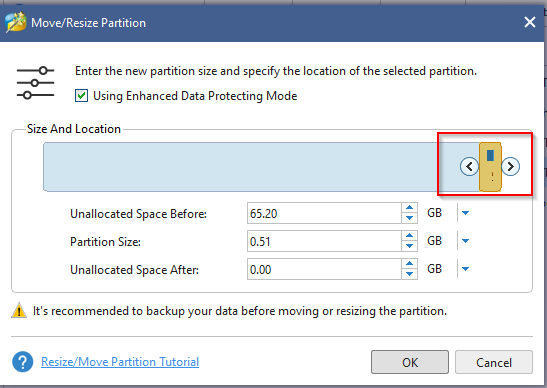
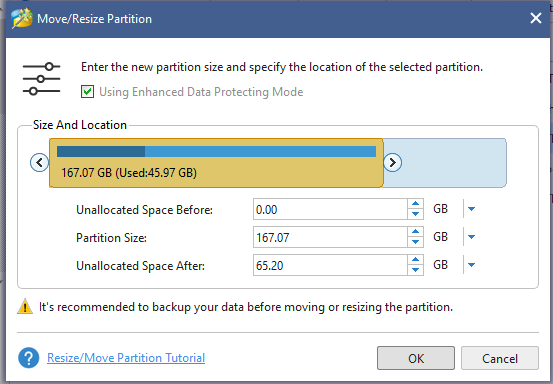
4. Next slide the (whole) partition to the far right of the partition bar (screenshot it before the operation).
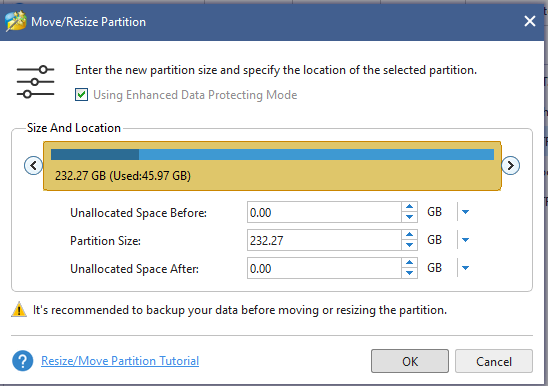
5. The result should look like the following screenshot after “sliding” the partition to the far right location.
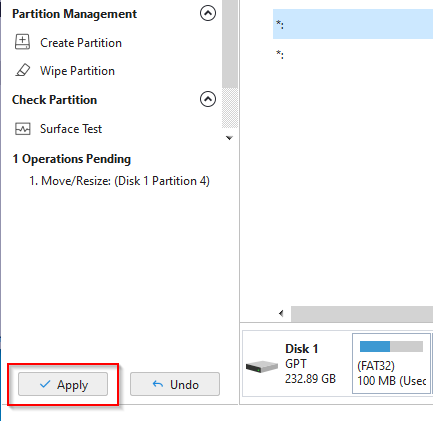
6. Click the Apply button
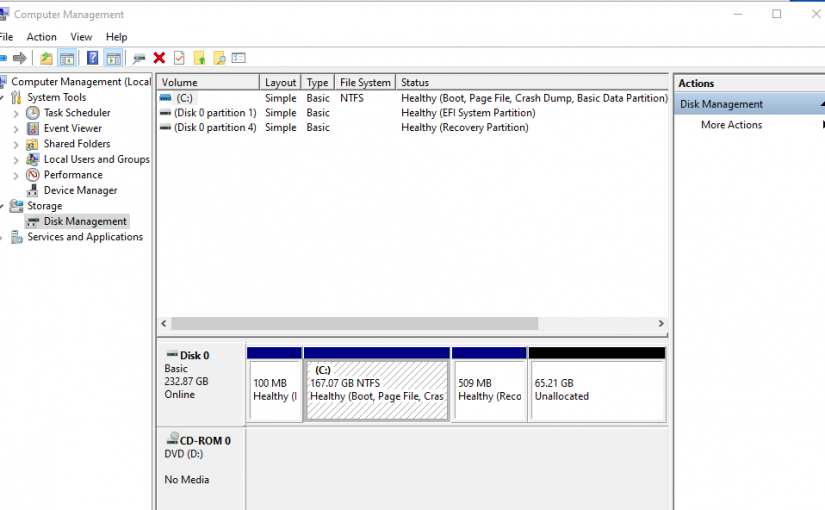
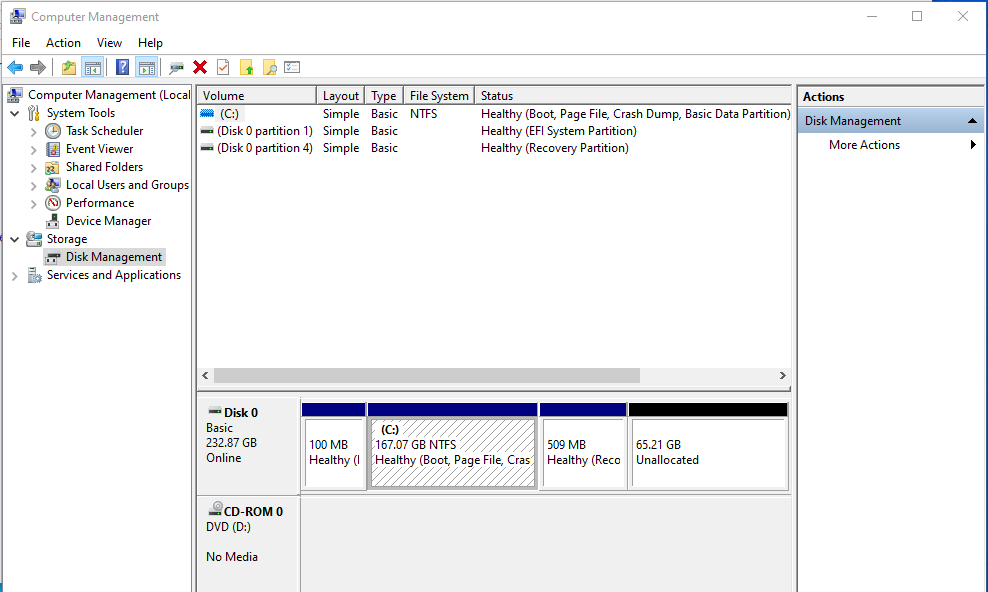
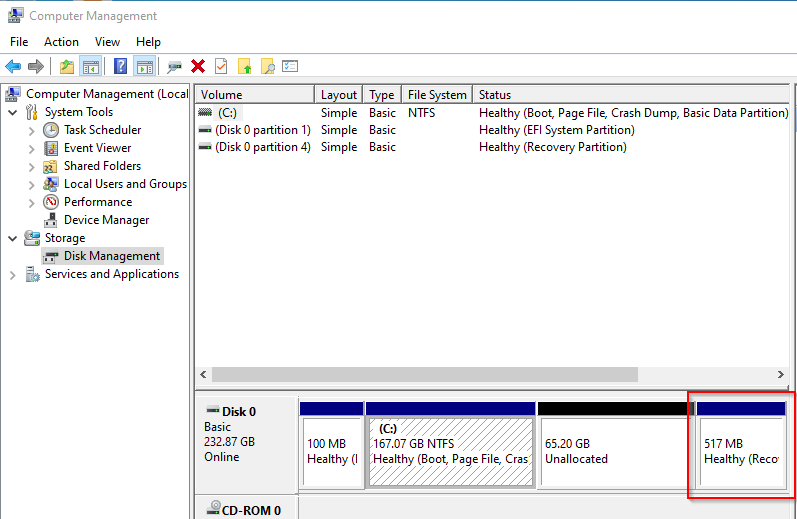
7. If we close the MiniTool Partition Utility and check Disk Management, we can see our Recovery Partition is now at the end of the disk, and free space is adjacent to our C: drive.
8. To extend the C: drive and use the unallocated/free partition, we can use either Disk Management or the MiniTool Partition utility, but here we will continue to use the free utility.
Open MiniTool’s Partition Utility again and select the C: drive partition. Then click the Move/Resize button again. Move the right-most “Handle” and slide it to the far right. Below is the “Before and after” screenshots:
9. Remember to click Apply after completing the operation.
We’re done! We can close the MiniTool utility and Disk Management and then open Disk Management again (or refresh the disks) and we can see our C: drive is now extended and using our free disk space.