Solved – Unable to remove OneDrive for Business from Windows 7

Solved – Unable to remove OneDrive for Business from Windows 7 – two versions of OneDrive on the same Windows 7 / Windows 10 PC. Remove / uninstall old version of OneDrive for Business. 

This may not be the most elegant/logical way of stopping the old/bad OneDrive from running, so let me know in the comments if you found the correct “Microsoft way” of fixing this issue. Others have spent hours trying to resolve this issue and hopefully you’ll get some kind of resolution with this information.

In some instances OneDrive for Business will ask you to upgrade. When you Update or upgrade OneDrive for Business it could keep the old version of OneDrive for Business on your computer, making it so that you have two versions of OneDrive for Business (even the icons look slightly different.) This may come pre-packaged with a Click to Run (clicktorun) install of Office or pre-installed on your system. You probably want to remove the older version of OneDrive for Business, but even after trying to uninstall OneDrive for Business old version from Programs and Features in the Control panel, even after restarting, the program comes back and you can’t delete it!

You probably still want to use OneDrive for Business, but you should only use the updated version that works correctly with Office365 and SharePoint Online.

Anyway, once your updated/upgraded OneDrive for Business is updated and installed, make sure you have all your important files inside the new OneDrive for Business and that the files are synced with SharePoint or where ever they should be. Make sure you have backups of the important files somewhere else like an external drive as well just to be safe. Once we disable the old OneDrive for Business / Groove.exe, make sure those old files are already synced with the new OneDrive for Business service. Once you have your files all synced and what-not with the new OneDrive for Business, we can disable/remove the old/bad version of OneDrive.

The older version of OneDrive for Business actually runs as Groove.exe. While the Task Manager is open (tick the check-mark or hit the button that says ‘Show Processes from All Users), track down Groove.exe by right-clicking on the bad OneDrive in the systray and then in the OneDrive menu, choose Exit (down by the clock – there may be two cloud icons down there, be sure to exit the correct one.) Then launch the old/bad OneDrive again from the Start > Program Files > OneDrive for Business. Do this several times and you will see Groove.exe pop in and out of existence inside the Task Manager. While it’s up and running, right click on the groove.exe in the task manager and choose “Open File Location”. The file will probably live somewhere similar to the following location:

C:\Program Files\Microsoft Office 15\root\office15\Groove.exe

Be sure to End Task or Exit out of the bad OneDrive for Business or Groove.exe, then rename the Groove.exe file to Groove.exe.old .

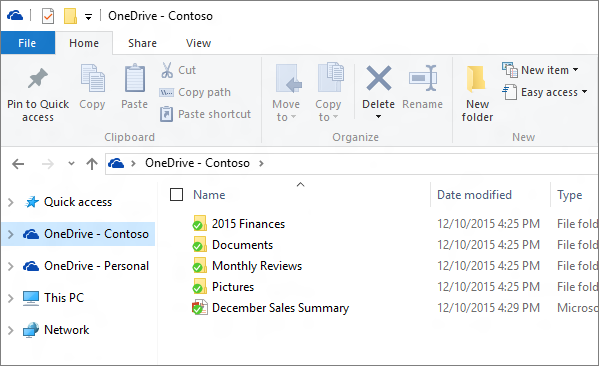
Now that this has been done, you may want to remove the old/bad OneDrive for Business link in your Explorer Favorites list. Do this with a left-click on the top-most Favorites link and in the right-hand pane, right-click on the old/bad OneDrive for Business shortcut and click Remove. Additionally you may want to remove the old/bad program shortcut in your Start Menu.

CockroachDB – how to build a 4 node SQL cluster on ubuntu and HyperV

CockroachDB Overview

Description: cockroach is an open source, survivable, strongly consistent, scale-out SQL database. If you wonder where google engineers go when they leave google, they go out on their own and build unbelievably great scalable and distributed open source software. Essentially if you want to run your own fault-tolerant SQL database across multiple datacenters and cloud services, using your own servers, allowing you complete control of your database, without paying hefty licensing fees, then run cockroach. The info in this post is not a review of cockroach, but rather a demonstration of a lab setup and POC.

To get started in our lab, first we want to build around 3 or 4 test clone servers or “nodes”. I use ubuntu on top of HyperV, but you can use any flavor of linux or MacOS you want. It can also run on Windows Docker.

If you’re like me and use Hyper-V on Win10, make 4 x Ubuntu 16.04 “clones” – first build a ‘goldmaster’ image, and clone it 4 times – guide here: https://4sysops.com/archives/clone-a-ubuntu-server-in-hyper-v-2012-r2/ – or use something like virtualboxes.org.

Create 4 virtual machines, each having it’s own IP address:
Node1: inet addr:10.0.10.169
Node2: inet addr:10.0.10.170
Node3: inet addr:10.0.10.171
Node4: inet addr:10.0.10.172

Make sure each node is up to date and has ntp installed and synchronized with the commands:

sudo apt-get install ntp

Use the command

timedatectl

To ensure that…

NTP synchronized: yes

At this point before you install/run cockroach, it’s wise to export each node VM with HyperV as a backup.

On Nodes 1,2,3,4 download the latest binary here https://www.cockroachlabs.com/docs/install- cockroachdb.html with the command:

sudo wget https://binaries.cockroachdb.com/cockroach-latest.linux-amd64.tgz

Extract the binary with the command:

tar -xvf cockroach-latest.linux-amd64.tgz

Move the binary to a location in your PATH or add the directory location to your path. You can learn about your path with the command:

sudo vi /etc/environment

And then move your extracted cockroach to /usr/sbin with the command:

sudo mv cockroach-latest.linux-amd64/cockroach /usr/sbin/

Do a sanity check with the command:

cockroach version

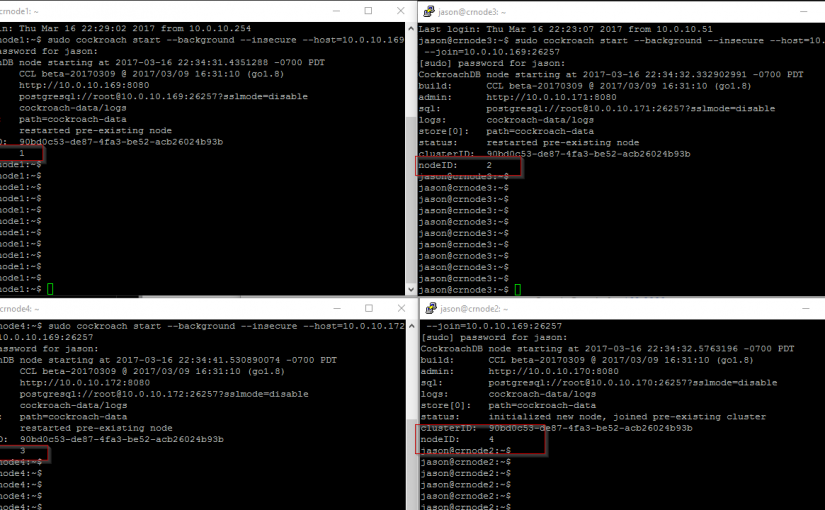
Start cockroach in insecure mode in the background on Node1 (master server) with the command:

sudo cockroach start --background --insecure --host=10.0.10.169

Result should be something like below:

CockroachDB node starting at 2017-03-15 23:16:23.118419329 -0700 PDT
 build: CCL beta-20170309 @ 2017/03/09 16:31:10 (go1.8)
 admin: http://10.0.10.169:8080
 sql: postgresql://[email protected]:26257?sslmode=disable
 logs: cockroach-data/logs
 store[0]: path=cockroach-data
 status: restarted pre-existing node
 clusterID: 08b6bfe6-4886-466b-a9c6-bc58a3809113
 nodeID: 1

Go ahead and browse to the admin page http://10.0.10.169:8080

On your other nodes:

sudo cockroach start --background --insecure --host=10.0.10.170 --join=10.0.10.169:26257

*where –host=current node ip address you’re having to join with the master server 10.0.10.169

Your results should look something like the following:

CockroachDB node starting at 2017-03-15 23:23:43.783097234 -0700 PDT
 build: CCL beta-20170309 @ 2017/03/09 16:31:10 (go1.8)
 admin: http://10.0.10.170:8080
 sql: postgresql://[email protected]:26257?sslmode=disable
 logs: cockroach-data/logs
 store[0]: path=cockroach-data
 status: initialized new node, joined pre-existing cluster
 clusterID: 08b6bfe6-4886-466b-a9c6-bc58a3809113
 nodeID: 2

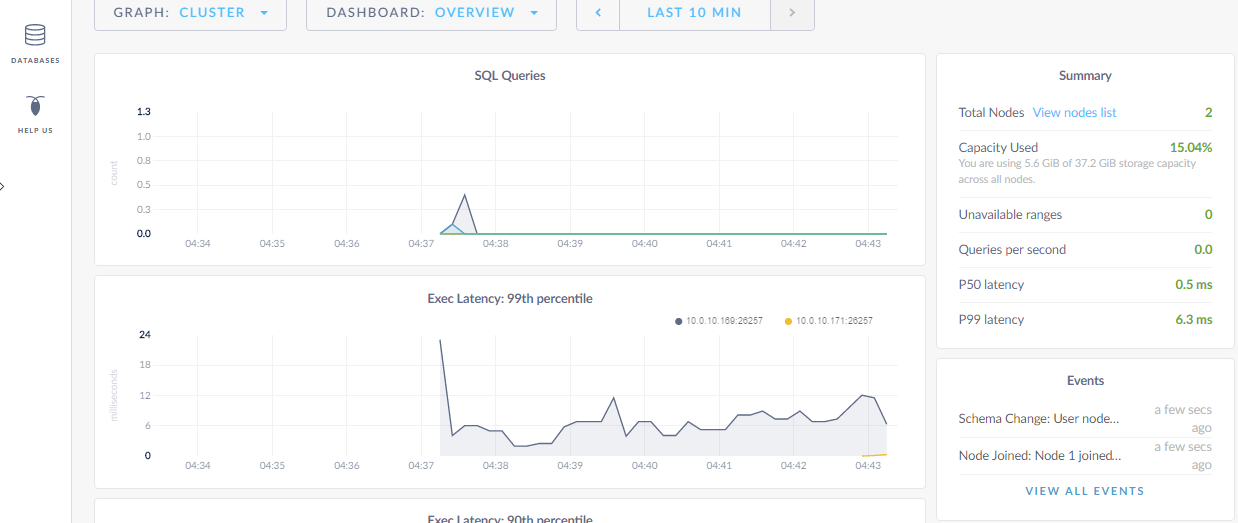
Your web interface should provide you with performance graphs:

Identify the new nodes in the View Nodes List link:

Go on and add the remaining Nodes to the cluster.

???

Profit! – just kidding

Now you can go on to learn about cockroach SQL and create some databases and tables and test how pulling the plug on one of your nodes doesn’t bring down the DB, and how all the data is replicated to all 4 nodes. It’s recommended you don’t run this lab on a single workstation-class system, but something that meets the cockroach DB minimum system requirements. This product is still in beta and features are subject to change. Regardless, cockroachdb is an incredible addition to the open-source community and I’m sure will be very useful to a lot of systems admins and application developers.


Dell Latitude 3450 cannot install windows 7 with samsung se-208 DVD driver missing

So I recently had problems installing Windows 7 SP1 with an original certified Dell installation DVD using a Samsung thin profile SE-208 external USB DVD/CD.

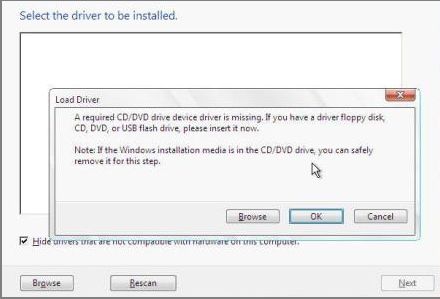
Upon booting to the Windows 7 installation, after telling the Windows 7 installer to go ahead, it said that the DVD/CD ROM drivers were missing.

I also could not install with a bootable Windows 7 USB key that I created by first ripping the Dell DVD to an ISO with IMG Burn, and then creating a bootable USB drive with rufus-2.12.exe. The same error – no drivers detected.

After finding this post here, it came to me that I had only tried the external DVD drive on the USB port that is on the right-hand side of the laptop (USB 3.0).

I instead connected the external USB DVD drive into the Left-hand side of the laptop USB port (USB 2.0) and booted the DVD into the installation and proceeded normally.

So if this happens to you, connect your bootable device to only a USB 2.0 port, when trying to install Windows 7 on a newer PC or laptop that has both USB 2.0 and USB 3.0 ports!