Microsoft now provides a way to analyze Excel spreadsheets and data using AI to find insights, trends, sort, create graphics, and charts without uploading your files to ChatGPT or Bing. This feature only appears to be available in both Destkop and Web versions of Enterprise editions of M365/Office365. For example this feature is not available in the free/hotmail/Microsoft account version of Excel for Web.
If you’d like to use a sample/example spreadsheet go ahead and download the one here. You may need to upload the file into OneDrive before you can use it. Also be aware when opening the file in the web-version of Excel you may need to allow pop-ups in Edge or Chrome.
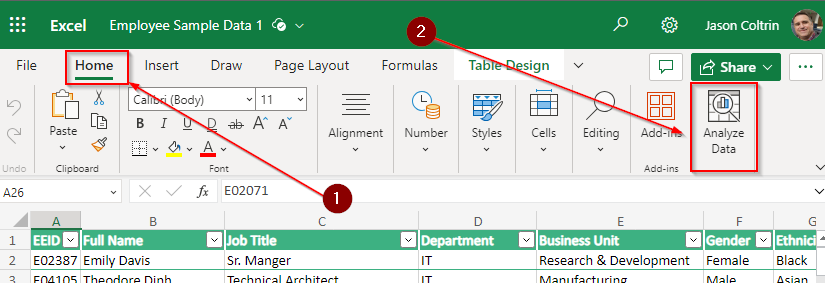
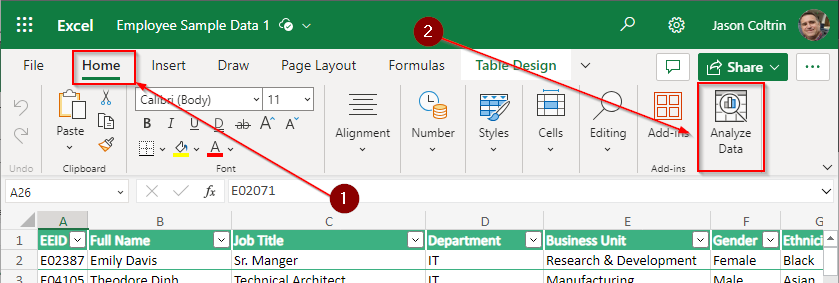
To use the feature, Click the HOME tab, and then on the far-right of the ribbon, click Analyze Data:
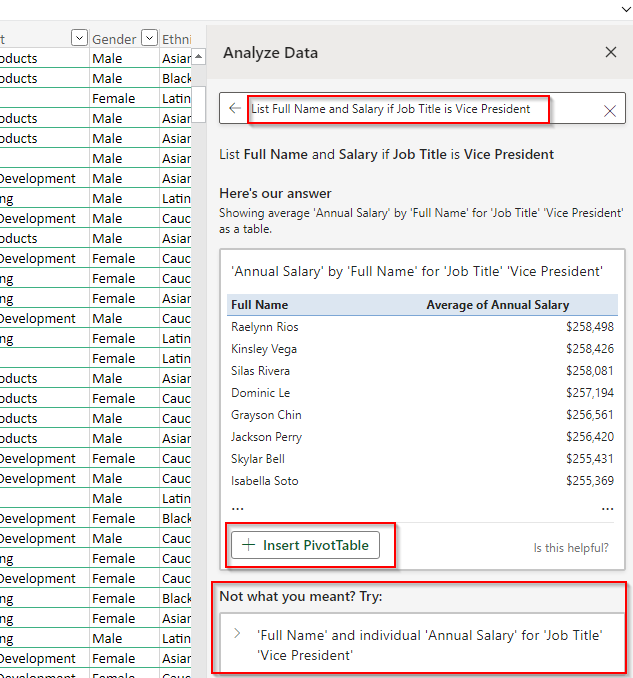
We can now ask questions about our data or let it provide us with it’s own insights. For example we can pose the question, “List Full Name and Salary if Job Title is Vice President.” And as simple as that it generates a pivot table that we can “Insert” (which means create a new “Sheet” at the bottom of the page.)
Note that the module provides a different prompt which is more succinct (‘Full Name’ and individual ‘Annual Salary’ for ‘Job Title’ ‘Vice President’) than the one we wrote at the bottom of the module:
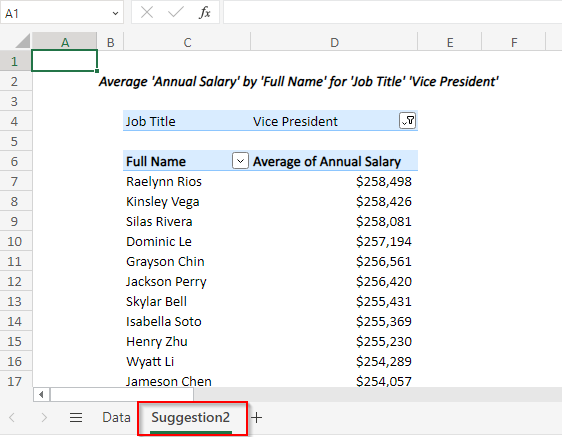
When we click Insert Pivot Table, a new Sheet appears at the bottom of our Workbook and names the workbook “Suggestion 1, Suggestion 2” etc. :
Excel’s Analyze Data feature can provide many insights into your data, but it’s always a good idea to double-check the results.
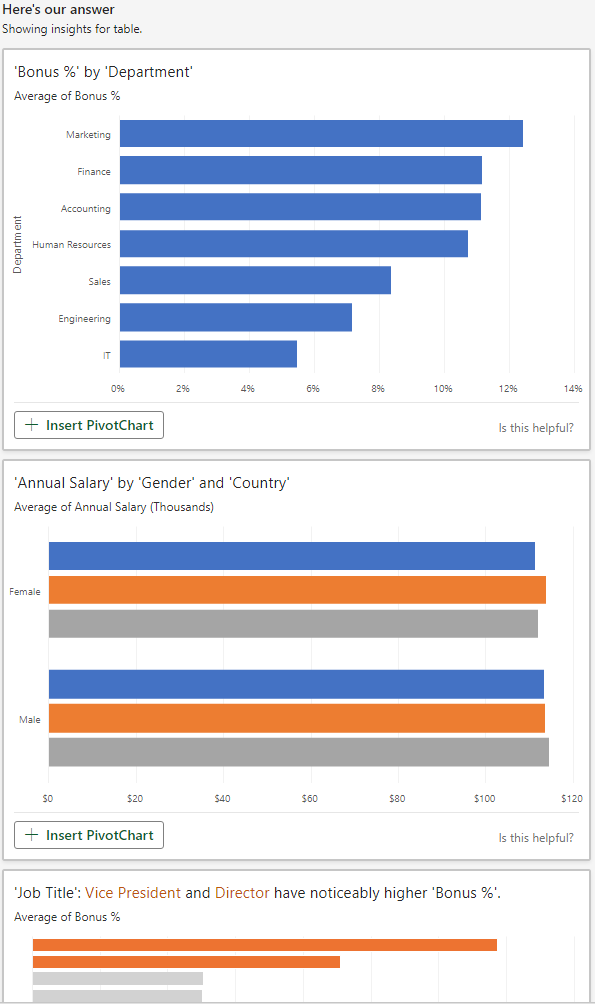
A great starting prompt would be something like, “What are some insights in this data?” For our sample Excel spreasheet, it returns charts for ‘Bonus %’ by ‘Department, and ‘Annual Salary’ by ‘Gender’ and ‘Country’. Also, it will find things like ‘Job title’ Vice President and Director have noticeably higher ‘Bonus %‘.
I hope this information was helpful, and let us know in the comments if you have found other ways to analyze Excel data using AI.
If you have employees who change phone extensions, names, departments, address, or titles a lot, HR or management may want to have this contact information data updated in Office365. Oftentimes these little changes can add up and we want to make a lot of changes in bulk with a single command. Instead of updating manually, we can make the changes to an Excel csv file and upload the changes all at once.
Ok in order to import/update the contact information for employees in the Office 365 tenant using a csv file and PowerShell, do the following:
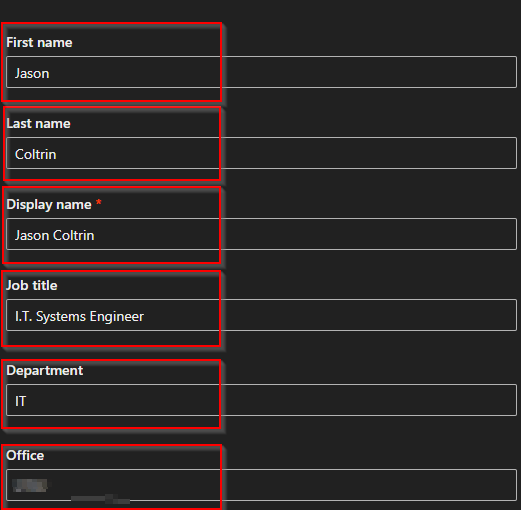
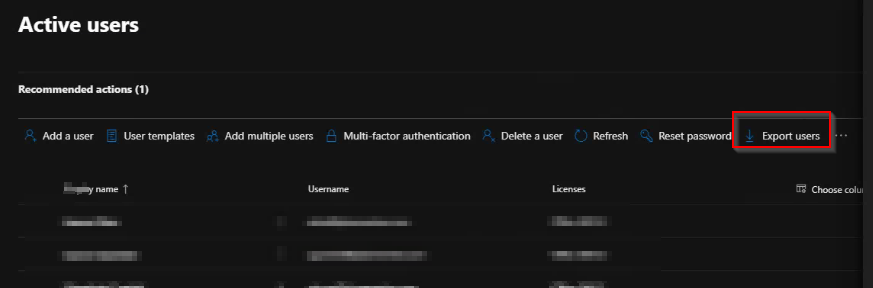
Edit the attached CSV file with information that needs to be imported into O365. **Note: the UserPrincipleName and DisplayName columns are required.** FYI, screenshot below is how I exported the required data from O365 and copied the required columns into the attached file.
If your email servers support, or are required to enforce transport layer security (TLS), then you can use Symantec TLS Business Partners to configure policies to enforce encryption between your mail servers and the broader public, as well as Symantec’s Email Security Services infrastructure. You can also configure policies to enforce TLS encryption between your domains and the domains of third-party business partner organizations. This article will provide a procedure that demonstrates how to generate a report with Symantec PBE Advanced Domains that displays mail which failed a TLS policy. We then go on to process that report and relax the enforcement of Certificate Validation with the following steps:
Scrub the Symantec Report for just email addresses of the intercepted mail.
Remove the first part of the email addresses, leaving only a list of the domain names.
Compare the domains from Step 2 to already-existing TLS Business Partners and leave only those domains that are unique.
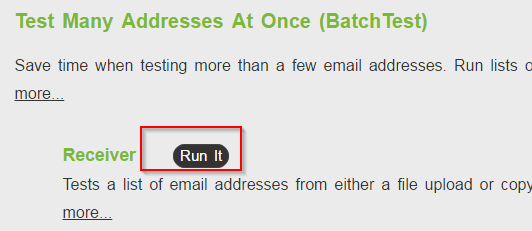
Create a new text .txt file with the unique domains, add ‘test@’ to the beginning of each domain to create an email address that can be tested at checktls.com.
Batch test the domains for certain TLS conditions.
Scrub and sort the checktls.com report for only those domains that meet conditions in Step 5.
Upload the list of unique, tested, and scrubbed domains into the Symantec Cloud TLS Business Partners.
Use Symantec to again test the domain for Certificate Validation, enable the domain, and enforce the encryption of traffic to that domain.
Often times, TLS encryption requirements will force end-users and recipients of TLS encrypted email to log into a secure mail portal to authenticate and retrieve messages. Depending on your organization’s policies, you may want to ‘relax’ the level of enforcement of TLS requirements so that users can receive mail in ‘plain text’ as a normal message in the user’s mailbox. These different levels of encryption are scored by traits including the availability of TLS encryption, TLS negotiation, the SSL/TLS Certificate trustworthiness, and other factors.
To a large degree, TLS email encryption has not quite become the standard for many mail servers out there. Many large mail providers such as earthlink.net do not support TLS encrypted email. Some mail servers will allow TLS encyrption (TLSAvailable=100), negotiate a TLS transaction (NegotiatedTLS=100), but not have a valid certificate (CertOK >= 33). Often times, the CertOK value will not reach 100 simply because the certificate on the receiving server is a self-signed certificate.
You can check the support of an email address or domain by visiting checktls.com, enter an email address into the address test, and hit the ‘Try It’ button. For example, when we test [email protected], our results are as follows:
TLS Receiver Test
In this case, if Symantec /MessageLabs were to try to send a message to the recipient, the message would not be delivered to the recipient mailbox, but quarantined in a secure mail portal. The recipient would then be required to create a secure portal account, log in, and retrieve the message.
If our results above were to demonstrate the passing of all checks with the exception of the CertOK column, then we may want to relax the enforcement of certificate validation in Symantec. But in order to find all of the domains that meet these conditions, (excluding those domains we already have validated and trust), we need to generate reports, scrub the data, and test for the conditions we accept. Once we find the unique domains, we’ll add them into our list of TLS Business Partners.
While the following procedure does not have long-winded explanations and exact step-by-step instructions, the information and screenshots should be enough to get you through the process, hopefully saving you the hours of research and note-taking that I endured. This article does not go over the initial setup of your domain’s email encryption with Symantec. The prerequisites for this guide are that you already have TLS email encyption setup with Symantec Cloud / MessageLabs.com. Also be sure to have Excel 2013 or newer and NotePad++ installed on your computer. Lastly, you may be required to purchase an account with checktls.com to run batch tests.
Lets get started!
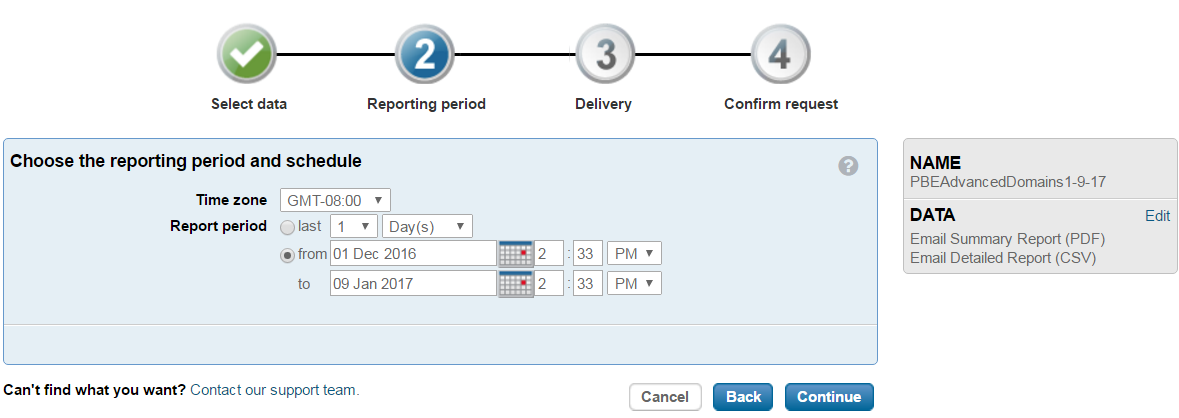
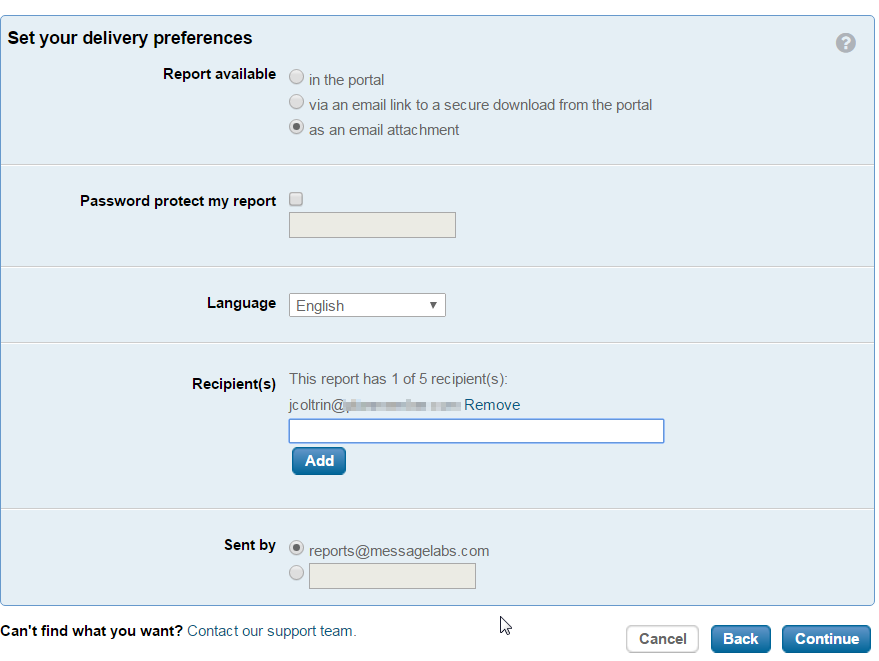
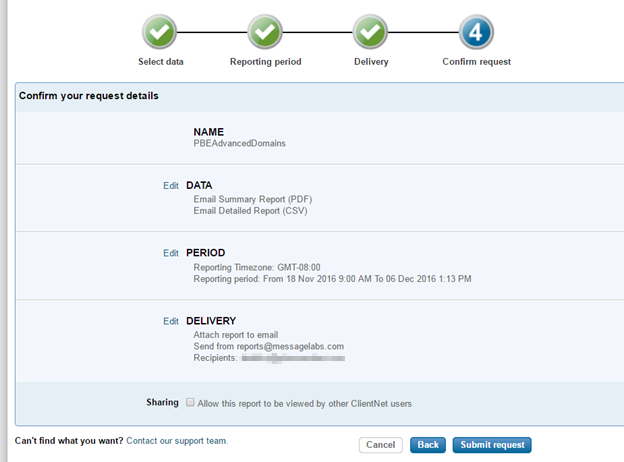
We’ll first run a report in the Symantec Cloud / clients.messagelabs.com to find emails intercepted by the service. Starting in the Dashboard, go to Reports > Report Request > Request a new Report > Request name: PBEAdvancedDomains-Date > continue > email summary report (PDF) >
The data we will include in the report are:
Email Summary Report (PDF) advanced settings
Emails intercepted by the service
Data Protection volume
Data Protection volume by domain
Top 20 Data Protection recipients
Email Detailed Report (CSV) advanced settings
Data Protection
Message Labs Report 1
MessageLabs Report 2
MessageLabs Report 3
MessageLabs Report 4
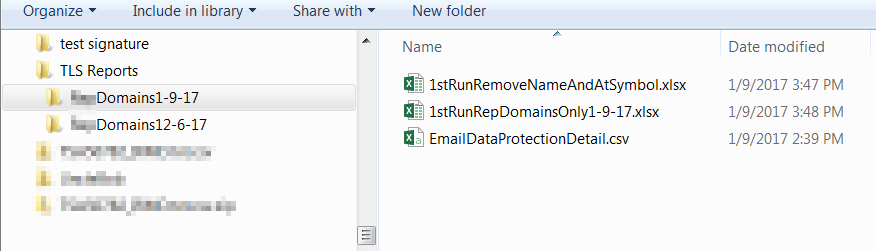
Download the Report.zip
Extract to Desktop\TLSReports\RepDomainsDate
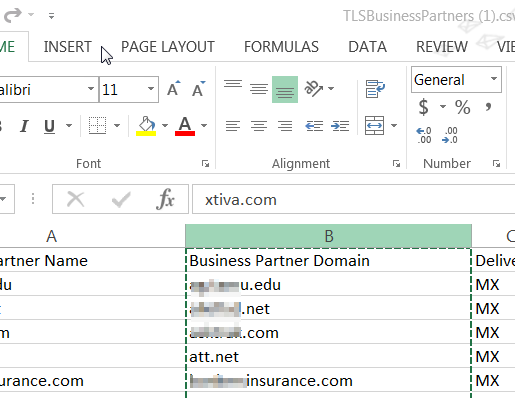
Open the EmailDataProtectionDetail.csv
Copy the column “Email To” to a new spreadsheet named 1stRunRemoveNameAndAtSymbol.xlsx
In 1stRunRemoveNameAndAtSymbol.xlsx, delete the 1st row “Email To”
Excel wants you to type out the formula (instead of copy/paste) in the first cell B1, then apply formula down the column.
Apply formula to an entire column or row without dragging by Fill feature
In Excel, Select the entire Column B, and then click Home > Fill > Down.
Apply formula fill down
Copy and Paste (Paste – Special->ValuesOnly) the resulting Domains (only) to a new sheet and name
1stRunDomainsOnlyDate.xlsx
Now you should have 3 files:
1st Run Files
In Symantec Message Labs go to Services > Encryption > existing TLS Business Partners
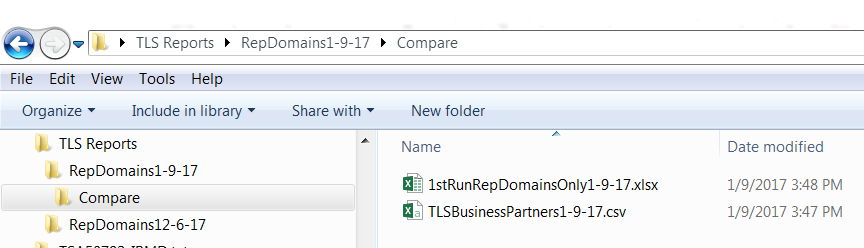
Download All -> get TLSBusinessPartners.csv > rename to TLSBusinessPartnersDate.csv copy to same folder, so you should have 4 files. In the 1stRunRepDomainsOnlyDate.xlsx you may want to remove all the empty cells with #VALUE! From the bottom of the file.
Create a new folder named Compare, and copy 1stRunRepDomainsOnlyDate.xlsx and TLSBusinessPartnersDate.csv into the folder:
Compare domains files
Remove all domains in TLSBusinessPartners file that are current Partners (as well as those existing in previously completed procedure runs.) – To do so,
Open 1stRunRepDomainsOnlyDate.xlsx. Create a new Sheet 2.
Open TLSBusinessPartners.. file and copy the column with only the domain names Column labeled “Business Partner Domain” into Sheet 2
Run compare and remove all domains that exist in TLS.BP.Date from 1stRunRDODate.
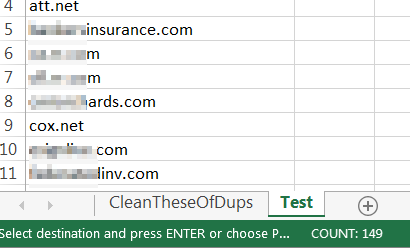
Scrub the domains of duplicates. Copy all the Business Partner Domains AND be sure to include all of the domains listed in TLS Enforcement page into Test sheet (selecting with the mouse, copy from website, and paste into excel works, just remove the hyperlinks).
Populate test worksheet with existing domains
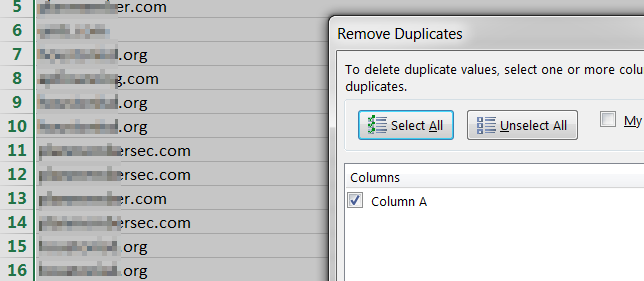
Next, select Sheet 1 then go to the Data tab and click Remove Duplicates:
Remove duplicate domains
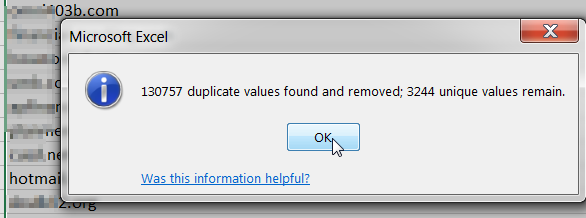
Click OK
Duplicate domains removed
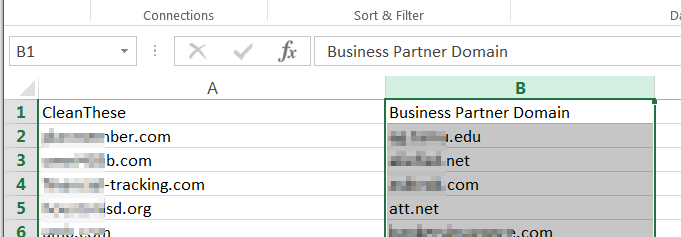
Add a new row to A1 top level and add header named: “CleanThese” for Column A and “Business Partner Domains” for Column B
Copy existing Business Partner unique domains in Test sheet to B1
Should now look something like this:
Clean domains of existing domains
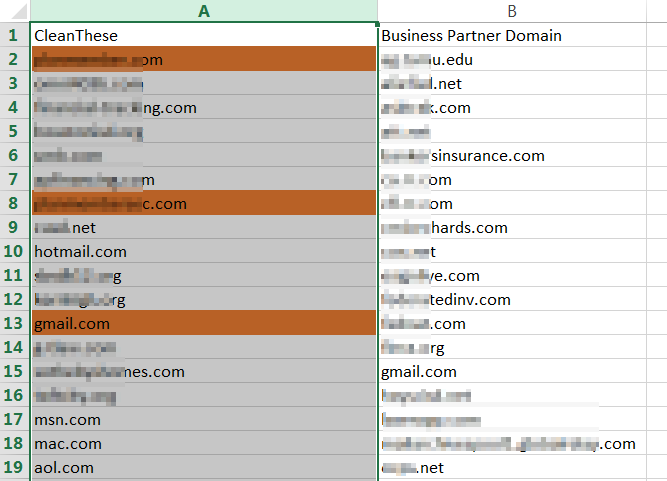
Now Filter for Unique values:
Click on the Column Header to highlight Column A. Select the Conditional Formatting button on the Home tab.
Select the New Rule option from the Conditional Formatting button drop-down list. Select “Use a formula to determine which cells to format" as a rule in the New Formatting Rule window.
Proceed by entering the following formula in the “Format values where this formula is true" box: =countif($B:$B, $A1)
Click on the Format button and specify the format you want to set. It is possible to set a different cell color for duplicate values by clicking the Fill tab and selecting a background color. (Orange)
After having specified the format you want click OK.
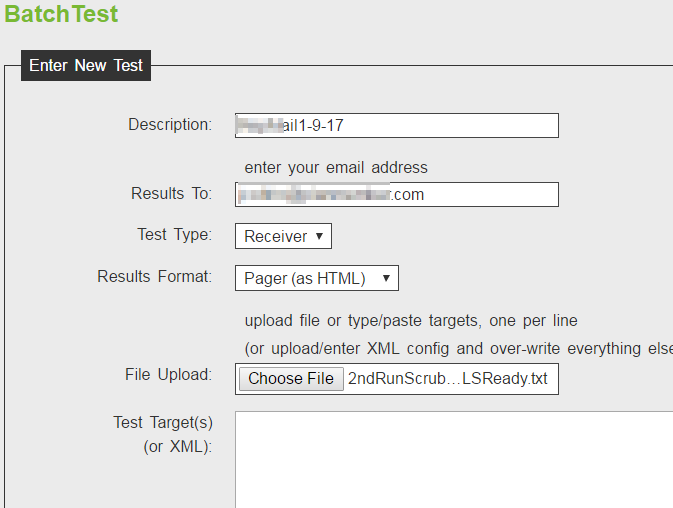
CheckTLS batch test: Once you’ve uploaded the file, hit R(u)n Test Now to initiate the testing. One domain takes 5 minutes, so 4000 domains can take 4 hours or so. An estimate from checktls.com will be given.
CheckTLS batch test 3
Once the report arrives via email, copy the data in email to a new file named TLSCheckReportResults1-9-17.xlsx
Next, find CertOK is a value of 33 or 0, but the TLSAvailable=100 and NegotiatedTLS=100
To do this, do Ctrl+A then Sort & Filter > Custom Sort > Sort by CertOK > Sort on Values > Order Custom List: 33, 0 > OK > OK
(Column H is Cert OK) so Select only those that are anything other than 100, copy the rows to a new spreadsheet named
TLSCheckReportResultsCertOK33-Date.xlsx
Sort the TLSCheckReportResultsCertOK33 file by TLSAvailable=100 and NegotiatedTLS=100
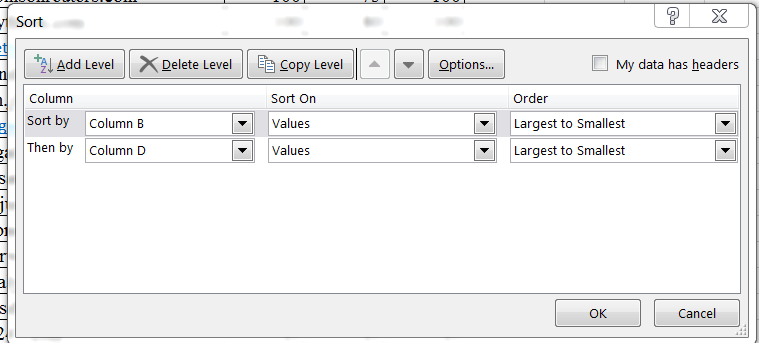
To do this, first remove all columns except EMailAddress, TLSAvailable, CertOK, and NegotiatedTLS=100
Do another custom sort; select columns labeled TLSAvailable, Cert OK, and NegotiatedTLS, and Sort by Column B (TLS) then by Column D (SenderOK/Sec) Largest to Smallest:
Excel custom sort columns on values largest to smallest
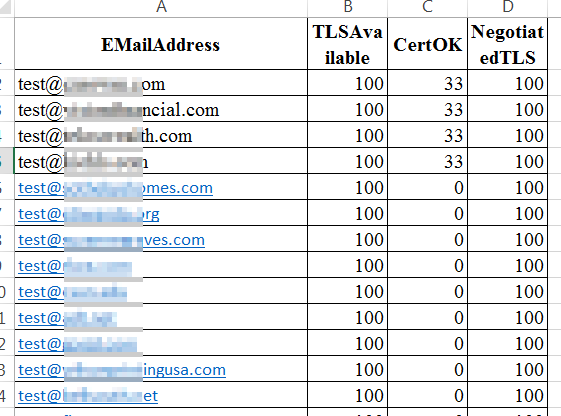
Select only those rows that have at least TLSAvailable = 100 … CertOK(%) … NegotiatedTLS = 100; where CertOK % is less than 100:
Excel custom sort results
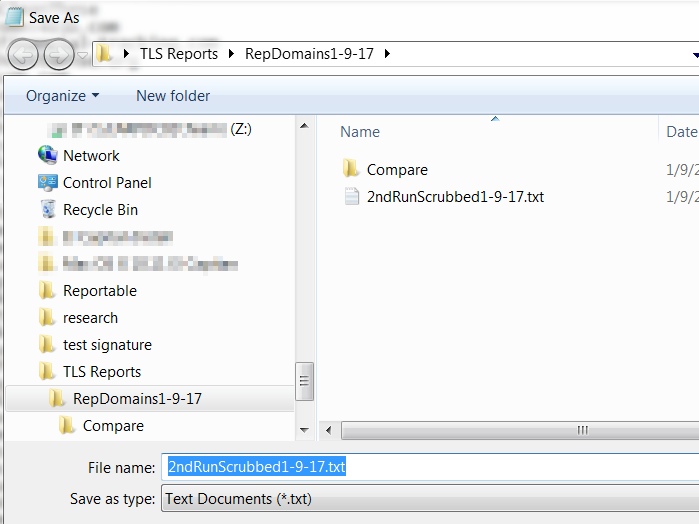
Copy these values to a new .xlsx file and folder named:
TLSCheckSortTLSAvailable100Negotiated100-Date
Copy custom sort results above into a new .xlsx file and rename the filename the same as the folder name.
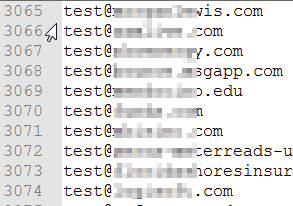
Remove everything except the domain name (remove ‘test@’) from this file. Follow instructions above – delete columns B, C, D, then formula =RIGHT(A1,LEN(A1)-FIND(“@”,A1)) – then fill down (select column first)
Copy resulting domains to a new .txt file named:
TLSCheckSortTLS-DomainOnly-Final-Date.txt
Now we need to add the tested domains to the Business Partner for the week. Eg. RepDomains-Date in Symantec.
Log into Symantec Cloud,
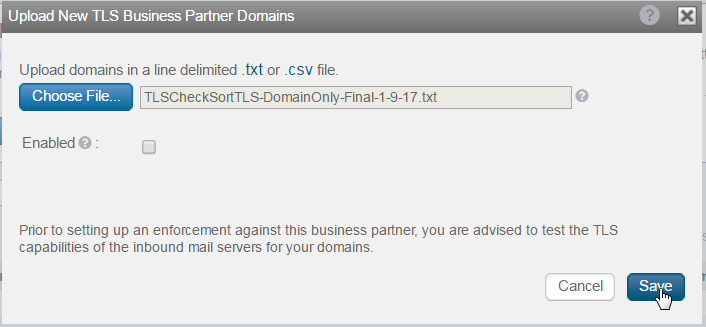
Services > Encryption > TLS Business Partners > Add new BP > RepDomains-Date > Upload New Business Partner Domains > Uncheck “Enabled” > choose file > select TLSCheckSortTLS-DomainOnly-Final-Date.txt > Save
Upload New TLS Business Partner Domains
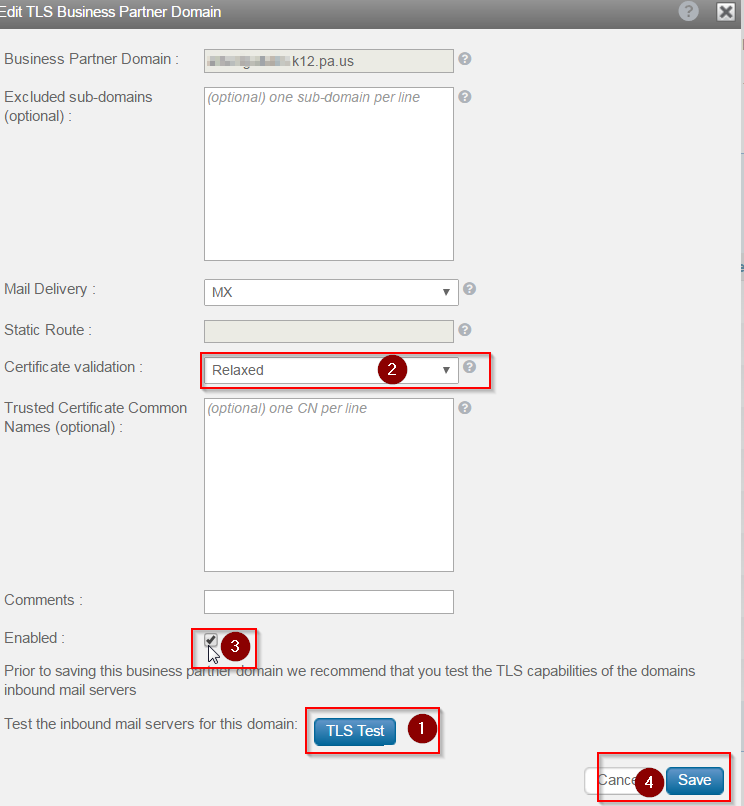
Now that all of the new unique domains have been imported, we need to test them within Symantec and change Certificate Validation from Strong to Relaxed if required.
Click on the domain name, hit the TLS Test button, and if the TLS connectivity fails, hit Close, change the Certificate Validation to “Relaxed” and then Save.
Relaxed certificate validation
Go through each of the newly uploaded domains, and when finished, make sure to ENABLE TLS Encryption enforcement in the TLS Enforcements tab.
Take those in the list that test correctly and are enforced and add to Data Protection Exceptions. Services > Data Protection > PBE Advanced TLS the Portal Trigger Template > (scroll down) Recipient Exclude Domain List > Edit List > Add List Items > Add
It’s a good idea to repeat this procedure every so often so that you catch mail that is being delivered to the secure portal unnecessarily. Hopefully, this procedure will help someone save some time if they have the same task, or at the least help someone sort and scrub email addresses and domains.
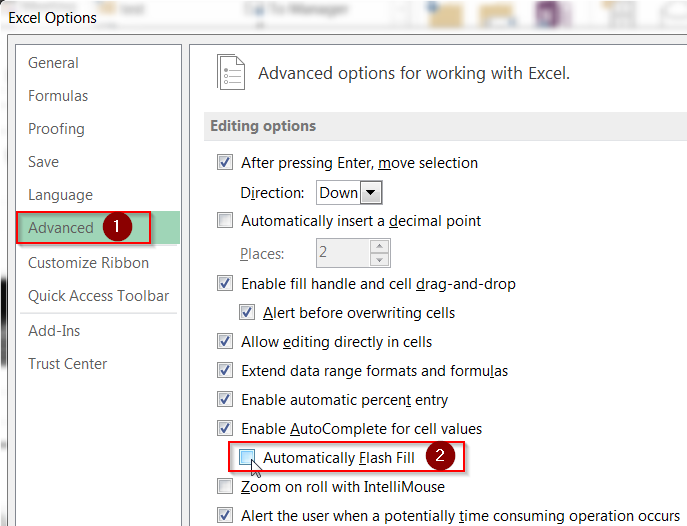
You might run into the problem or issue where it’s really slow when a user enters text into an Excel 2003 2010 2013 .xls or .xlsx cells for certain files. This input delay may be due to and advanced cell fill feature that you don’t really need. You might want to try the following fix:
Open Excel
Go to File -> Options -> Advanced
Go the the “Enable AutoComplete for cell values”
Under this setting uncheck “Automatically Flash Fill”
Click OK
Hopefully this will resolve the 3 to 4 second delay when trying to type into excel cells and you can stop going crazy haha.