
If you have a disk drive that is running out of space because a database is starting to grow too large for the drive in an EBS volume on AWS, you may be asked to modify or expand the volume. In this case, we are tasked with expanding the “E drive” on a Windows Server 2012 AWS virtual machine. Because this is not a boot volume, and because it is an NVMe-based gp2 volume, it will be fairly easy to expand the volume without having to do things like shut down the instance, take a snapshot, expand the snapshot etc.
When you have a lot of disks attached to a Windows Server corresponding to a lot of different volumes attached to the instance in AWS, it can be a little tricky identifying the correct volume to expand. Read below to learn how to match an EBS volume in AWS to a Disk drive in Windows, expand the volume in AWS, and then finally resize the disk in Windows.
Identify Volumes Associated with Instance
First, log into AWS
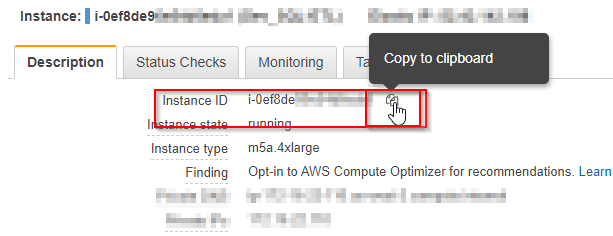
Next, Go to EC2 > Find your instance in EC2 by name, select it, then copy the instance ID.
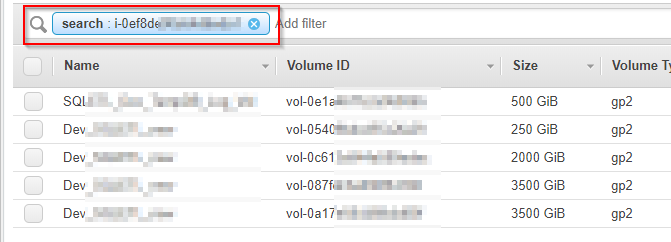
Next, navigate in AWS to EBS > Volumes.
Find all the volume names associated with the instance by pasting the Instance ID into the search box at the top of the screen.
Identify the EBS Device in Windows
Now we’ll switch over to Windows. RDP into the server we want to modify. Once we’re in the server’s desktop, we want to download ebsnvme-id.zip from https://docs.aws.amazon.com/AWSEC2/latest/WindowsGuide/nvme-ebs-volumes.html And unzip/copy the .exe to your desktop.
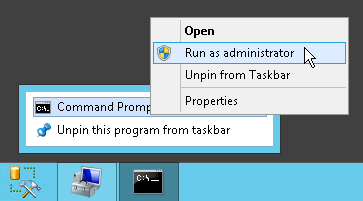
Next find the command prompt and open CMD as administrator (right-click on CMD icon > run as administrator.)
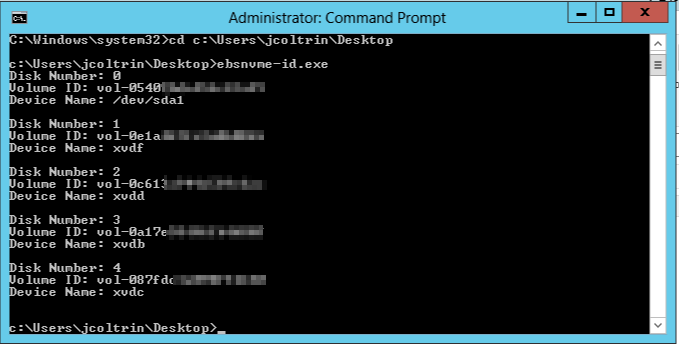
Change directory in CMD to your desktop with the command:
cd c:\users\jcoltrin\desktop
Run the ebsnvme-id.exe in the Administrator Command Prompt
Identify Disk in Windows and Match to Volume ID
Next, on the Windows server, open Server Manager
In the upper-right corner of Server Manager, go to Tools > Computer Management

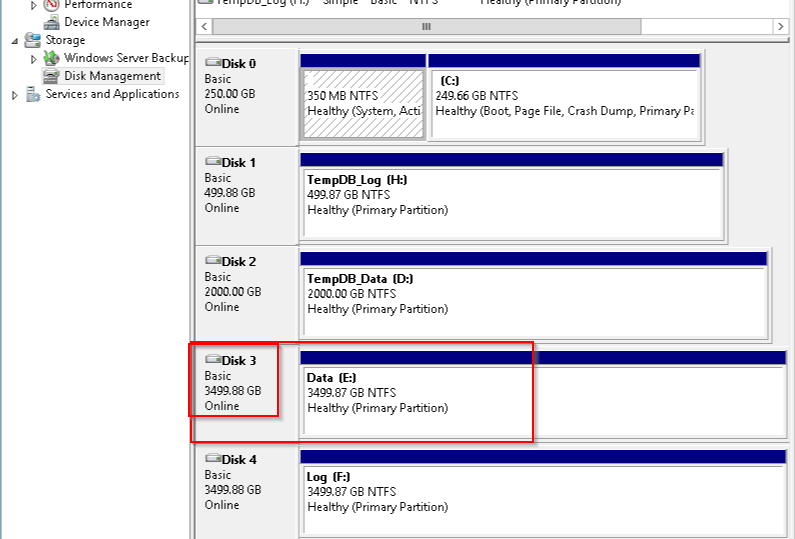
Make note of which disk (Disk 0, Disk 1, Disk 2, etc) corresponds to the Device Name and Volume ID that you want to change. In my case I want to expand Disk E, which is also known as Disk 3. Looking at the output of the CMD screenshot above, I can see Disk 3 shows my Volume ID is vol-0a17e…, and Device Name is XVDB.
Modify and Expand EBS Volume in AWS
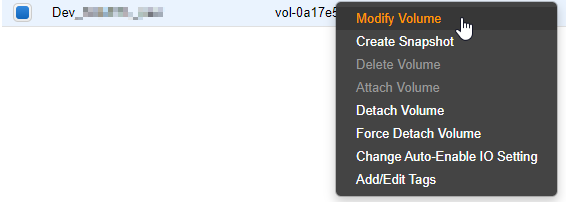
Now that we are sure which volume it is we want to expand, and that this is not our Boot drive we can right-click on the vol-0a17e… volume in EBS and choose Modify Volume. **If the Disk is your boot drive, a snapshot should be taken first, and then shut down to expand the snapshot volume, then detach the snapshot, and attach the expanded volume.
A new dialog box pops up asking for the new size of the volume:
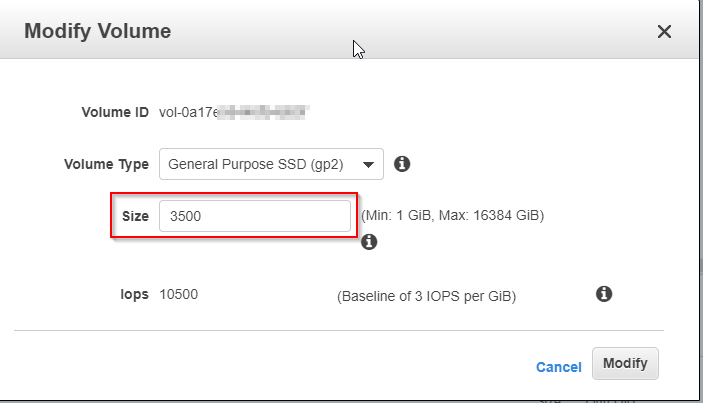
Enter the new size and click Modify.
Switch gears and now go back to your RDP session, go to Disk Managment, Right click on the volume and choose Extend Volume… > use all of the available space and click ok.
Our Volume size has now been increased and we can continue to grow!