
What follows is a ubuntu/linux server setup guide that can be used to configure, 1. A new linux server and 2. setup an OS X workstation to easily connect to your linux servers with preshared keys.
-
Build the server on Hyperv, then setup your initial account during the Ubuntu LTS 14.04.2 setup.
-
Log in as the initial user and add accounts as necessary:
-
“sudo su -“ – this does a sudo and copies root path and all environmental variables
-
useradd -m -s /bin/bash jcoltrin
-
passwd jcoltrin
-
vi /etc/sudoers
-
(end of file) add line: jcoltrin ALL=NOPASSWD: ALL
-
-
su jcoltrin – make sure you can su.
-
sudo su – this sequence has allowed you to sudo without having to type in your password.
-
Just a note: modifying /etc/group – putting users in here is the wrong way of adding sudoers – no granular control – users here will be required to enter their password when doing sudo.
-
-
ctrl+l clears screen
- Add static IP address and dns-nameservers to /etc/network/interfaces
- Get the name of your network interface with command:
-
ifconfig -a
In my case, the network interface name is ens33. So to make my ens33 interface a static interface, I configure the /etc/network/interface with the text editor vi. The first interface is lo, which is the loopback interface. The line ‘auto ens33’ is necessary because it is used to start the interface when the system boots.
-
source /etc/network/interfaces.d/*

# The loopback network interface
auto lo
iface lo inet loopback

# The primary network interface
auto ens33
iface ens33 inet static
        address 10.0.10.151
        netmask 255.255.255.0
        gateway 10.0.10.254
        dns-nameservers 8.8.8.8 8.8.4.4
-
apt-get:
-
apt-get update – checks online for updates
-
apt-get upgrade – installs updates and security patches
-
apt-get dist-upgrade – note: make sure /boot dir is not more than 80% full. If it’s full it may have old kernel upgrades so google ubuntu clean old kernels.
-
reboot
-
Setup ssh, keygen, brew, and ssh-copy-id on Mac OS X
Now we need to establish a secure and easy connection from our mac to the new server. On our Mac issue the commands:
-
Install iTerm on your Mac. Configure to your liking, but it’s a good idea to set, in the Terminal settings, the scroll-back limit to either 99,999 or unlimited. Now in our new iTerminal, issue the command: ssh-keygen – this generates both public and private keys in our .ssh directory in our home directory.
-
Install HomeBrew on your Mac in order to get unix tools installed on your mac:
-
Make sure your account on your Mac is an administrator by going into System Preferences → Users and Groups → (unlock) → Select Account → checkmark Allow user to administer this computer.
-
First install XCode, then open a terminal again and paste in the command for installing homebrew from http://brew.sh
-
ruby -e “$(curl -fsSL https://raw.githubusercontent.com/Homebrew/install/master/install)“
-
Install homebrew as it prompts, and run brew doctor so that we know we’re ready to install homebrew
-
brew install nmap ssh-copy-id wget htop ccze – this installs the linux tools we want on our mac
-
-
-
ssh-copy-id jcoltrin@serverIPaddress (password) – this copies our public key into the server we connected to. Now we can log into the servers from our mac terminal without having to type in the password.
-
Also on the mac we want to make it easy to ssh into, for example, server.domain.com.
-
vi .ssh/config
-
Line 1: host server
-
Line 2: hostname server.domain.com
-
Line 3: User jcoltrin
-
Line 4: KeepAlive yes
-
ctrl+wq!
-
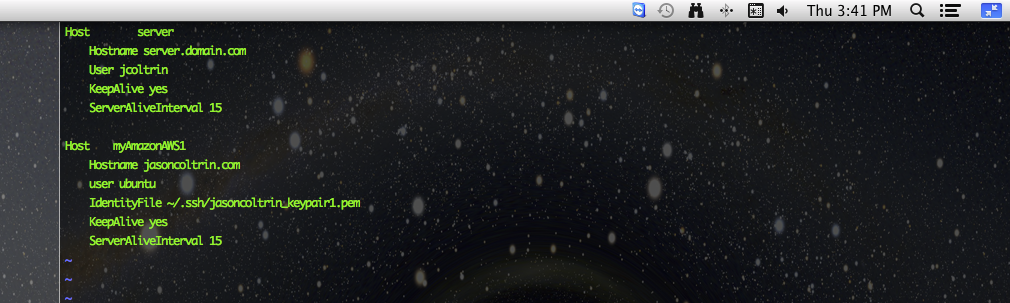
The result should look like the following:
-
jcmbp:.ssh jcoltrin$ cat config
Host	    server
    Hostname server.domain.com
    User jcoltrin
    KeepAlive yes
    ServerAliveInterval 15

Host    myAmazonAWS1
    Hostname jasoncoltrin.com
    user ubuntu
    IdentityFile ~/.ssh/jasoncoltrin_keypair1.pem
    KeepAlive yes
    ServerAliveInterval 15
-
ssh server – now we are able to issue this command and get in immediately without having to enter a password and also we can run sudo commands without having to enter our password again. As you can see in the config file above, we can also copy our .pem files into our .ssh directory and have config point to them so that we can easily ssh into our amazon AWS servers as well.
-
If we will be running websites, we now want to install virtualmin. Go to http://www.virtualmin.com/download.html#gpl and follow instructions here for downloading install.sh
Adding a new remote Administrative User’s ssh keys to a Linux Server
useradd -m -s /bin/bash newadmin1
mkdir ~newadmin1/.ssh
echo ssh-dss ****key data***..xxblahblahACBAM……kpucyrGw== [email protected] » ~newadmin1/.ssh/authorized_keys
chown -R newadmin1:newadmin1 ~newadmin1/.ssh
chmod 700 ~newadmin1/.ssh
chmod 600 ~newadmin1/.ssh/authorized_keys
vi /etc/sudoers
newadmin1 ALL=NOPASSWD: ALL
While this guide is not meant to be a comprehensive step-by-step guide, it should provide you with enough to setup an OS X workstation with pre-shared keys, and copy those keys to your new server. Working with iTerm and pre-shared keys, I think, is vastly superior to Putty on Windows. I hope this guide helps a few admins become more efficient and versatile working on OS X and linux.