If your organization has been utilizing SharePoint’s “View in File Explorer” or “Open With Explorer” to map a drive to a SharePoint directory, you may have had problems opening SharePoint files in File Explorer, the connection between SharePoint and the File Explorer breaks, the Mapped Drive disconnects, or the connection is unreliable. Also, SharePoint can be a bit cumbersome when trying to work with files in the web-browser. The outdated SharePoint “View in File Explorer” feature was built with WebDav in the 90’s, and may use ActiveX controls, which is why it relies on Internet Explorer version 10 and/or 11 to run. You may recall we wrote about troubleshooting SharePoint’s “Open in File Explorer” here.
Microsoft’s preferred alternative to “View in File Explorer” is OneDrive Sync, and Files On Demand (FOD.) When we think of “Sync”, we probably think of the classic Windows “Offline Files” configured in the Control Panel’s Sync Center. However, OneDrive Sync is not the same as Offline Files.
OneDrive Sync utilizes the more modern technology, Files-on-Demand (FOD), which is configured in OneDrive Settings. Once configured, Files on Demand will only pull the index of all the files and folders in a SharePoint Library.
If desired, we can get the entire file/folder/data by right-clicking on the file or folder and choosing “Always keep on this device.” By default, if FOD is enabled, and we choose to Sync, we’ll only get an index of the SharePoint Library in the File Explorer (and we won’t sync the entire library and data contained there in.)
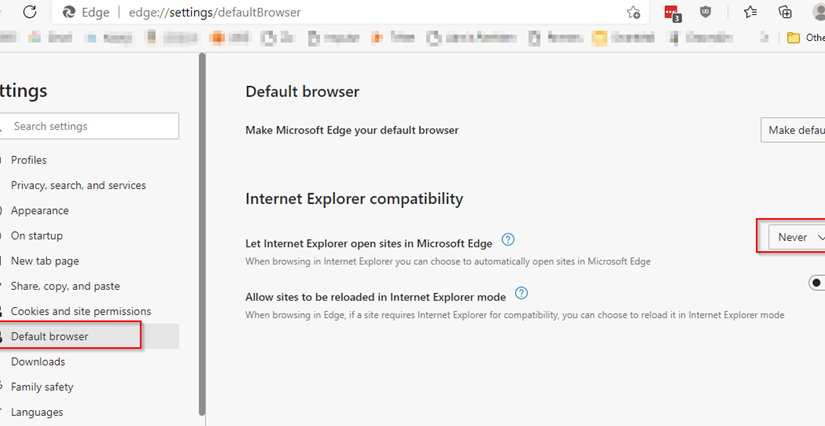
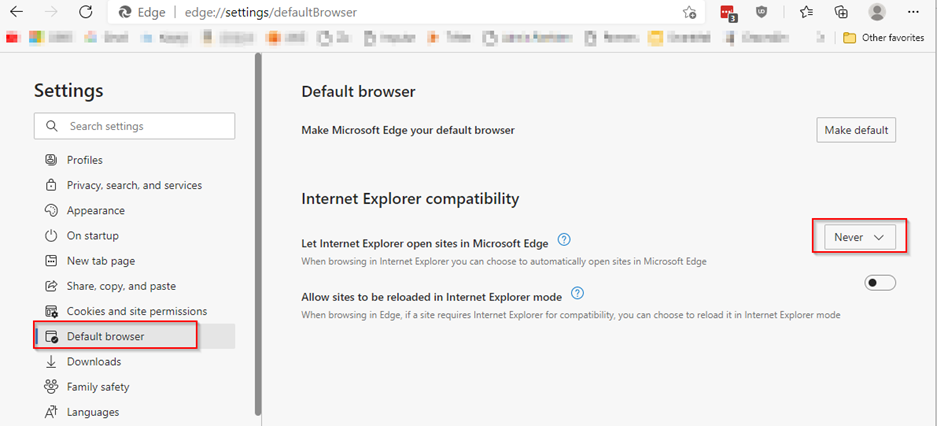
How to Enable Files On Demand and Sync a SharePoint Library
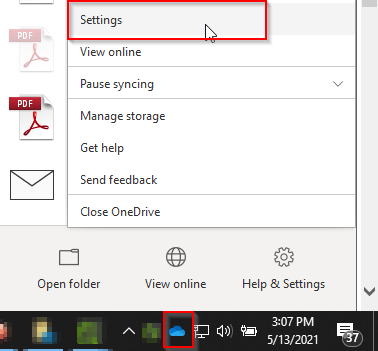
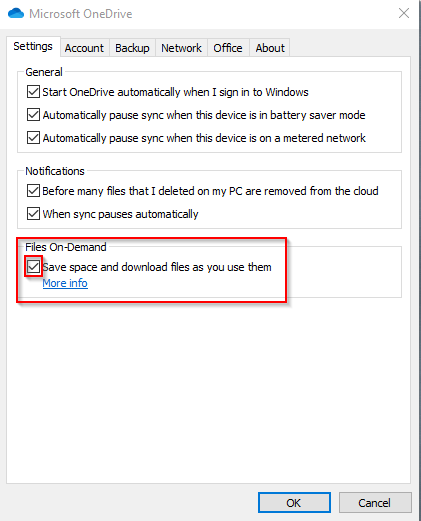
Before we Sync our SharePoint Library, make sure the OneDrive app is up to date and is running and logged in with the same credentials used to log into SharePoint online at www.office.com. Look for the blue or white cloud icon in the Systray (bottom right corner of your primary screen; near the clock,) then right-click, and click Settings.
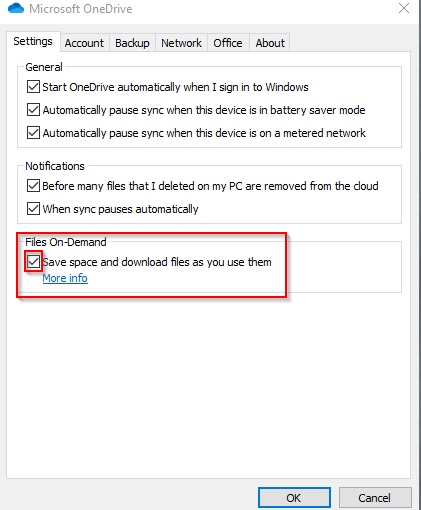
Next, in the Settings dialog box, near the bottom, place a check mark in the Files On-Demand / “Save space and download files as you use them” checkbox.
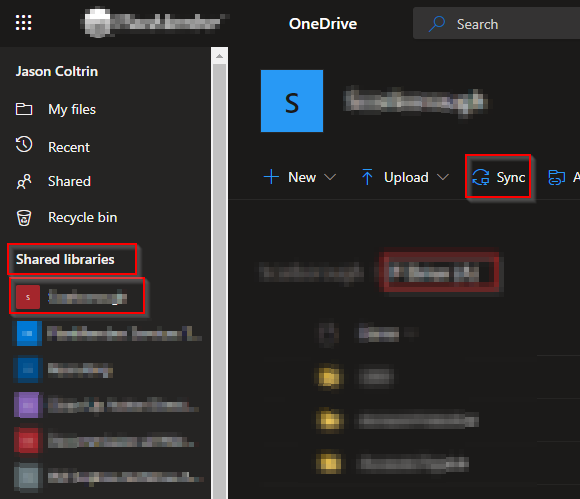
Next, open the Edge web browser and sign into www.office.com. Click on the SharePoint icon and then navigate to a Document Library that you would like to sync. Next, click the Sync button at the top of the Library:
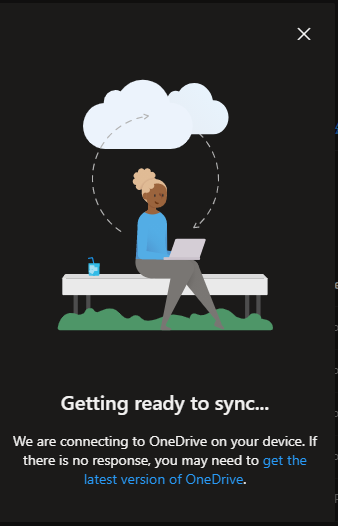
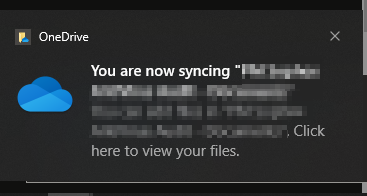
Normally we’ll see a couple pop-ups: Getting Ready to Sync, and You are Now Syncing:
We’ll now have the SharePoint Library’s index built in our File Explorer with the files now having a status of either “Cloud Icon” or “Green Check Mark” next to each folder/file. As the Sync runs, we can check the Sync status by right-clicking on the OneDrive icon in the Systray.
If you attempt to sync a library that already has a shortcut pointing to that library from within the user’s OneDrive folder, you may get an error:
Sorry, we can’t sync this folder – You’ve already syncing a shortcut to a folder from this shared library.
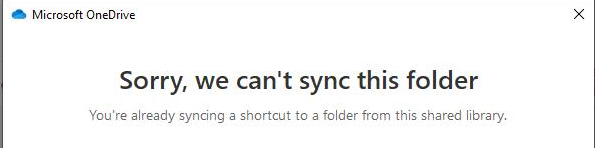
So what the error means is just that. Look in the user’s OneDrive folder in the file explorer and look for a folder/file that has a link icon (screenshot below). Special thanks to Hans Bender blog for pointing this out: https://hansbrender.com/2020/10/07/onedrive-for-business-add-to-onedrive-problems/
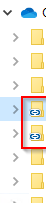
The icon will appear to have a link, so right-click on the folder that’s pointing to the Library you’re trying to Sync, and choose remove shortcut. Now we should be able to Sync the library.
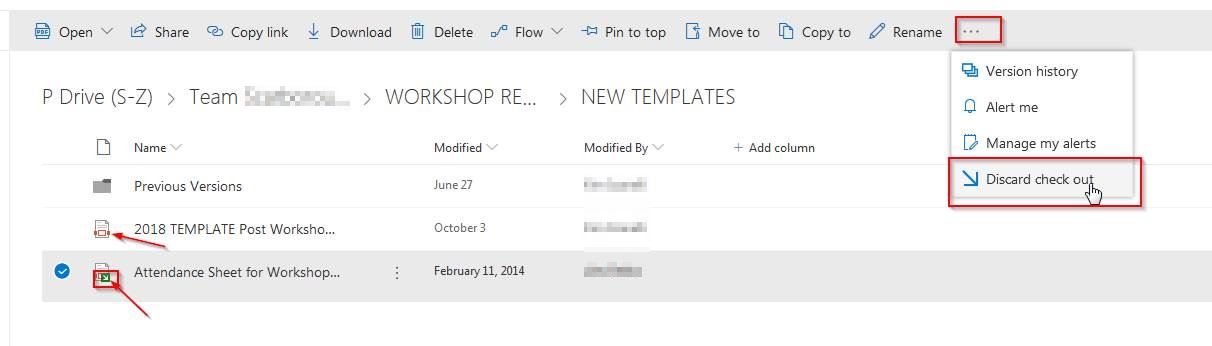
If we want to have the file in SharePoint downloaded completely to our computer, right-click and choose “Always keep on this device.”
We probably do not want “Always keep on Device” for the entire Folder/Library, as it will eat up our entire hard drive.
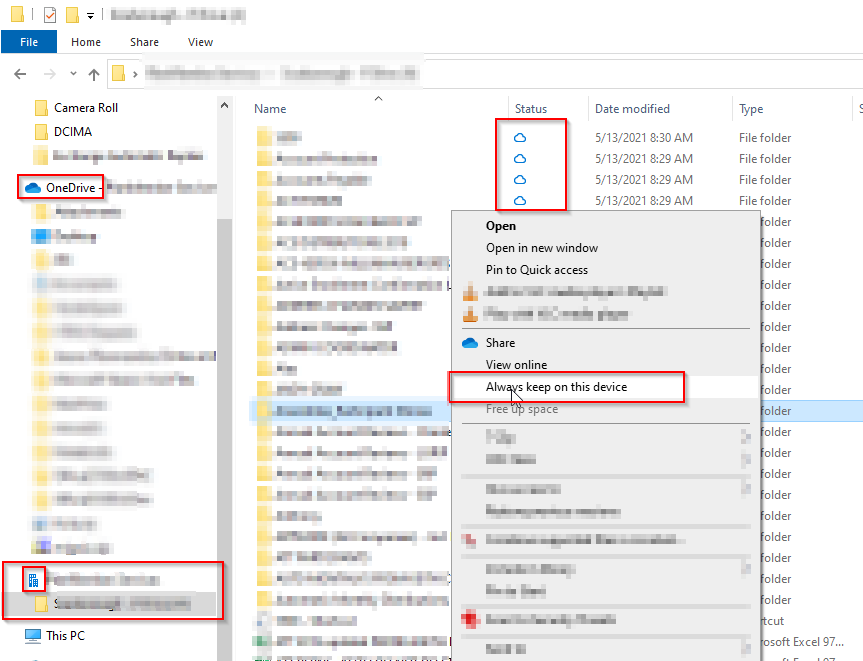
If a file or folder is inadvertently kept on our device, we can right-click and instead choose “Free up space” on the file (greyed-out in the screenshot above.)
Take note in the screenshot above, the newly-synced Shared Library is not directly under OneDrive in the left navigation pane of the File Explorer, instead, it is listed separately below it and has a different “building” type icon.
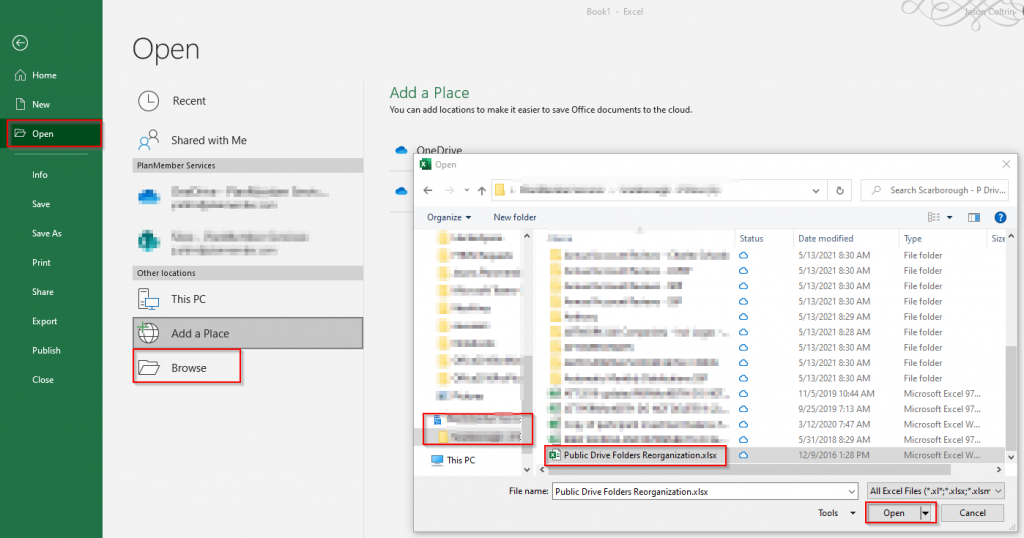
So now we can use Word and Excel apps to browse our local computer for files that are synced with SharePoint without having to use the old “Open/View in File Explorer” method.
For example, if we want to open a SharePoint file inside Excel, we click the File menu > Open > Browse > Organization / Library > File.xlsx > Open
Once we have made our changes and click Save, we’ll see a green checkmark under the Status column inside the File Explorer.

We hope that if you’ve experienced difficulty opening SharePoint files in the Windows 10 File explorer, this procedure and OneDrive Sync will provide a more stable and fluid means of browsing SharePoint files in the File Explorer.