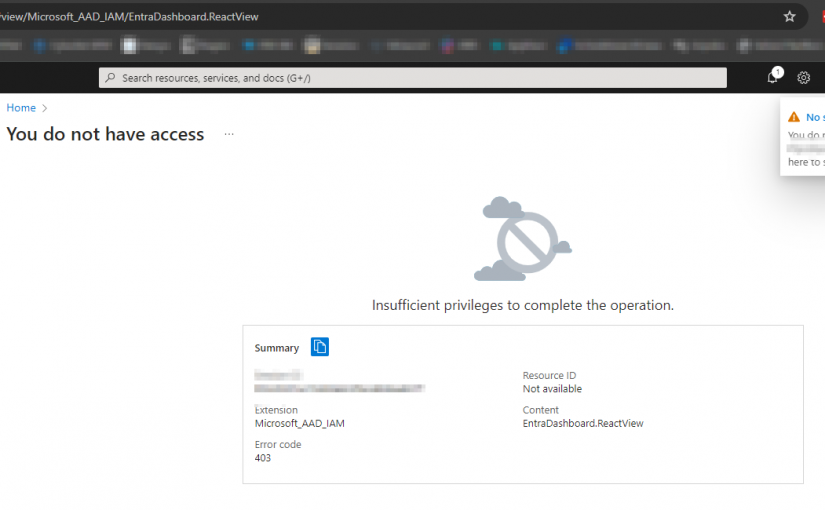
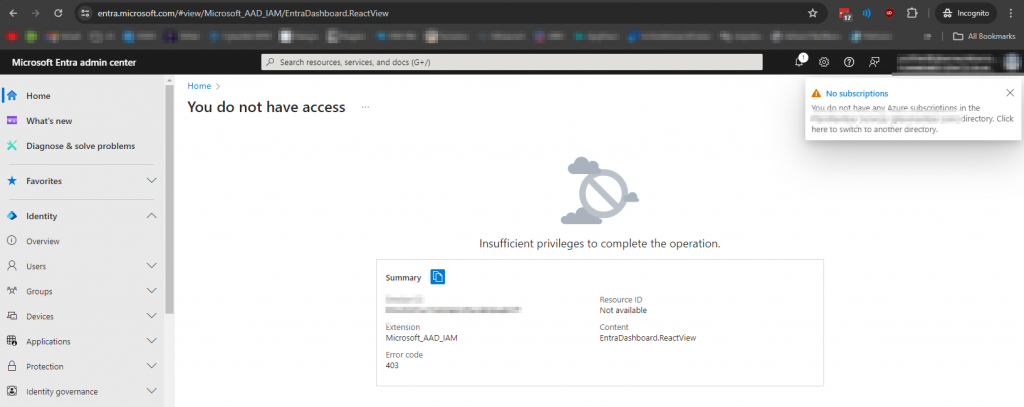
If you have multiple M365 tenants you may encounter an issue when logging into Microsoft Entra. You may get errors such as “You do not have access.” or “Insufficient privileges to complete the option.” or “No subscriptions, You do not have any Azure subscriptions in the (tenant name) directory. Click here to switch to another directory” or “Error Code: 403. “You may see this occurs even when you log into M365 in a new browser or in incognito/private mode. Common sense would dictate this was a cookie or session issue, but the issue persists across browsers and sessions.
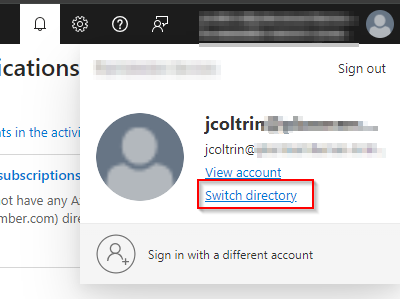
To resolve, you’ll want to click the “Bell/Alert” icon in the upper left corner of the screen and “Click here” to switch. Or click the Account icon (usually your initials in the upper right corner of the screen) and choose “Switch Directory.”
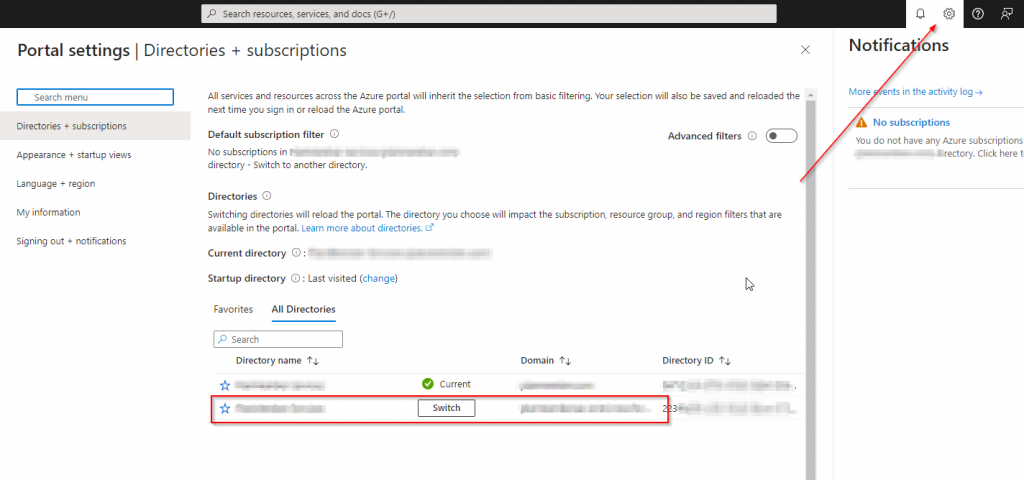
Now we will see a Portal Settings page with Directories and Subscriptions. Here we can switch to the tenant we want to manage. Do this by clicking the “Switch” button on the tenant we want to manage with Entra.
That should do it, let me know if you find a cause or reason for this issue occurring in the first place.
Microsoft now provides a way to analyze Excel spreadsheets and data using AI to find insights, trends, sort, create graphics, and charts without uploading your files to ChatGPT or Bing. This feature only appears to be available in both Destkop and Web versions of Enterprise editions of M365/Office365. For example this feature is not available in the free/hotmail/Microsoft account version of Excel for Web.
If you’d like to use a sample/example spreadsheet go ahead and download the one here. You may need to upload the file into OneDrive before you can use it. Also be aware when opening the file in the web-version of Excel you may need to allow pop-ups in Edge or Chrome.
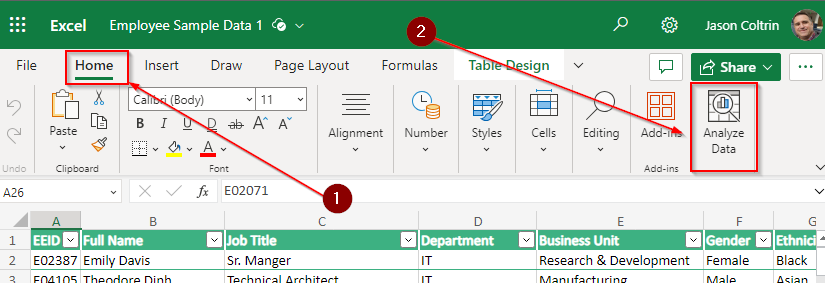
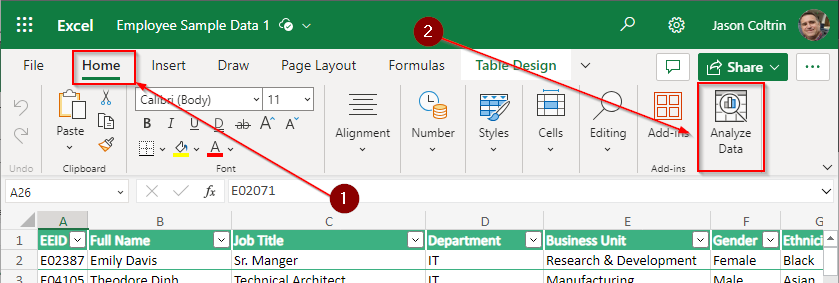
To use the feature, Click the HOME tab, and then on the far-right of the ribbon, click Analyze Data:
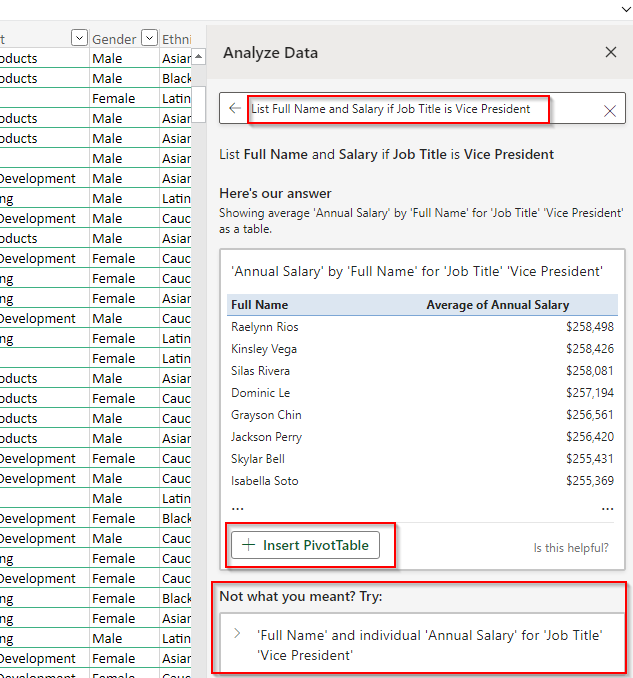
We can now ask questions about our data or let it provide us with it’s own insights. For example we can pose the question, “List Full Name and Salary if Job Title is Vice President.” And as simple as that it generates a pivot table that we can “Insert” (which means create a new “Sheet” at the bottom of the page.)
Note that the module provides a different prompt which is more succinct (‘Full Name’ and individual ‘Annual Salary’ for ‘Job Title’ ‘Vice President’) than the one we wrote at the bottom of the module:
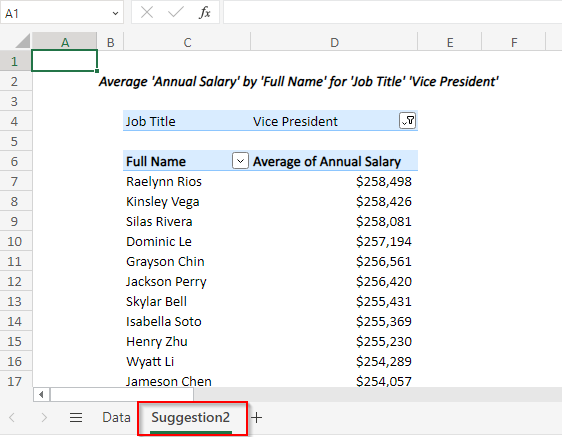
When we click Insert Pivot Table, a new Sheet appears at the bottom of our Workbook and names the workbook “Suggestion 1, Suggestion 2” etc. :
Excel’s Analyze Data feature can provide many insights into your data, but it’s always a good idea to double-check the results.
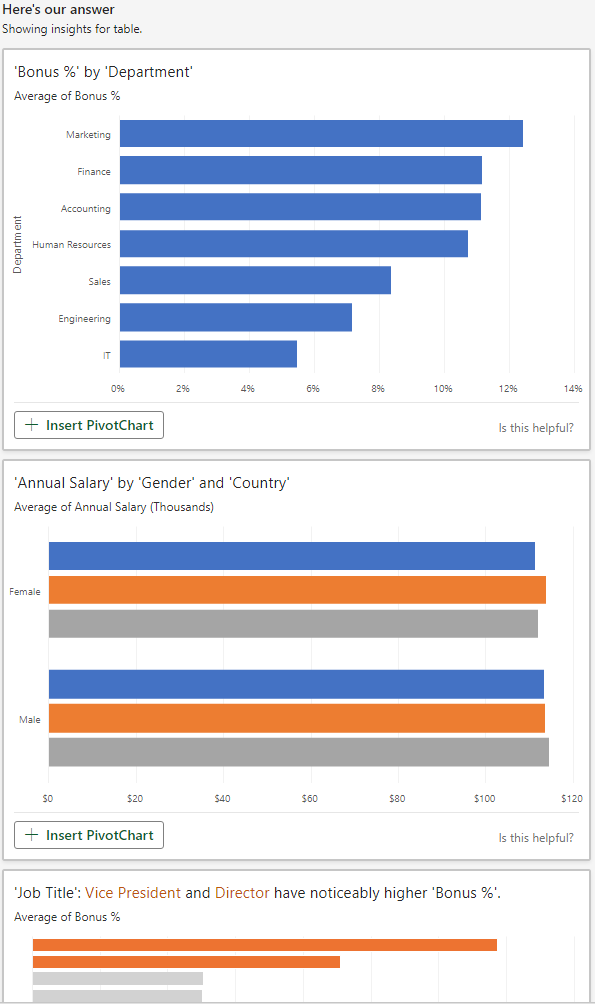
A great starting prompt would be something like, “What are some insights in this data?” For our sample Excel spreasheet, it returns charts for ‘Bonus %’ by ‘Department, and ‘Annual Salary’ by ‘Gender’ and ‘Country’. Also, it will find things like ‘Job title’ Vice President and Director have noticeably higher ‘Bonus %‘.
I hope this information was helpful, and let us know in the comments if you have found other ways to analyze Excel data using AI.
If you have employees who change phone extensions, names, departments, address, or titles a lot, HR or management may want to have this contact information data updated in Office365. Oftentimes these little changes can add up and we want to make a lot of changes in bulk with a single command. Instead of updating manually, we can make the changes to an Excel csv file and upload the changes all at once.
Ok in order to import/update the contact information for employees in the Office 365 tenant using a csv file and PowerShell, do the following:
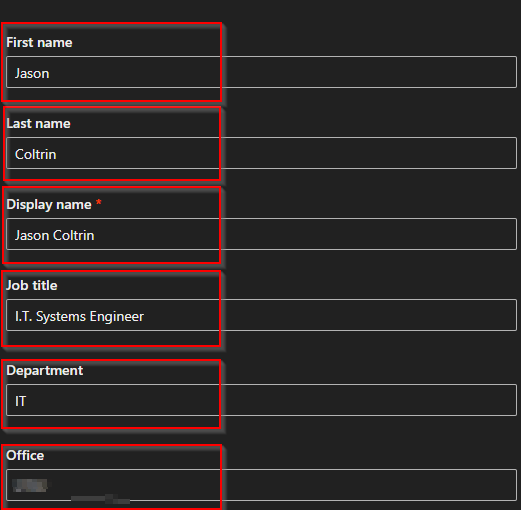
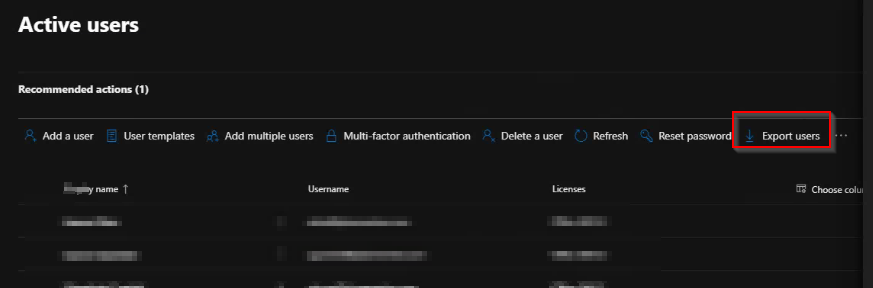
Edit the attached CSV file with information that needs to be imported into O365. **Note: the UserPrincipleName and DisplayName columns are required.** FYI, screenshot below is how I exported the required data from O365 and copied the required columns into the attached file.
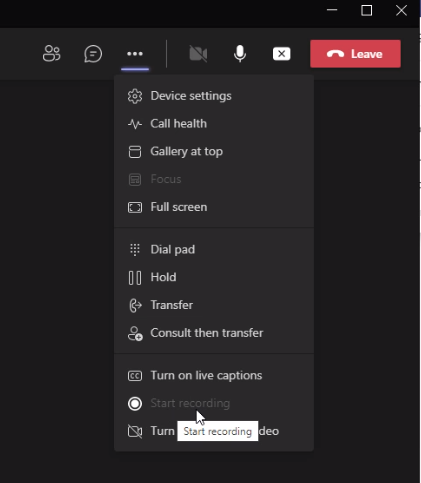
If your users report that the “Start Recording” button in Microsoft Teams is disabled and/or “greyed” out and/or “grayed out,” then perhaps recently the storage path for Teams to One Drive had changed, or there was a policy change or a tenant change occurred which caused the problem. Regardless, the following resolved the issue and fixed the grayed out problem for us. Special thanks to Ryu_Yosei for providing a solution here; below is the step-by-step.
For starters, this resolution’s time-to-fix is about 20 minutes. You’ll first want to start by opening a Microsoft Exchange Online Powershell Module as an Administrator, into the Tenant that is having the issue. If you’re unfamiliar with how to do this, follow the instructions in the first part of the procedure/guide here. One caveat, is that in order to import the required MicrosoftTeams module, we want to ensure that we start the Exchange Powershell session as an Administrator.
How to Run the Microsoft Exchange Online Powershell Module as Administrator
After installing the Hybrid Exchange Shell, we will probably have a desktop shortcut. Right-clicking on the shortcut doesn’t give us the usual “Run as an Administrator” option. Instead, we’ll want to first start a command ‘cmd’ prompt, run that as an administrator first, and then launch the Exchange Shell from within the command prompt.
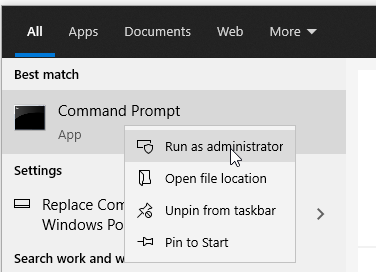
Click the Start Button and type cmd
Right click on the Command Prompt app and choose Run as an Administrator
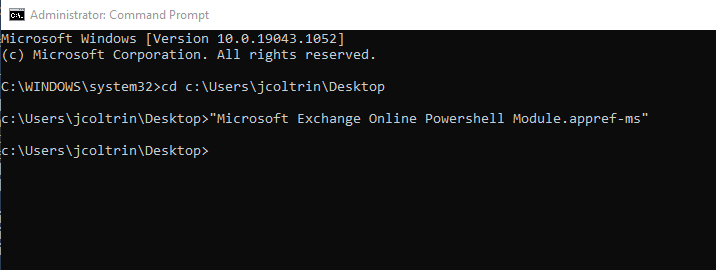
4. Next, inside the Administrator command prompt, issue the commands
cd c:\Users\Username\Desktop
5. Next start the Exchange module by running the command:
You may be prompted to log into O365, and perform multi-factor authentication if necessary. Next, if we do not already have the Teams module installed, issue the commands:
We’ll see some information asking to allow to trust the repo, so type y for yes.
PS C:\Users\jcoltrin> Install-Module MicrosoftTeams

Untrusted repository
You are installing the modules from an untrusted repository. If you trust this repository, change its
InstallationPolicy value by running the Set-PSRepository cmdlet. Are you sure you want to install the modules from
'PSGallery'?
[Y] Yes  [A] Yes to All  [N] No  [L] No to All  [S] Suspend  [?] Help (default is "N"): y
Next we’ll want to connect to Microsoft Teams in our tenant with the command:
Connect-MicrosoftTeams
We’ll have the system return some information including our Account, Environment, Tenant, and TenantId. We can now check the status of our CsTeamsCallingPolicy with the command:
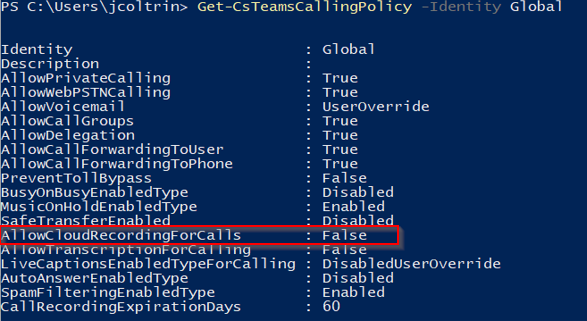
Get-CsTeamsCallingPolicy -Identity Global
In our case if we look at the entry for AllowCloudRecordingForCalls, we can see it is set to False:
Teams AllowCloudRecordingForCalls set to False
To change this to True, use the following command:
Set-CsTeamsCallingPolicy -Identity Global -AllowCloudRecordingForCalls $true
We can check to see if the command worked by issuing the previous command again:
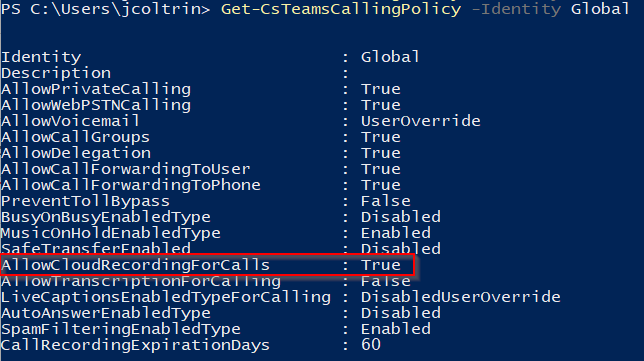
Get-CsTeamsCallingPolicy -Identity Global
We can now see that AllowCloudRecordingForCalls is now set to True:
AllowCloudRecordingForCalls set to True
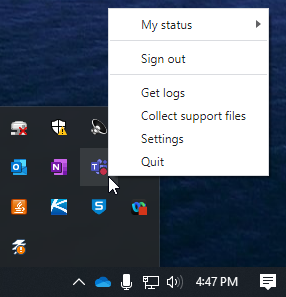
The setting should take place pretty much immediately across the tenant, however, users will still see the Start Recording button is disabled or grayed out until they completely Quit Teams and then restart the App again. To quit teams, in the bottom-right corner of the Windows primary desktop, down by the clock, expand the SysTray, right-click on the Teams icon and choose Quit.
How to Quit Microsoft Teams
Restart and/or Sign into Microsoft Teams again, start a test Call/Meeting with an associate, and check to see that Start Recording is now available and enabled.
Hopefully this guide helps restore your ability to record Teams calls. If something else worked for you, please leave a note in the comments below.
When you manage a large amount of Exchange mailboxes, inevitably someone will leave the organization, and you have to setup autoreplies with a message stating the user is no longer available by email. Common sense dictates we will setup a noreply@ mailbox and add the terminated users as alias’ to that mailbox, but not so fast. After a few days of testing and working with support, we’ve found that setting up a shared mailbox with autoreplies enabled with the terminated user’s unique email address/alias, provides the most consistent results.
We’re not going to go through the myriad of possible scenarios about what your org does with a mailbox after a user leaves. Instead, we’ll assume the mailbox is now deleted, and forwarding of mail bound for that mailbox is no longer necessary. To be on the safe side, ensure you back up the mailbox in some way before deleting the mail.
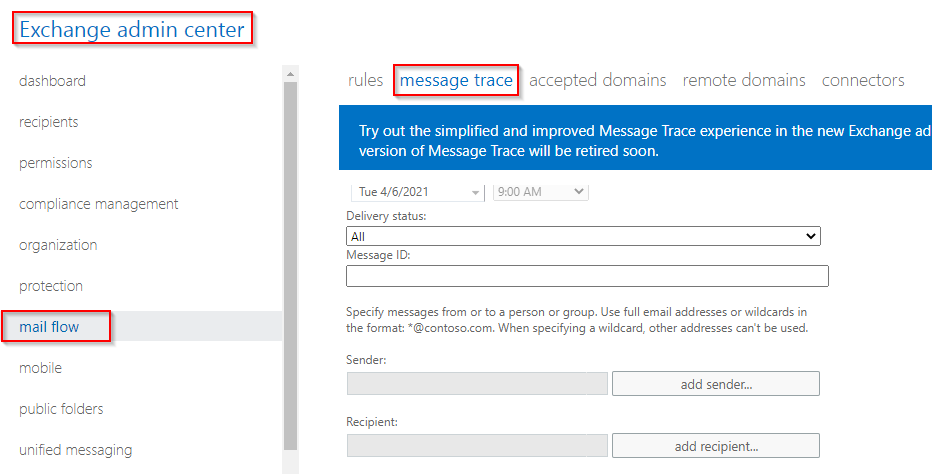
When testing auto replies, you may want to use the Exchange Message Tracker to see the messages come in and go out. To get there, go to O365 Admin > Exchange > Mail Flow > Message Trace.
A good thing to note here is that while performing a message trace, when sending test messages to the newly created shared mailbox with Automatic Replies enabled from within the same tenant or domain, auto reply messages may Drop with the following error:
This Drop message is actually an intended action, and is not an error, as it is probably used to prevent a loop of autoreplies within the same tenant.
Getting back to our original issue, to generate autoreplies, we first tried to setup a “noreply@” shared mailbox and add terminated user’s email addresses as aliases to the noreply box, but we got inconsistent results. Instead, we did the following.
How to Setup Automatic Replies for a Terminated User Mailbox
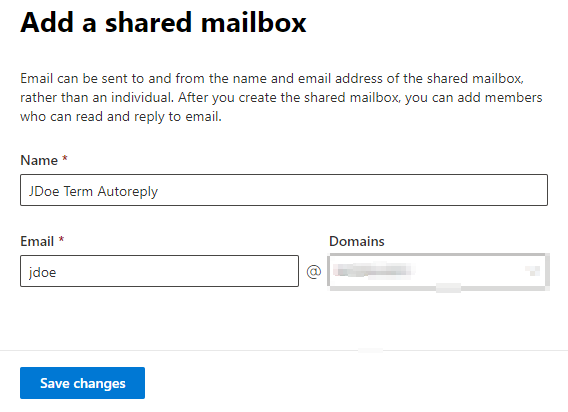
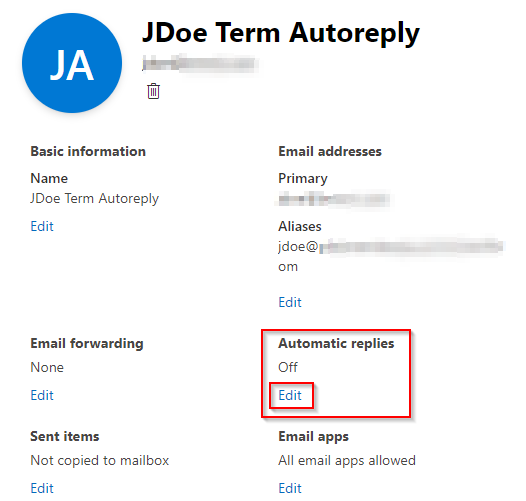
Create a shared mailbox with the terminated user’s email address. To do this go to 365 Admin Center > Groups > Shared mailboxes > Add a shared mailbox > Give the shared mailbox a name like “JDoe Term AutoReply” > Give the shared mailbox the (previously/actually used) email address of the terminated user. This does not use a mailbox license thereby freeing up a license. Alternatively, you can try simply converting the terminated user’s mailbox to a shared mailbox, but we had an inconsistent result doing this.
Next, simply click on the details of the shared mailbox, and under Automatic replies, click the Edit link:
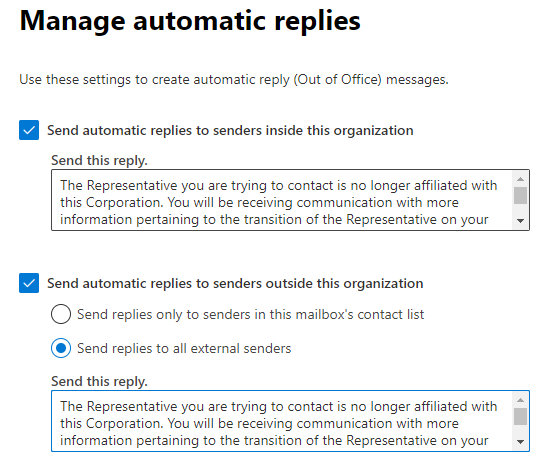
Next place Checkmarks in both “Send automatic replies to senders inside this organization” and “Send automatic replies to senders outside this organization”
Add a reply blurb which can be something similar to the following:
The Representative you are trying to contact is no longer affiliated with this Corporation. You will be receiving communication with more information pertaining to the transition of the Representative on your account. If you have an urgent matter and would like to speak with someone, please call our Service Center at 800-555-5555 between the hours of 6am-5pm (PST).
Click “Save” at the bottom and you should be all set.
If you want to test, you can try sending an email from an account outside your organization. *Note – when we sent a test message from gmail, the autoreply ended up going into the gmail account’s spam folder.
If further errors are encountered, you may need to look at your spam/external forwarding policies in your mail filtering site at https://protection.office.com/antispam or reach out to MS Support.
So recently Windows 10 has enabled a security feature that redirects certain websites like www.office.com to the Edge browser. If you need to get into a website using Internet Explorer, for now the workaround is to disable the Edge redirect setting inside the Edge browser settings.
If you use SharePoint online a lot you have probably found that Open in File Explorer is a convenient way to manage your SharePoint files and libraries in Windows 10. You’ve also probably found that in order to view the SharePoint files in the Windows 10 File Explorer, you first need to open Internet Explorer, then open the SharePoint library, find the link Return to Classic SharePoint in the bottom left corner of the SharePoint library page, and then click on the Open in File Explorer link inside Classic Mode. Details on how to troubleshoot opening SharePoint files in File Explorer can be found here. If you want an alternative way to browse SharePoint files in Windows 10 File Explorer using Edge, please go here.
If you want to know how to disable or remove the IE to Edge redirect, use the following instructions:
Start by opening the Edge browser.
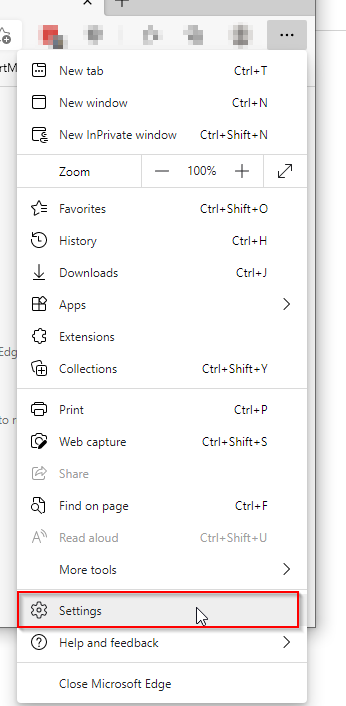
In Edge, click on the … ellipsis menu in the upper-right corner, and then click Settings. Or in the address bar at the top of Edge, type edge://settings/defaultbrowser and press Enter.
Edge Browser Settings
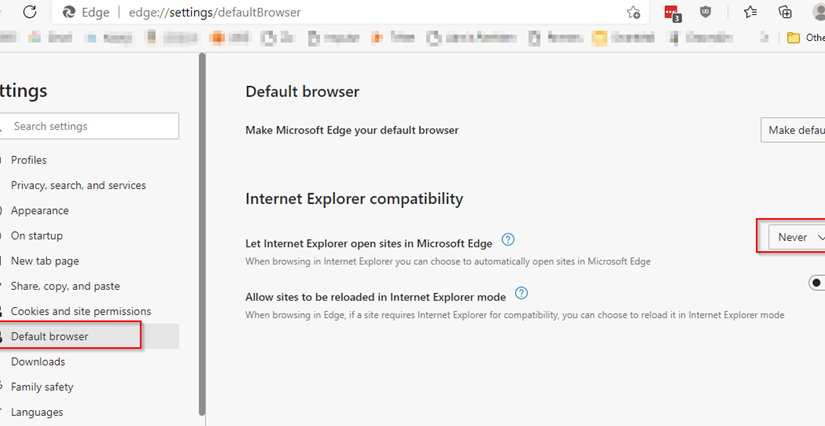
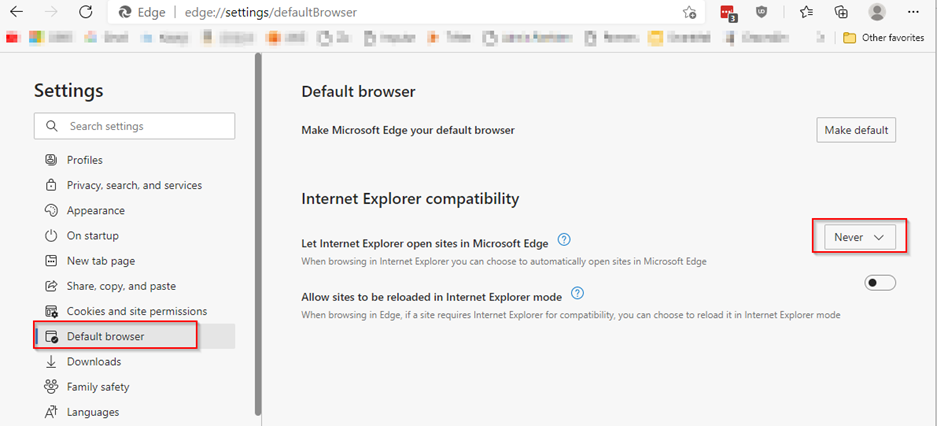
Next, inside the Edge Settings page, on the left side menu, click Default browser.
Change the setting “Let Internet Explorer open sites in Microsoft Edge” to Never.
Edge Default Browser Let Internet Explorer open sites in Microsoft Edge
That should do it!
Close the Settings Tab/Edge browser. Close and then open Internet Explorer browser. Go to www.office.com in IE and it should let you in.