YYYY-MM-DD is the standardized international date formatting scheme as codified in ISO 8601. The standard aims to provide a well-defined unambiguous method of representing calendar dates and times in worldwide communications.
The standard has the additional benefit of organizing file and folders in a data-system in an intuitive ascending or descending order. Additionally not only is this good for Excel sorting, it’s also excellent for file naming as it sorts properly (based on date) even if the sort is done alphabetically and not numerically.
Also, the ISO 8601 is a format recognized internationally, and will prevent costly mistakes (the refund expires on 2/22/21,) and inconveniences (my plane arrives in Japan at 5:30P on 12-23-22.)
Question: Yes this is all fine and good but I can’t remember all this, how do I get used to the correct date format?
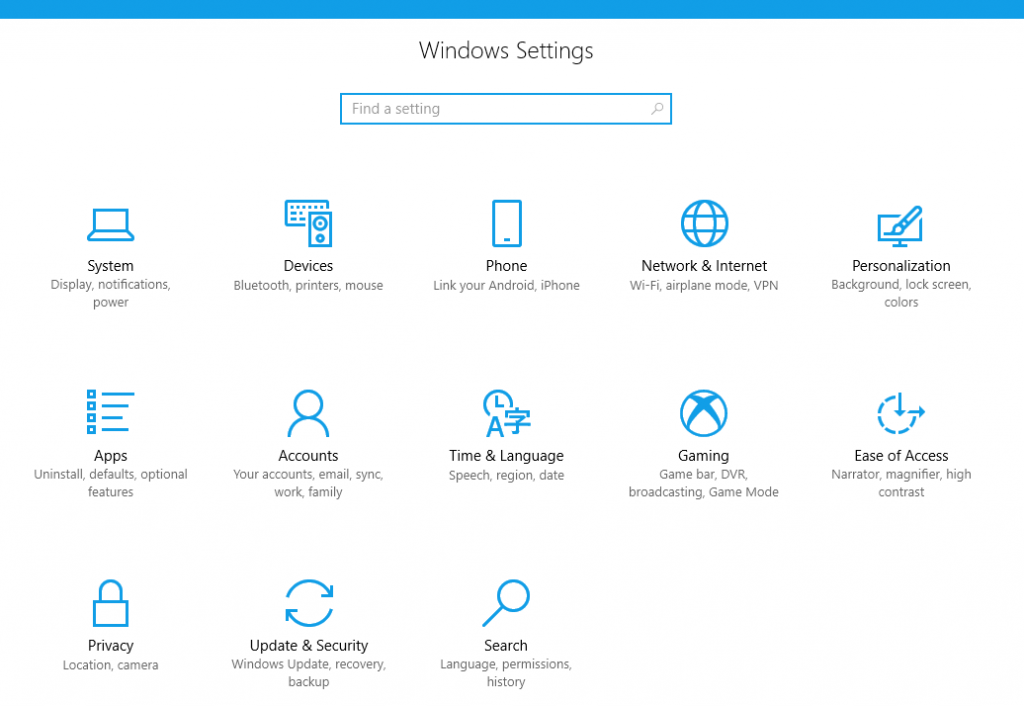
Answer: Change the Short Date format under Windows Settings > Region Settings or Date and Time Format.
Click on the Windows Start button and type Region
Click on Region Settings or Change the Date and Time Format
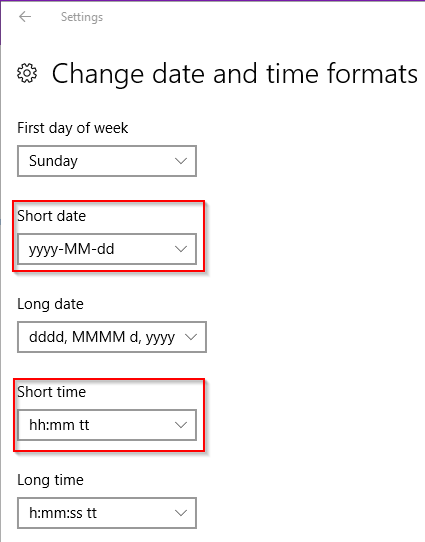
In the Date and Time Format settings, change the Short Date format to yyyy-MM-dd
Windows Region Time Date Format Settings YYYY-MM-DD
4. Additionally we can change the Short Time format to hh:mm tt (which adheres to the ISO 8601 format)
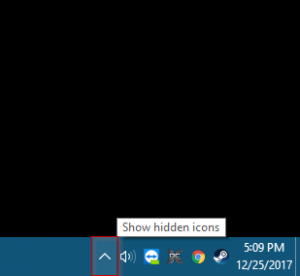
5. Now we can see in the bottom-right corner of our screen, our date and time formats are displayed:
Systray Time Date Format
ISO 8601 Filename conventions
Naming files using the ISO 8601 scheme can have many variations, however the following makes most sense to me.
The timestamp is only a portion of the filename, it should not dictate how the other portions are formatted.
Typically dashes are used to separate fragments of a filename, while underscores delimit tokens within a fragment.
As such, the timestamp and the filename should be delimited by dashes, as they are different sections. Keep underscores within a section.
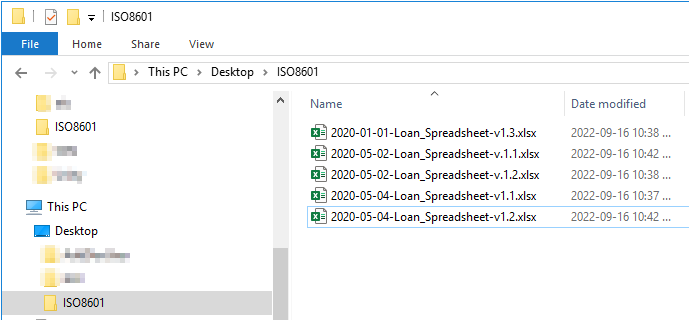
Then you get filenames which look like YYYY-MM-DD-file_name-v3.41. Which is clean and consistent (and easily copy / paste-able.)
Which of these filenames below is going to have you pulling your hair out, and which will leave you nice and happy when sorting by date in Windows File Explorer?
If you have employees who change phone extensions, names, departments, address, or titles a lot, HR or management may want to have this contact information data updated in Office365. Oftentimes these little changes can add up and we want to make a lot of changes in bulk with a single command. Instead of updating manually, we can make the changes to an Excel csv file and upload the changes all at once.
Ok in order to import/update the contact information for employees in the Office 365 tenant using a csv file and PowerShell, do the following:
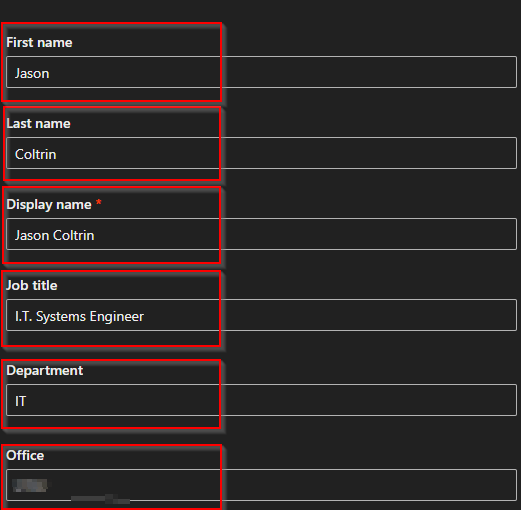
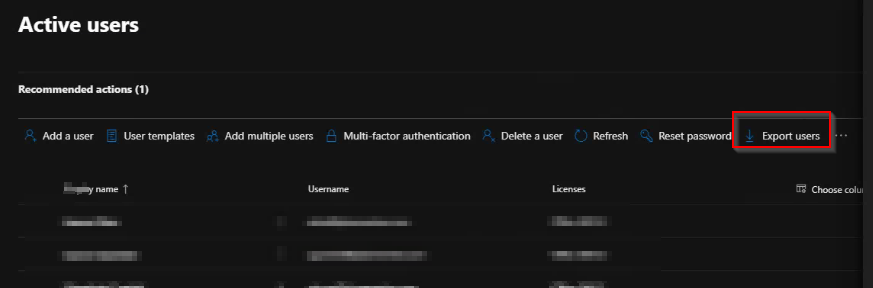
Edit the attached CSV file with information that needs to be imported into O365. **Note: the UserPrincipleName and DisplayName columns are required.** FYI, screenshot below is how I exported the required data from O365 and copied the required columns into the attached file.
In the event our Ubuntu server has an incorrect time, a clock that is offset may prevent users from logging in, or for example, synchronizing databases. If OpenVPN is in use with 2FA and google authenticator, their login is dependent on the time of the server being correct . We want to ensure our end users can log into the server or OpenVPN successfully. Let’s start by viewing the clock on our server, and then synchronize the clock with an internet-based time service.
First issue the command:
date
If we compare this time with an accurate clock, such as a cell phone, we may see this time is no accurate. The date display in the above screenshot shows the Day, Date, Hours, Minutes, Seconds, TimeZone and Year.
Let’s check to see if our clock is set to be synchronized. Do this by issuing the command:
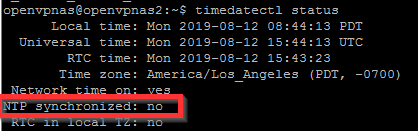
timedatectl status
Here we see that our “NTP synchronized: no” status indicates our Network Time Protocol synchronization is turned off.
In order to get our clock synchronized and change it to NTP synchronized: yes, we need to do the following.
Stop the ntp service
Sync the time using ntpd with the -g and -q switches (allows the time to be set without restriction)
Start the ntp service
We can do this by issuing the commands:
Sudo service ntp stop
Sudo ntpd -gq
This will produce something like the following output:
In this output we can see that our time was offset and adjusted by -49.77 seconds.
Next let’s start the ntp service again with the command:
Sudo service ntp start
Lastly we can confirm that our time is set correctly and that NTP synchronized: is now set to yes with the command:
timedatectl
That should do it! Try issuing the command date again and compare it to an accurate clock. Check to see that your OpenVPN users can log in. If they continue to have issues, check out the article on Troubleshooting OpenVPN
When trying to setup and authenticate to an AWS Instance running OpenVPN, a user could not complete a new connection to OpenVPN after entering the initial un/pwd. They receive the error: Permission denied. This is after successfully setting up the OpenVPN client on Windows 10 and scanning an Authenticator code using Google Authenticator App on a Samsung S8 Active Android mobile phone running Android 8.0.0 ‘lollipop’. Ultimately the reason the user could not authenticate was their mobile phone’s time was off by about 3 minutes. Continue below to find additional information on how to troubleshoot this and other authentication issues with OpenVPN.
When troubleshooting OpenVPN login errors it’s a good idea to first try some of the following:
Unlock a Disabled or Locked account on OpenVPN Admin console
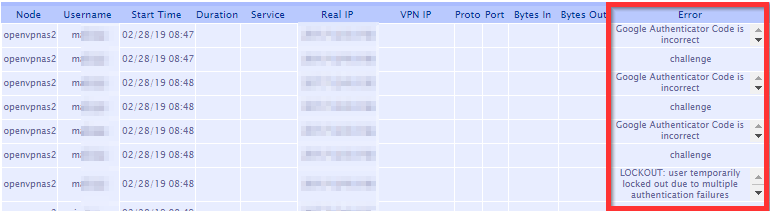
To check for the events related to a user lockout, first log into the Admin web console > Status > Log Reports. Here you will find the errors related to bad authentication and eventually an account lockout.
The errors you may find could be the following:
Google Authenticator Code is incorrect.
LOCKOUT: user temporarily locked out due to multiple authentication failures.
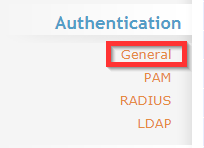
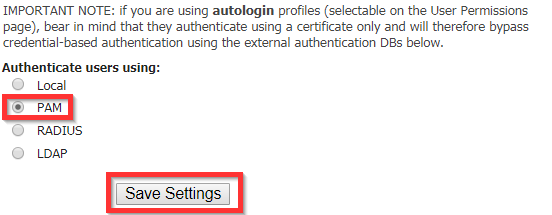
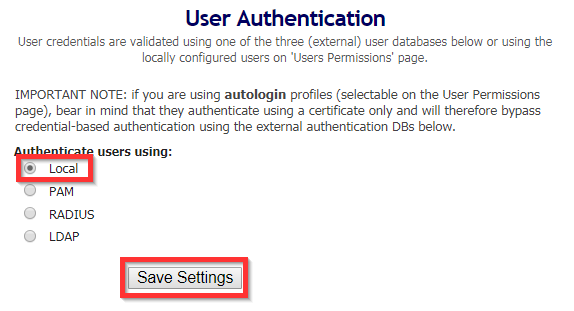
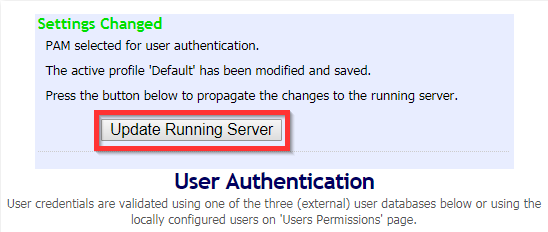
To unlock a user account (if using local authentication), Login to the Admin Web Console, Go to “General” under Authentication and change Authentication to “PAM”, Save Settings > Update Running Server > “Local” > Save Settings> Update Running Server.
This procedure should unlock disabled or locked user accounts on OpenVPN.
Reset A User Account on OpenVPN
To reset a user’s OpenVPN account:
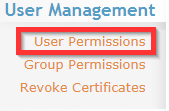
Log in to the admin web console, click on User Permissions.
Find the username, place a checkmark in the Delete column, then Apply > Save. Next, re-create the account. Scroll to the bottom of the list, type the new user name: Eg. jcoltrin Save > update server
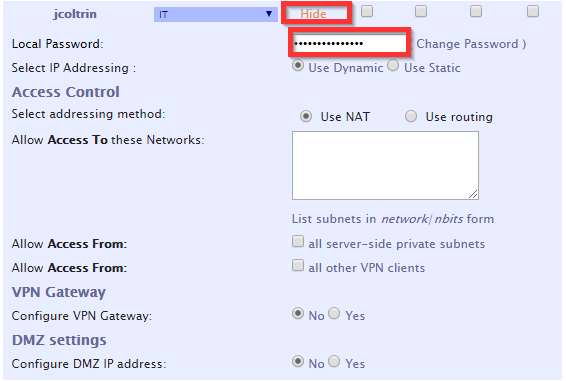
Go back find the username again in the list and hit Show:
Enter in the Local Password: (S3cr3tP@ssw0rd!) Save > Update
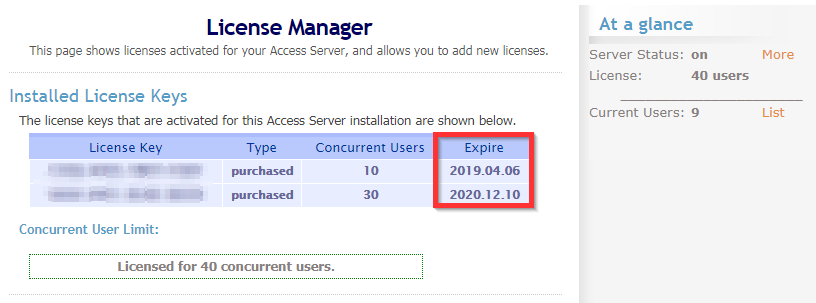
Check OpenVPN for Valid Concurrent License
In the admin web console, under the Configuration menu, click License. Check to ensure that your concurrent users have not reached or exceeded the limits of your licenses (under At a glance,) or that your licenses have not expired.
Use SSH to check the logs of the OpenVPN server and get the specific errors for an individual’s login problems.
After logging into the server using Putty/SSH, you can change directory to the scripts directory:
cd
/usr/local/openvpn_as/scripts/
and then issue the command ./authcli –user <username> –pass S3cr3tP@ssw0rd
./authcli --user jcoltrin --pass S3cr3tP@ssw0rd
This will produce something similar to the following information:
Result:
API METHOD: authenticate
AUTH_RETURN
  status : COM_FAULT
  reason : An error occurred while connecting: 13: Permission denied. (twisted.internet.error.ConnectError)
  user : jcoltrin
Addtionally you can find more messages related to authentication failures in /var/log. You’ll find these messages in the latest log files:
openvpnas.log
openvpnas.log.1
Use your favorite editor (vi) to search through the logs
vi openvpnas.log
use the command / and then the username to search for that term and hit “n” to go to the next instance of your term, for example:
/jcoltrin > n > n
and then :q to quit.
Here are some typical error messages for my authentication errors:
2019-02-26
14:20:08-0800 [-] WEB OUT: '2019-02-26 14:20:08-0800
[UDSProxyQueryProtocol,client] Web login failed
(twisted.cred.error.UnauthorizedLogin)'
2019-02-26 14:21:30-0800 [-] WEB OUT: "2019-02-26 14:21:30-0800 [UDSProxyQueryProtocol,client] Web login authentication failed: {'status': 1, 'client_reason': 'LOCKOUT: user temporarily locked out due to multiple authentication failures', 'reason': 'LOCKOUT: user temporarily locked out due to multiple authentication failures', 'user': 'jcoltrin'}"
Make sure the phone with Google Authenticator has the correct time and set the phone to sync it’s clock with the network/carrier
As mentioned at the beginning of this article, what the original login issue came down to was the Android phone, on which the Google Authenticator was running, had it’s time off by about 3 minutes. To set and change the correct time on an Android Galaxy S8 Active, first, go to Settings > General Management > Date and Time > Set/Turn on Automatic Date and Time.
I’m not sure why the value for this phone had it’s time set to not have automatic sync with the network/carrier. This may have been due to a recent android update because I found this setting off on a couple phones in the office. Ensure the time on your server is accurate as well by issuing the bash/ssh command:
date
Your result should look like the following:
openvpnas@openvpnas2:/var/log$ date
Thu Feb 28 14:46:57 PST 2019
When attempting to move files in SharePoint Online Office365 from one folder to another you may find that you get errors or the moving process times out or fails with the error:
Error: We couldn't move the file because it's locked for editing or has been modified or deleted.
What has happened is some of the files in these folders have been marked as “checked out” or “locked”. This may have been done erroneously by a user or the status was corrupted when the files were originally uploaded into SharePoint.
Once the files are checked in, you can move them. As an alternative to moving the files, you may also be able to “Copy To…”, and then delete the original files. Again, you may not be able to delete the files you copied because the files you want to delete in SharePoint may also be locked or checked-out.
This is what worked for me:
Use your favorite web browser and log into your SharePoint site (e.g. https://companyname.sharepoint.com/sites/sitename.
Browse to the problem folders that contain files that you cannot move to another folder.
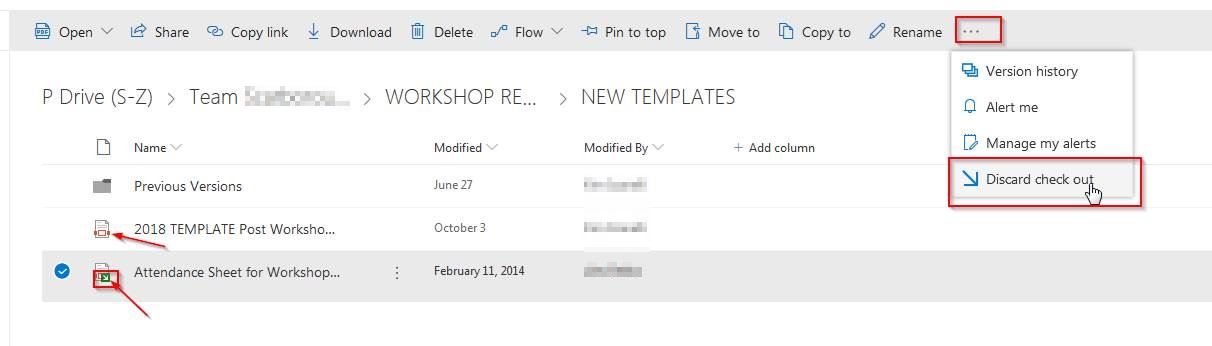
In the folders, you should find files that are “checked out”. The files will have a green arrow icon next to the file icon.
Place a checkmark next to the file that is checked out.
In the menu at the top-right choose “…”
In the “…” menu, click “Discard check out”
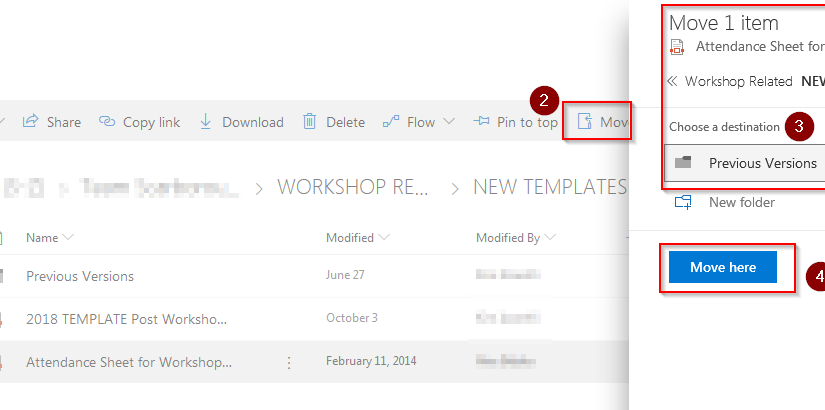
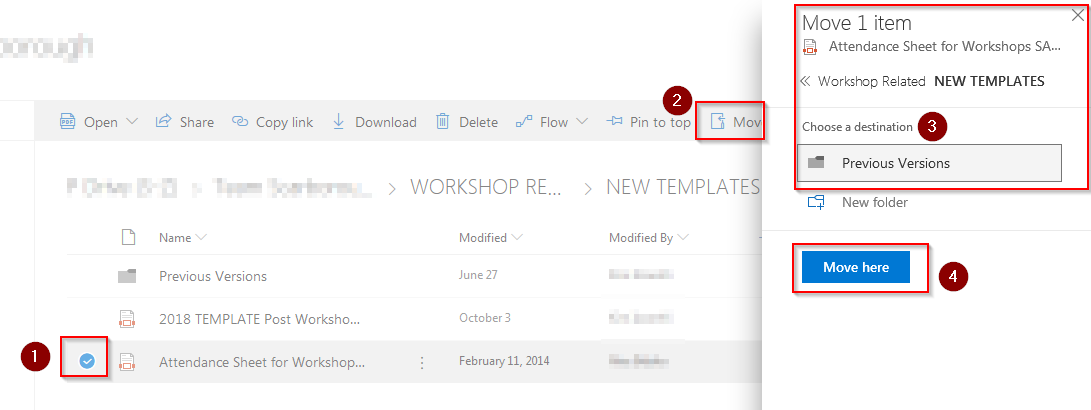
Now try moving the file with the following sequence:
If the problem files are Word/Excel files, you may need to Open the files in Word or Excel first, in order to check them back in.
Use PowerShell to get the Windows Experience Index in Windows 10
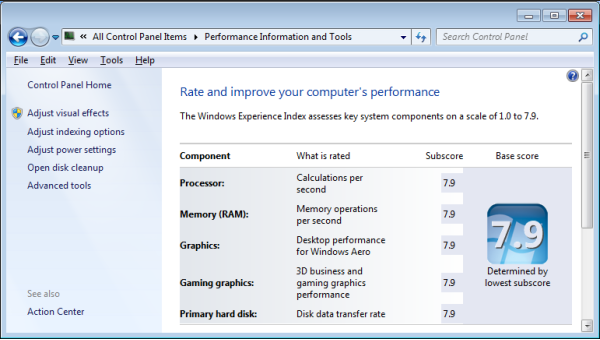
Windows 7 has the Windows Experience Index which is used often by hardware techs to get a good idea about the kind of hardware installed in a PC. It also allows you to quickly find where improvements can be made to get the machine to run faster. The following screenshot is an example of the Windows 7 Windows Experience Index:
You can get an idea about how fast the components of your Windows 10 computer are by running the Windows System Assessment Tool, but the readout is a little hard to understand. Skip this part (winsat formal) to get the Windows Experience Index in Windows 10 or Windows 7 with PowerShell below.
First open an elevated command prompt and run the command:
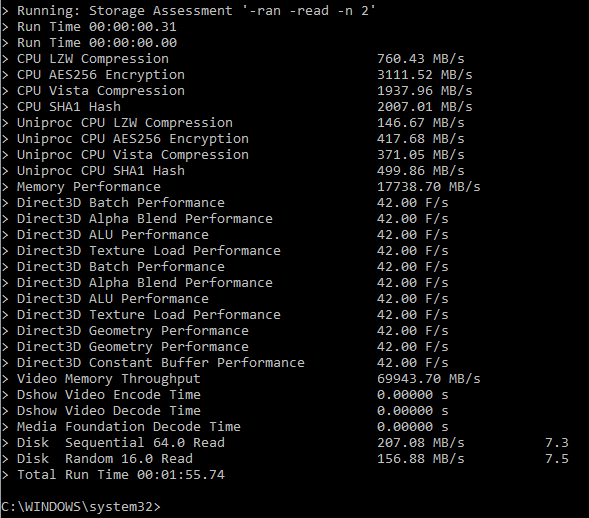
winsat formal
Below is a screenshot of the command running and it’s output. Running this tool will slow down your PC for a few minutes as it runs the tests:
Results:
The Windows Experience Index WMI modules are still available in Windows 10, however, the scores are not readily apparent in the Windows 10 system settings.
To get your Windows 10 Windows Experience Index subscores with PowerShell, first open up the Windows PowerShell ISE. Next, go to the following link: https://pastebin.com/i5M81xsV, -credit goes to reddit user:
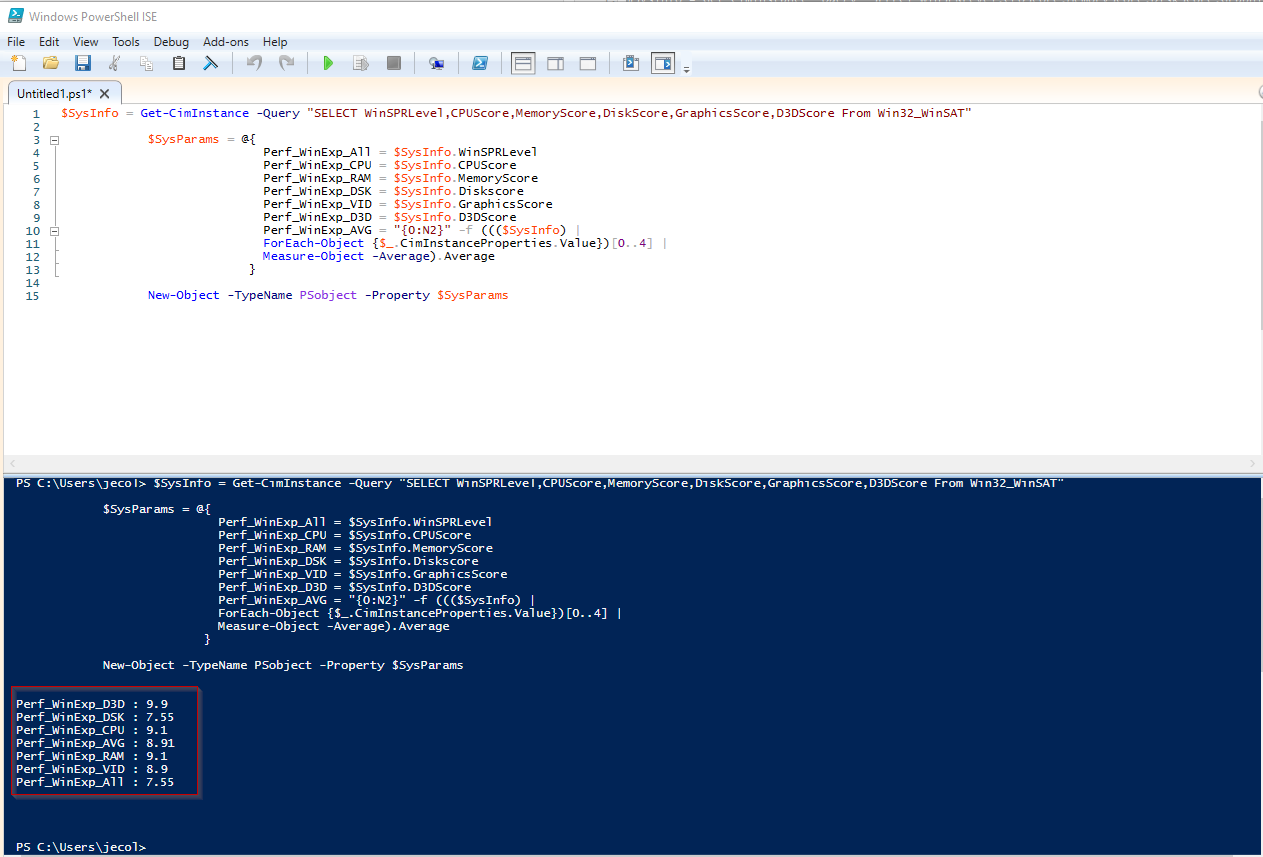
Copy the code into the Windows 10 PowerShell ISE and then run the script, or create a .ps1 file, and you can get the Windows Experience Index with PowerShell in either Windows 10 or Windows 7:
So you can see that in my results, my WEI score would be 7.5 – where the lowest subscore determines my overall result. Looking at the scores, I can improve my score and upgrade my computer by increasing the DSK (disk) performance. To do this I would probably have to upgrade my motherboard to one that supports an NVME hard drive.
My friend’s laptop’s lowest score is VID (video) which means his laptop GPU is keeping the score low. There are a few options for upgrading a laptop GPU, such as an external GPU, but this isn’t surprising as most laptops GPUs can’t compete with a full-sized computer and GPU.
With the release of Windows 10 Creators Edition version 1709, comes more bells, whistles, tricks, and shortcuts for us to dig into and explore. In this article, we’ll look mostly at the Windows Key shortcuts available and how the shortcuts and key combos can help us in our daily workflow.
In the event you’re not already aware, the Windows Key on your keyboard (usually between the Ctrl and the Alt keys in the lower left area of most keyboards) has a lots of capabilities when held down while pressing other keys on the keyboard. Pressing this key on it’s own launches the Start Menu:
Windows Key + A – Brings up the Windows Notifications SideBar. Here we can find existing notifications, switch to tablet mode, get into the windows settings panel, join a WiFi network, and change our location settings.
Windows Key + B – Select / Activate the Systray / Show Hidden Icons Expansion menu. This can come in handy as a few applications run as services and can only be accessed by right-clicking on the icon in the Systray; if your mouse stops working, this is a good shortcut to know.
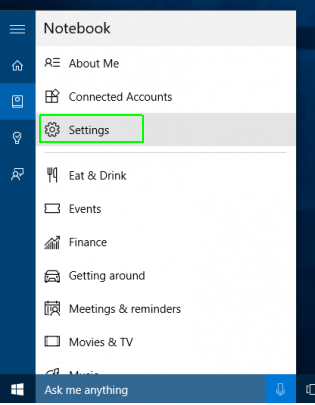
Windows Key + C – Opens Cortana in Listening Mode. “Hey Cortana!” This is disabled by default and can be activated in the Cortana Settings. (Enable in Cortana > Menu > Notebook
Windows Key + D – Show the desktop
Windows Key + E – Open File Explorer
Windows Key + F – Open the Feedback Hub and Take a screenshot (this didn’t work for me)
Windows Key + G – Open the X-Box Game Bar
Windows Key + H – Open the Dictation control bar
Windows Key + I – Opens the Windows 10 Settings
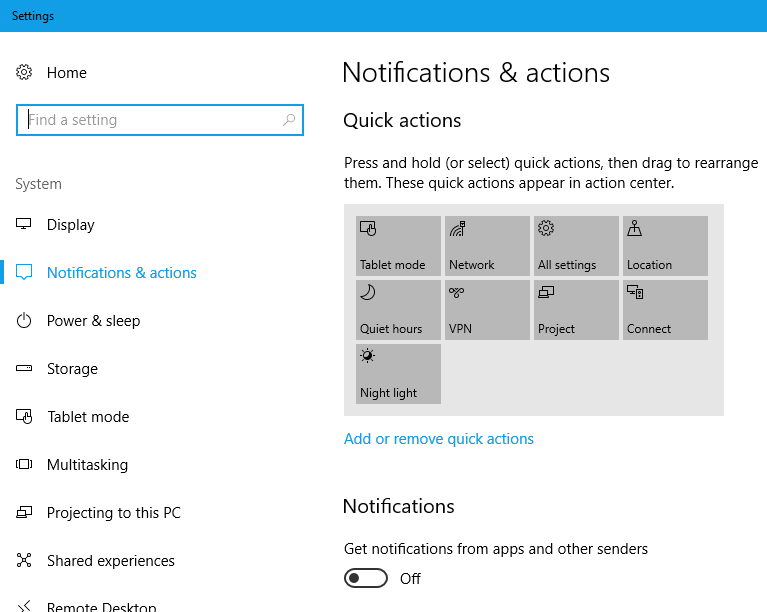
Windows Key + J – Sets focus to Windows Tips when one is available (Turn off tips in Settings > Notifications & Actions)
Windows Key + K – Open the Connect Quick action (connect to a wireless projector)
Windows Key + L – Lock your PC or Switch Accounts
Windows Key + M – Minimize all windows
Windows Key + O – Lock the device orientation (helpful for tablets)
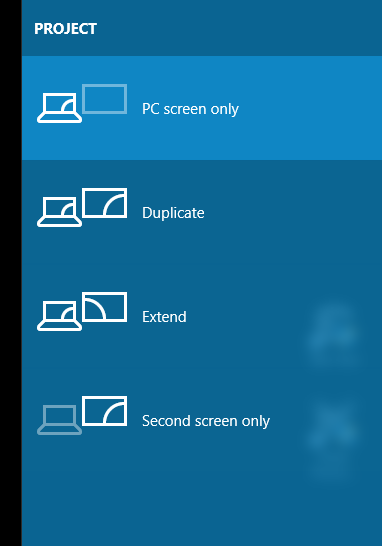
Windows Key + P – Choose a presentation display mode (Sidebar Projectors tool)
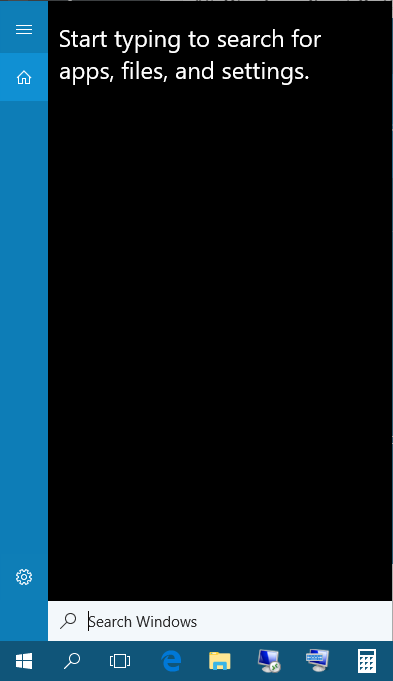
Windows Key + Q – Quick file search
Windows Key + R – Open Run dialog box
Windows Key + S – Open Windows Search (same as Windows Key + Q)
Windows Key + T – Cycle through apps pinned to the taskbar (cycle in reverse is Windows Key + Shift + T)
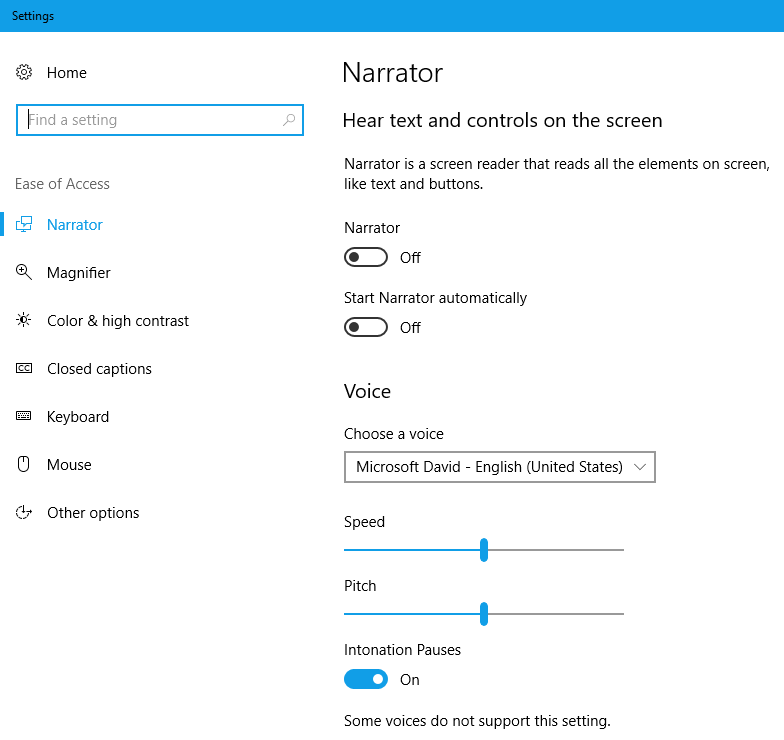
Windows Key + U – Open Ease of Access Center
Windows Key + V – Cycle through windows notifications
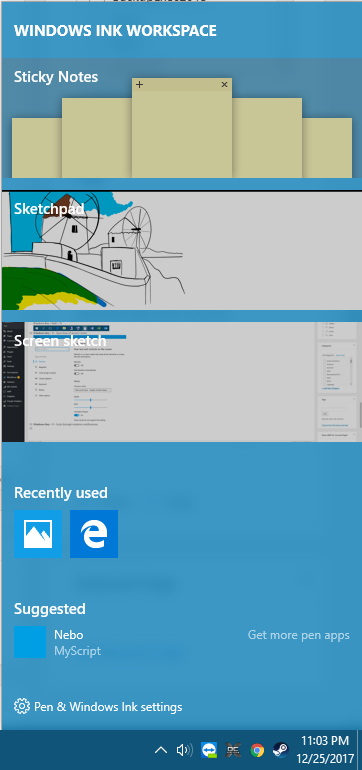
Windows Key + W – Opens the Windows Ink Workspace
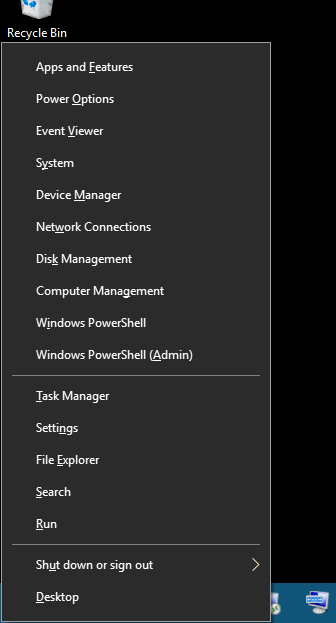
Windows Key + X – Opens the Quick Links Menu (right-click on the start menu)
Windows Key + Y – Switch input between Windows Mixed Reality and desktop (Your PC may not meet the minimum specs for Windows Mixed Reality)
Windows Key + Z – Shows menus or commands available when an app is in full-screen mode.
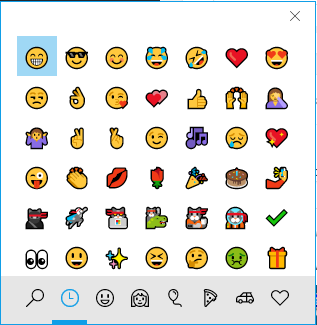
Windows Logo Key + period (.) or semicolon (;) – Opens the Windows 10 Emoji control panel 👍
Windows Key + Comma (,) – temporarily peek at the desktop
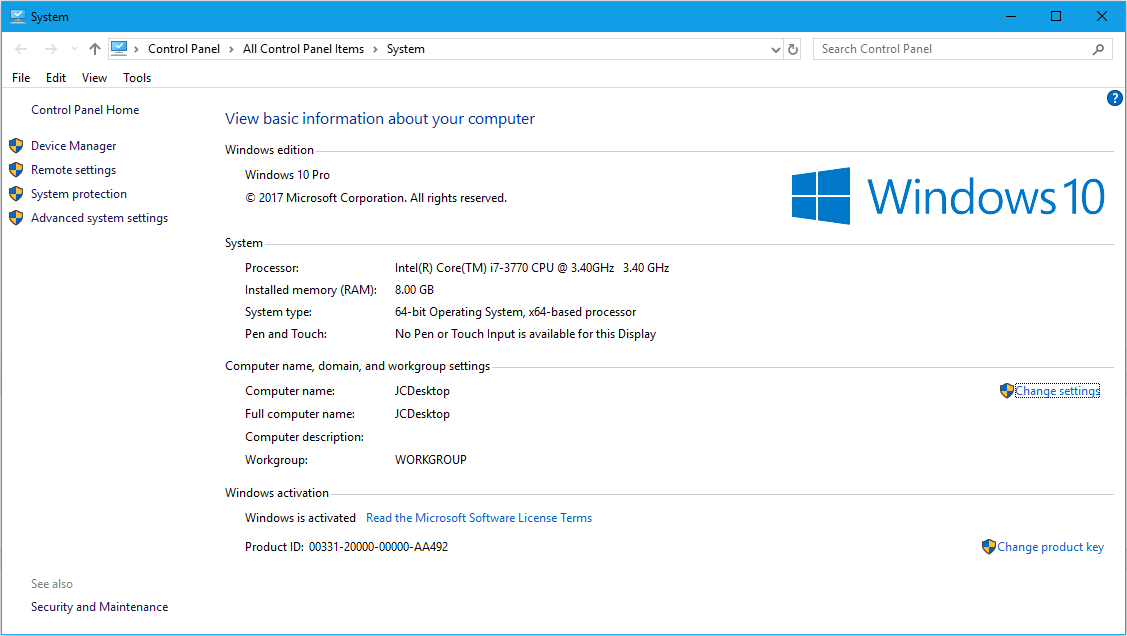
Windows Key + Pause/Break – Opens the System Properties
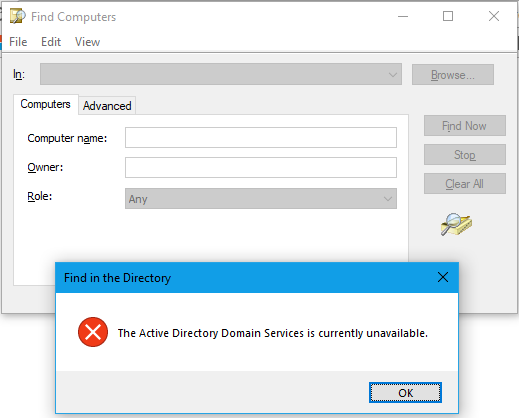
Windows Key + Ctrl + F – Search for Active Directory computers on a network
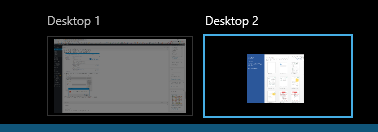
Windows Key + Number/Shift/Ctrl/Alt – Manage TaskView Virtual Desktops
I’m sure there are more so let me know in the comments if I missed any and let us know which are your favorites (mine is Windows Key + Pause/Break)