Office365 Outlook Room Calendar not showing details – displays busy only – fix when Set-MailboxFolderPermission does not resolve

Solved: Office365 O365 Resources Rooms and & Equipment cannot view details or subject in shared calendar, can only see “Busy” and Set-MailboxFolderPermission did not fix or resolve.

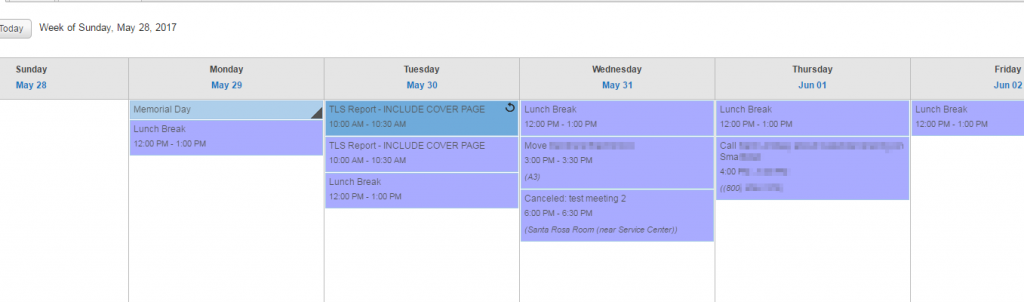
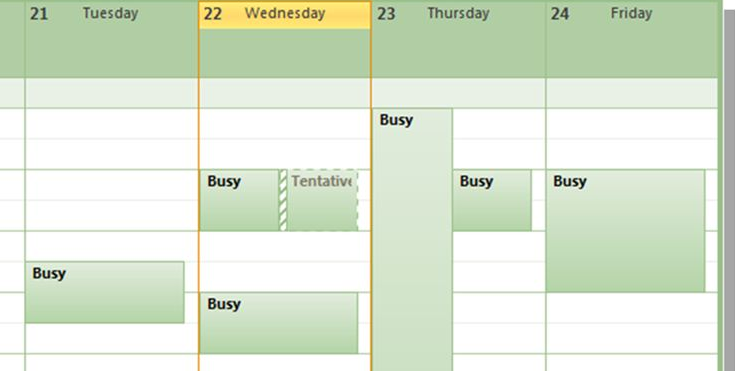
So a room calendar would not display who reserved the room, and users requested that the calendars for room reservations display who reserved the room and the details. By default the event only displays “Busy”. Most posts I found online for this issue have the same resolution: use Set-MailboxFolderPermission to display details, comments, subject, and organizer. I did this and tried this using the identity in quotes as well as the full email address of the room, however the Set-MailboxFolderPermission setting did not work and the calendar would still only show “Busy”.

I was able to resolve the problem by looking at the rights of the users.

I found that the Calendar Access Rights for the User: “Default” only had {AvailabilityOnly}

To check permissions and fix this issue, first open PowerShell and connect to your O365 Exchange. If you’ve enabled MFA on your Office365 account (two-factor authentication,) use the guide on how to connect to Exchange with Hybrid/Modern Authentication here. If you don’t use Modern 2FA authentication, use the following commands: 

$LiveCred = Get-Credential
$Session = New-PSSession -ConfigurationName Microsoft.Exchange-ConnectionUri https://ps.outlook.com/powershell/ -Credential $LiveCred -Authentication Basic -AllowRedirection
Import-PSSession $Session

Once connected, first check that the default user has the correct AccessRights and permissions to work with the calendar. As you can see below here, the Default user has {AvailabilityOnly} permissions when issuing the following command:

Get-MailboxFolderPermission [email protected]:\Calendar
PS C:\admin> Get-MailboxFolderPermission [email protected]:\Calendar

FolderName           User                 AccessRights
----------           ----                 ------------
Calendar             Default              {AvailabilityOnly}
Calendar             Anonymous            {None}

I changed the AccessRights from {AvailabilityOnly} to {PublishingAuthor} with the following command:

Set-MailboxFolderPermission -Identity "[email protected]:\Calendar" -User default -AccessRights PublishingAuthor

And then ensured the identity has the correct CalendarProcessing switches with this command:

Set-CalendarProcessing -Identity "[email protected]" -AddOrganizerToSubject $true -DeleteComments $false -DeleteSubject $false

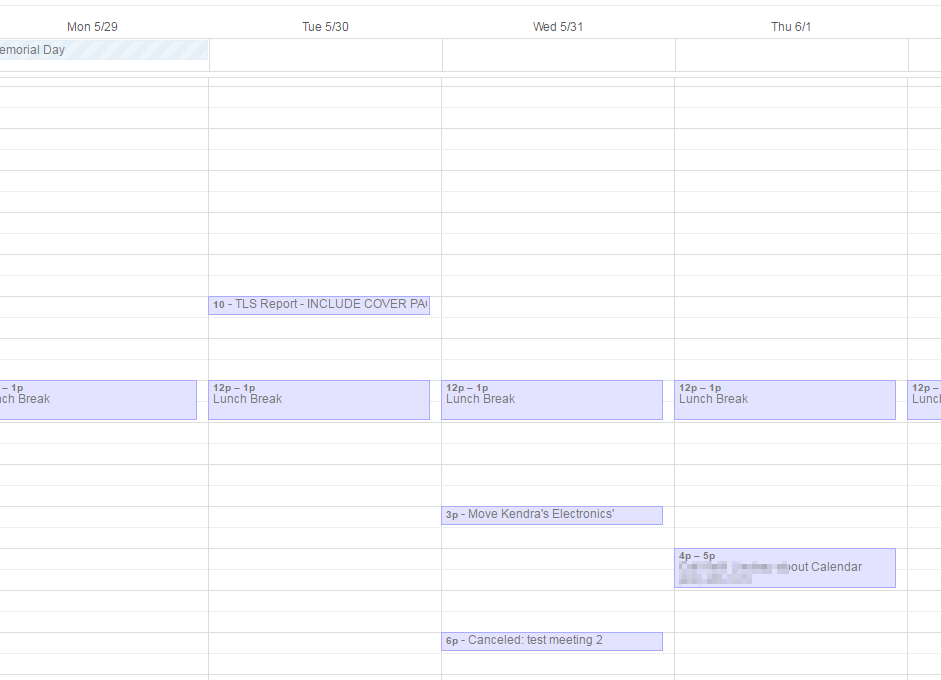
Now the event’s details and subject can be viewed by everyone. This change takes place pretty quickly, within a minute – the “Busy” events should change to display the details when you close/open Outlook and/or switch between the calendars in Outlook online. Hope this saves someone else a call to MS Support.

In the event the new room’s Calendar is not auto processing or accepting meeting requests, check out my article here:

Solved – Office 365 Room Calendar Not Auto Processing or Accepting Meeting Requests

Please leave a comment, thanks.

SmarterMail Enterprise 15.5 – Export / Import iCalendar/Outlook calendar into SmartMail

How to import iCalendar events into SmartMail / SmarterMail Enterprise IMAP calendar

So one of my clients have a team that have been using iCalendar to share calendars, but have decided to migrate to SmarterMail Enterprise 15.5 IMAP/Exchange for their team calendar sharing. While there is no direct way to import iCalendar events into SmartMail directly, there is a two-step approach that works pretty well.

In this case, the clients only want to migrate historical data and not current/future events. It sounds harder than it is, but the migrations shouldn’t take long and with minimal effort. If you don’t have spare gmail accounts to use then you may want to create new gmail accounts just for this purpose, or delete all calendar events in an existing google calendar between migrations.

One thing that I did notice is that reoccurring appointments will be transferred over and this may in turn create duplicates if you already have appointments in SmartMail that are reoccurring. It may be wise to remove reoccurring appointments from the source calendar prior to doing the first export.

As always it’s best to first backup your data prior to doing anything, then run a few tests to make sure that all calendar events, items, and attachments transfer successfully during the migration.

But in our test case, the Outlook (icalendar) – to – GMAIL – to – SmartMail works perfectly fine.

First go to Outlook > File menu > Open & Export > Import/Export > Select your iCalendar (and any other calendars you’d like to export):

Export to .CSV > Calendar (here you can select date range of events to be exported) > save to something like c:\Users\jcoltrin\Desktop\jasoncalendar.csv

Then

Login to any Google account/Gmail > Calendar > Gear Icon > Settings > Calendars > Import calendar > choose jasoncalendar.csv (import successful.)

Calendar items display in my google calendar:

Then now that the calendar items are in my google calendar, I went into smartmail account  > settings > Advanced Settings > Mailbox Migration > Account type: GMAIL > next > Check “Calendar” > do the Google authentication (which works well and uses Google’s authentication). >  Import

Now the same calendar items are in my Smartmail Calendar.

Clonezilla – identify original disk size of clone .img image by looking at flat files

How to find the original HDD hard drive disk size in a Clonezilla img image file

So if you’re a fan of Clonezilla like I am, you may have a library of .img images in a file share somewhere. I find that when taking an image of a system, it’s best to name the image/file with something descriptive such as (Win7-64-Optiplex7040-500GB-Date-img). But what happens if you want to restore data from an image onto a new hard drive, but you can’t remember, or didn’t write down the size of the disk that it originally was imaged from? As you may already know, Clonezilla doesn’t like to be restored onto disks smaller than the original disk on which it originated. There are some advanced options when saving a Disk-to-image in clonezilla, or Image-to-Disk, however I haven’t found a reliable way to restore an image to a smaller disk drive.

In the event you have an old image, but you’re not sure what size disk it came from originally, and you didn’t name your file with the original disk size, there is a way how to find the original disk size using the flat files that clonezilla creates when taking the image.  To do this, go into the img folder, look for a file named sda-pt.parted.compact and open it with a text editor such as NotePad++.

This file will contain everything you need to know to determine the original size of a HDD that existed in the computer before you took the copy of the clone. For example, here is the contents of the file highlighted above:

Model: ATA WDC WD2500AAJS-7 (scsi)
Disk /dev/sda: 250GB
Sector size (logical/physical): 512B/512B
Partition Table: msdos
Disk Flags: 

Number  Start   End    Size   Type     File system  Flags
 1      1049kB  106MB  105MB  primary  ntfs         boot
 2      106MB   250GB  250GB  primary  ntfs

As you can see we get a Model number, Manufacturer, disk size, partition sizes and file-system type.

I haven’t had trouble restoring Clonezilla images to different manufacturers of hard drives as long as the new drive is larger than the original drive. Also, I find that it’s invaluable to have at least a gigabit connection between the machine you’re trying to clone and the file share where you’re saving the img file.

Test USB 3.0 and USB 2.0 thumb flash drive on Windows 10 read write speeds

How to test USB thumb drives for USB 3.0, USB 2.0, and test Read and Write Speeds on Windows 10

Determine if USB Port is 2.0 or 3.0 in Windows 10:

Below are some directions and screenshots of how you can tell if a USB drive is connected to Windows 10 with USB 3.0 or USB 2.0., first insert the drive into a USB port on your Windows 10 computer.

Click on the Start Button > then click on the Settings gear icon > in the “Find a Setting” box > type “Connected Devices” > then click on the “Connected Device Settings” icon. The USB 3.0 will show “Connected to USB 3.0”, the USB 2.0 drives will not display these words:

Testing Read and Write speeds of USB 2.0 and USB 3.0 with SpeedOut utility and  Windows 10.

I picked up a couple thumb drives this weekend that were on sale at Frys. I like to have both USB 2.0 and USB 3.0 drives on hand in case a computer doesn’t recognize USB 3.0 as a boot drive. I wanted to determine the Read and Write speeds of my USB drives to test if they actually display a difference according to their listed specs (spoiler alert: numbers can be deceiving.) My PC workstation has an Intel SSD drive and USB 3.0 ports.  I downloaded and ran the SpeedOut v0.5 utility against 4 different USB thumb drives:

  1. Patriot Memory Flash PSF32GBLZ3USB 32GB USB3.0 BLITZ with a yellow plastic case.
  2. Hyundai USB 2.0 Bravo 16GB with a metal case.
  3. Kingston USB 2.0 DTS E9 Data Traveller 16GB with a metal case.
  4. SanDisk Ultra USB 3.0 32GB SDCZ48-032G with a plastic case.

All four drives were formatted FAT32 (and I tested the Patriot drive as NTFS.) The way you know if a device is connected to 3.0 USB in windows 10: Start > Settings > Search “Find a setting” : type in “devices” > Show all results > Connected Device Settings > Other devices > Find your USB drive and it should say “Connected to USB 3.0”. More details on where to find this setting at the bottom of the article.

Anyway, I ran SpeedOut utility against the Patriot USB 3.0 drive first, and the results were: 23.7 MB/s READ and 27.8 MB/s.

I ran the same SpeedOut test against on the same USB port using a HYUNDAI USB 2.0 BRAVO 16GB drive (wasn’t recognized as USB3.0 by Windows 10) and it’s results were: 21.9 READ and 10.5 WRITE.

Then I ran the same SpeedOut test again using a Kingston DTS E9 Data Traveler and it’s results were 17.158 READ and 9.8 MB/s WRITE.

Lastly I ran the same SpeedOut test again using a SanDisk Ultra USB 3.0 32GB drive and the results were: 128.04 MB/s READ and 52.47 MB/s WRITE.

I gave the Patriot USB 3.0 drive another chance the results of a 2nd read write test against the drive were pretty good:

This test gave me hope that the drive would have decent write speeds but upon testing the copy of an ubuntu-16.10-server-amd64.iso (684.032 MB) file from my SSD drive to the Patriot USB 3.0 Drive, the results show surprisingly slow speeds after an initial burst of speed:

I thought perhaps this may have to do with the drive formatted as Fat32, so I formatted the drive as NTFS and tried again. Here is the SpeedOut result first:

Now the same Ubuntu.iso copy and it’s results:

Same results. The write speed would alternate between 6.24 MB/s and 12 MB/s which is in all reality pretty abysmal for a USB 3.0 drive! The total copy time for the 684MB file was 55.12 seconds…

The total copy time for the HYUNDAI USB drive for the same ubuntu .iso was 1:10.02 seconds.

The USB Patriot USB 3.0 drive did not fare much better than the Hyundai USB 2.0 drive, but I did notice that there is an initial speed burst when copying data to the Patriot drive. To test this I copied a 100MB file to the Patriot drive and while the first copy of the 94MB file did quickly finish at around 60 MB/s, however subsequent tests were very low again in the 6-12MB/sec range. The Patriot drive is no other way to describe than flaky; fast sometimes for a little while, but ultimately pretty slow – just a little better than the USB 2.0 drives.

Lastly I tested the copy speed of the same Ubuntu .iso file to the SanDisk Ultra 3.0 32 GB drive formatted Fat32 and the amount of time to copy was  14.59 seconds!

Just because something says USB 3.0 and is on sale, doesn’t mean you’re going to get true USB 3.0 speeds reliably…