How to format a large external usb hard drive for use between both an OS X Mac and a Windows 10 PC

All versions of Windows since Windows Vista should be able to access a GUID drive. Because OS X is able to partition a GUID partition, we want to partition our large external hard drives with this compatible partition table. So, any modern computer since 2006 should be compatible. GUID doesn’t suffer from the restriction of a maximum partition size of 2TB, so if we have a hard drive larger than 2TB, we won’t be required to build multiple partitions with MBR.

Here’s a good quote for other important features regarding GUID (GPT stands for GUID Partition Table).

“On an MBR disk, the partitioning and boot data is stored in one place. If this data is overwritten or corrupted, you’re in trouble. In contrast, GPT stores multiple copies of this data across the disk, so it’s much more robust and can recover if the data is corrupted. GPT also stores cyclic redundancy check (CRC) values to check that its data is intact — if the data is corrupted, GPT can notice the problem and attempt to recover the damaged data from another location on the disk. MBR had no way of knowing if its data was corrupted — you’d only see there was a problem when the boot process failed or your drive’s partitions vanished.”

exFAT was released in 2006 as well, but Microsoft added backwards-compatibility to previous Windows versions from before Vista. The main benefit to it is that it doesn’t have the file size restrictions of FAT32, so individual files with exFAT can be larger than 4GB each. It probably isn’t super important for smaller files, but it could be a necessity for people working on larger files like videos or disk images.

Below is a step-by-step procedure for formatting a large External USB drive which can be used by both a Mac and a PC. This setup will utilize the newest, most fault-tolerant partition tables, and allows for the largest volume and file size capabilities. In my case I am formatting an 8TB Seagate Backup Plus+ USB 3.0 external HDD hard drive.

First, plug a new USB drive into a Mac:

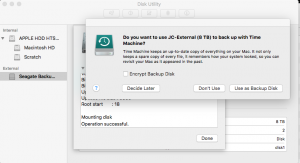
  1. The Mac will automatically prompt if you want to use the drive as a Time Machine backup Disk – click “Don’t Use”
  2. Open Disk Utility
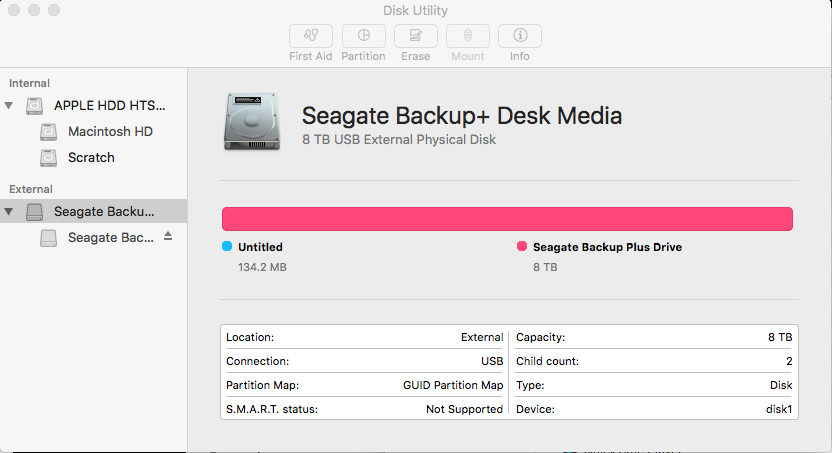
  3. On the left side of Disk Utility, under External, you should see your drive listed.
  4. Select the “highest-level” of the drive, not the partitions located underneath. In my case, Seagate Backup+ Desk Media.PC Mac External drive format (1)
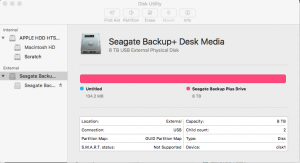
  5. At the top of Disk Utility, click the “Erase” button.PC Mac External drive format (2)
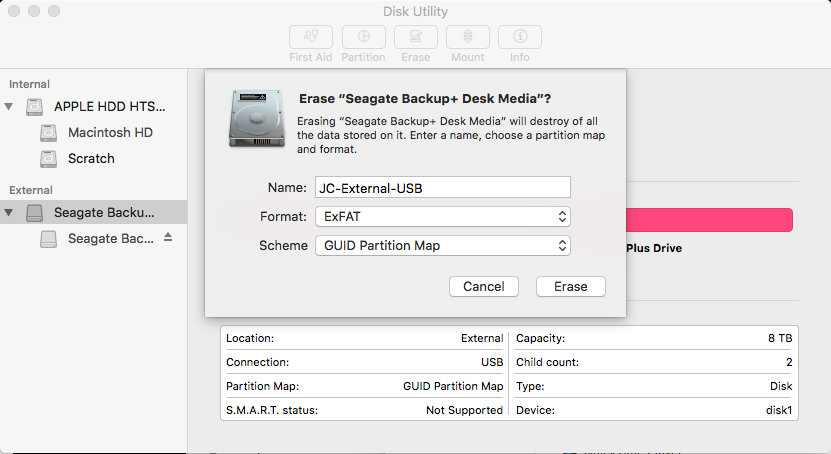
  6. Name your disk, such as “JC-External”.
  7. Under “Format” drop-down menu, select “ExFAT”
  8. Under “Scheme” drop-down menu, select “GUID Partition Map”PC Mac External drive format (3)
  9. Click “Erase”
  10. Once the drive has been erased, again, Time Machine will prompt to use as a backup disk – select “Don’t Use”PC Mac External drive format (4)
  11. Click “Done”
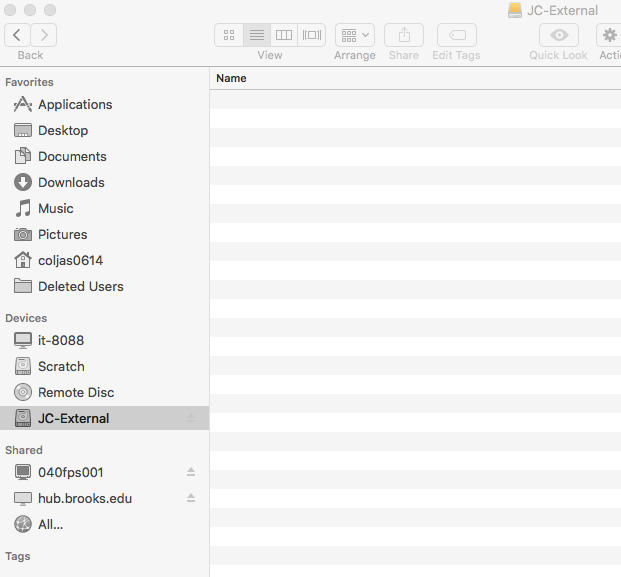
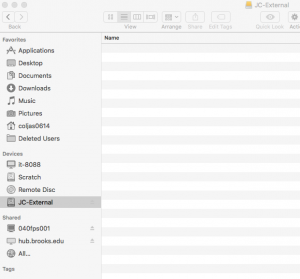
  12. Your drive should now be listed under Devices in the Finder.PC Mac External drive format (5)
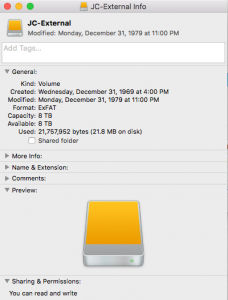
  13. Control-click or right-click on the device in the Finder, and click “Get Info”.  You can see that indeed it created an 8TB ExFAT Volume, but the Sharing and Permissions cannot be modified. Permissions can only be set if the drive is formatted with  “OS X Extended”. Also, notice that the Created/Modified dates may not be accurate, however, files and folders contained in the drive will display accurate modified dates/times.PC Mac External drive format (6)
  14. One thing to note, is after initially formatting the drive on a Mac, and then attaching the external drive to a Windows 10 PC, the drive may not immediately display with a drive letter by default in the Windows File Explorer. Go into Windows 10 Disk Management and find the drive listed in the discovered drives, but you may find that a drive letter is not associated with the volume.
  15. To fix this, in Disk Management, right-click on the large/unidentified new data volume and click “Change Drive Letter and Paths…”. Next, click the Add.. button, assign a drive letter (D:) and then OK. You should now find your external drive listed in Windows Explorer and see the files and folders you copied into it while it had been connected to your Mac.

Raspberry Pi 3 Model B 32 GB Setup and Config

Raspberry Pi 3 Model B 32GB Initial Setup and Configuration

So my first Raspberry Pi 3 Model B 32GB just arrived which is part of a “Canakit” on Amazon which can be found here. Below is a general setup and config step by step guide to get you started with your own Pi. I may follow up this post with the progress of my pie-in-the-sky project to build a miniature hyperloop “pod” and track, controlled by a stand-alone Raspberry Pi. But before I get into powering my Pi with an electrified rail, we need to get the Pi setup and configured. 

  1. Unbox, connect peripherals & power on (I swear, every video and tutorial spends too much time on this topic.) But I will say that the little machine is very quick and responsive, and I’m really happy with it’s performance so far!
  2. Initial power up. The Red LED powers on, and my monitor stays black, hmm, it’s not booting… Oh duh, it will help if I insert the included 32GB MicroSD. Important to note is the SD card does not click-eject or click-insert but is friction-based receptacle.
  3. Ok 2nd power up – it’s alive! Boots to the desktop and looks great – except the resolution. I used the Wifi config to get connected to my WAP easy. But it’s strange that I can’t ping anything. A quick search found this post, and the command:
     sudo chmod u+s /bin/ping

    With that command I can now ping out and about.

  4. Now I can go online with the default web-browser (Web 3.8.2) and find a fix for my monitor’s resolution. To set a raspberry pi 3 monitor resolution, follow the instructions in this post – which told me to first check my monitor’s capabilities with the commands:
    tvservice -d edid
    edidparser edid

    and then seeing that I do have a DMT monitor (group 2) and an hdmi mode 82, I edited /boot/config.txt with the new editor named Geany. I started geany with sudo so I could edit the protected file with the command:

    sudo geany
    

    Which brings up the Geany file editor running as sudo, and then I could open and browse to the File System > /boot/ directory where I could edit the file config.txt to include the following lines:

    hdmi_group=2
    hdmi_mode=82

    After a restart my monitor’s resolution is correct.

  5. So now to make sure my OS is up to date. By default the version I installed is
    Linux raspberrypi 4.4.9-v7+ #884 SMP Fri May 6 17:28:59 BST 2016 armv7l GNU/Linux
    

    So it is time to run an update. It’s so nice that the distro is debian-based and the familiar apt package management system is installed. No dist-upgrade necessary.

    sudo apt-get update
    sudo apt-get upgrade

OS X new domain migration – retaining user profile with terminal commands

If you’ve been tasked with the domain migration of a number of OS X El Capitan and Mavericks iMacs or MacBook Pro or Mac Air workstations, you may need to retain the user profiles. Normally, when unbinding, and then binding to a new domain, your user’s settings will be lost. You may be tempted to use Migration Assistant, but this usually requires copying the entire profile somewhere else which can take a long time and use a lot of disk space.

With this list of steps, you can use commands, scripting, and setting permissions and ownership of the user directories to perform the domain migration in-place.

Below is the sequence of commands and workflow step by step to migrate an OS X mac to a different domain. The key is to delete the sqlindex files, and prepare the user account for it’s new permissions. Please note the guide may not make sense at first while reading, but it will allow you to migrate your macs so that the users keep their same profile. Let me know if this guide helps you in your domain migration and if you find any better solutions.

Tasks Commands
1 Login as admin user and list users  Terminal -> ls -alh /Users/
2 move domain User folders to .old sudo mv /Users/johndoe /Users/johndoe.old
3 Unbind Machine  Preferences->Accounts->Login Options->Network account server -> Directory utility ->Active directory->Unbind
4 Delete sqlindex files found in ls /var/db/dslocal/nodes/Default/ sudo rm -f /var/db/dslocal/nodes/Default/sqlindex
sudo rm -f /var/db/dslocal/nodes/Default/sqlindex-shm
sudo rm -f /var/db/dslocal/nodes/Default/sqlindex-wal
5 reboot sudo reboot
6 Bind to new domain Preferences->Accounts->Login Options->Network account server -> Directory utility ->Active directory->Unbind
7 reboot
8 login as user
9 Logout and login as admin
10 move User folder .new After you have logged in as the user under the new domain you need to move the newly created User home folder to johndoe.new and move the .old User folder to /Users/johndoe with the command:
sudo mv /Users/johndoe /Users/johndoe.new
11 move .old to new username sudo mv /Users/johndoe.old /Users/johndoe
12 Change ownership of user home folder sudo chown -R johndoe:”Domain\Domain Users” /Users/johndoe
13 logout as admin
14 Reboot
15 login as that user (johndoe)
16 Click on “Create a new keychain” much easier in El Capitan and Yosemite If “Create new Keychain” fails then goto Keychain Access –> Preferences –> Reset Default Keychain