
How to setup pfSense with free Secure and Private DNS
You’re probably aware by now that Cloudflare and APNIC has begun to provide secure and private DNS – DNS over HTTPS (DOH), to the general public. You can learn more and read about the initiative here. This article will give a brief summary of why this is important, and how to configure your pfSense router to use these new addresses and disseminate them to your network clients.
By default, your Internet Service Provider (ISP) will provide your router with it’s own list of DNS server IP addresses when you first connect your device to the internet. DNS is used to find websites, and essentially only translates IP addresses to domain names and vice-versa. However, these DNS IP addresses provided by your ISP may also be running on servers that nefariously log and record your internet browsing history. In some cases, these servers may go so far as to even inject advertisements into your web browser whether or not you’d like to see those ads.
By changing your router and/or computer to use 1.1.1.1 or 1.0.0.1 as it’s DNS resolver, you bypass your ISP’s DNS servers, and get a secure and private response from Cloudflare. Cloudflare has a configuration page guide for IOS, Android, MacOS, Windows, Linux, and a Router here. Follow the procedure below on how to setup a pfSense firewall/router to use DNS for it’s queries, as well as set your pfSense’s DHCP Server service to broadcast the new DNS IP addresses to your network clients.
- Login to your pfSense firewall by pointing your web browser of choice to the login page (usually this is your Default Gateway IP Address).
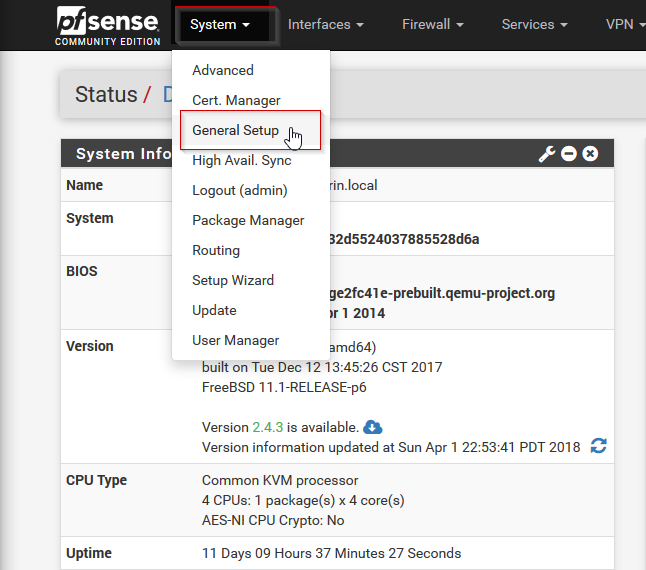
- At the Status / Dashboard page, in the upper left-hand menu, click System > General Setup
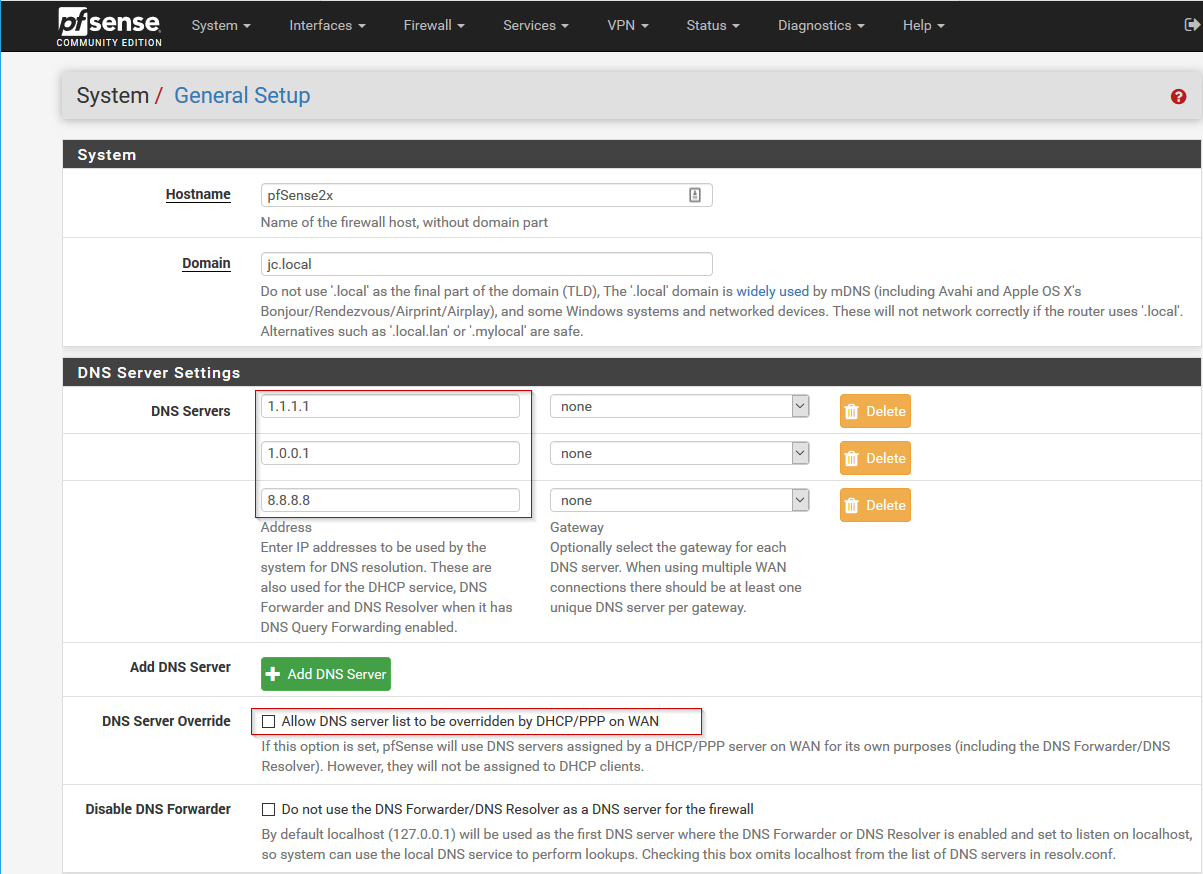
- Next, under DNS Server Settings, change the DNS servers in the first two fields to 1.1.1.1 and 1.0.0.1 respectively. Optionally, you can add 8.8.8.8 as a third IP address to use Google DNS in the event that the CloudFlare servers are unavailable, or are taken down by the government. It’s also a good idea to uncheck “Allow DNS server list override”. Once these changes have been made, scroll to the bottom of the page and hit Save
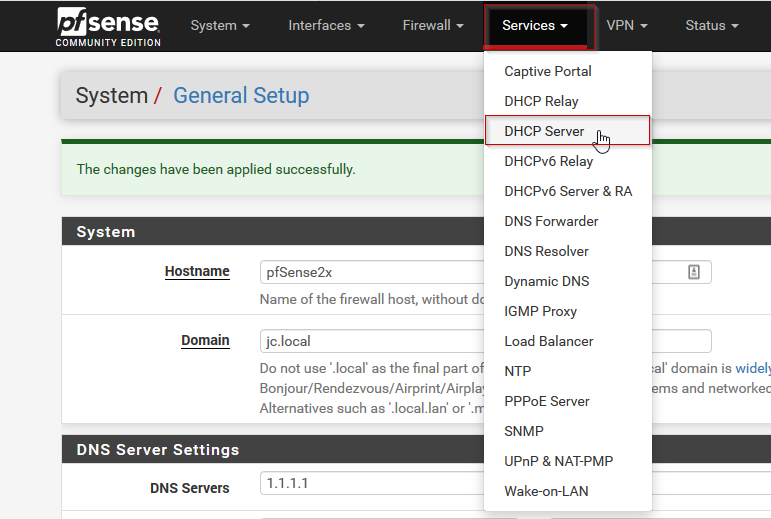
- Next, if our pfSense is also being used as a DHCP server, we also want our clients to get these IP addresses for their DNS server settings. To do so, at the top of the pfSense settings menu, click Services > DHCP Server
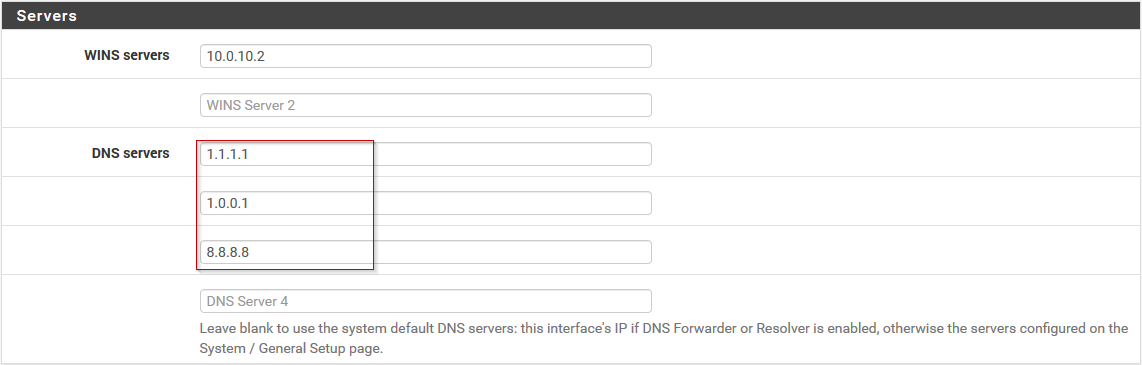
- In the DHCP Server settings, scroll down to Servers, and edit the DNS servers to contain the two new cloudflare DNS servers, (1.1.1.1 and 1.0.0.1), as well as Google’s 8.8.8.8, if desired. Next, scroll to the bottom of the page and hit Save.
- Now would be a good time to restart your client computers to pick up the new IP address settings. You can confirm your computers have received the new IP addresses by opening a command prompt and issue the command:
-
ipconfig /all | more
This will give you something like the following information:
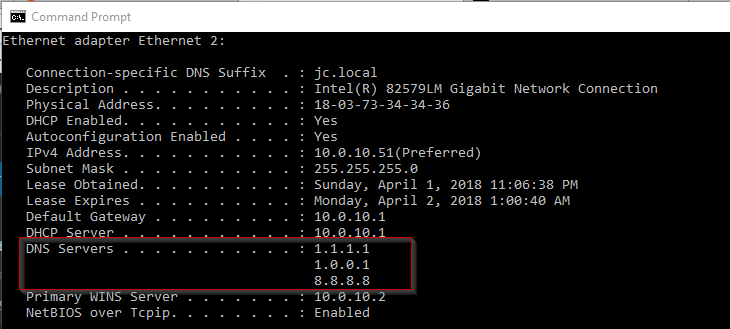
- As you can see our client has recieved the correct IP address from our pfSense DHCP server.
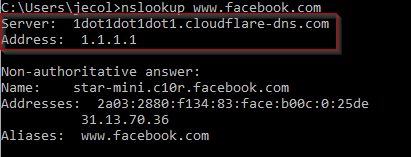
- To confirm our computer is actually getting it’s DNS queries from CloudFlare (1.1.1.1), we can issue a new command in the command prompt:
nslookup www.facebook.com
And we can find in our results that the responding server is named 1dot1dot1dot1.cloudflare-dns.com, and it’s address is 1.1.1.1:
In order to test that your DNS queries are indeed secure, you can use the link posted by John in the comments; thanks, John!
let the clients obtain the pfsense box as DNS server ip via DHCP. It would still route external queries to cloud flare but would also resolve any local DNS queries too.
That’s true, no need to be redundant is there?
Thank you for the info. Do you know how to test that the DNS queries are being encrypted?
DNSSEC Resolver Test
https://dnssec.vs.uni-due.de/
This is fantastic, thanks for the comment!
As noted, your clients in DHCP should resolve to your PFSense box which in turn will resolve over DNSSEC to Cloudfare or other supported providers, this also provides DNS cache
By setting the DNS servers in DHCP, you are bypassing the DNSSEC / HTTPS request because not all clients on your network are configured or support DNSSEC by default thus defeating the purpose.
Thanks for taking the effort to write this but unfortunately this will not enable DNS-over-HTTPS.
Setting your DNS up like this will just forward standard, unencrypted, DNS Request (UDP/53) to the Cloudflare DNS Server.
There is currently no support for DoH in pfSense, but only DoT (DNS over TLS) – that is if you are using the unbound DNS Resolver (Services->DNS Resolver).
Furthermore there seems to be some confusion about DNSSEC. DNSSEC does not encrypt data in any form. It’s just makes sure that DNS responses are authenticated/valid (https://en.wikipedia.org/wiki/Domain_Name_System_Security_Extensions)
So to summarize: a setup like this will NOT encrypt your DNS requests.