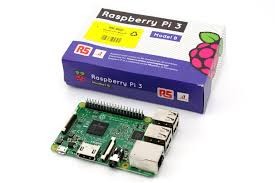
Raspberry Pi 3 Model B 32GB Initial Setup and Configuration
So my first Raspberry Pi 3 Model B 32GB just arrived which is part of a “Canakit” on Amazon which can be found here. Below is a general setup and config step by step guide to get you started with your own Pi. I may follow up this post with the progress of my pie-in-the-sky project to build a miniature hyperloop “pod” and track, controlled by a stand-alone Raspberry Pi. But before I get into powering my Pi with an electrified rail, we need to get the Pi setup and configured.
- Unbox, connect peripherals & power on (I swear, every video and tutorial spends too much time on this topic.) But I will say that the little machine is very quick and responsive, and I’m really happy with it’s performance so far!
- Initial power up. The Red LED powers on, and my monitor stays black, hmm, it’s not booting… Oh duh, it will help if I insert the included 32GB MicroSD. Important to note is the SD card does not click-eject or click-insert but is friction-based receptacle.
- Ok 2nd power up – it’s alive! Boots to the desktop and looks great – except the resolution. I used the Wifi config to get connected to my WAP easy. But it’s strange that I can’t ping anything. A quick search found this post, and the command:
sudo chmod u+s /bin/ping
With that command I can now ping out and about.
- Now I can go online with the default web-browser (Web 3.8.2) and find a fix for my monitor’s resolution. To set a raspberry pi 3 monitor resolution, follow the instructions in this post – which told me to first check my monitor’s capabilities with the commands:
tvservice -d edid
edidparser edid
and then seeing that I do have a DMT monitor (group 2) and an hdmi mode 82, I edited /boot/config.txt with the new editor named Geany. I started geany with sudo so I could edit the protected file with the command:
sudo geany
Which brings up the Geany file editor running as sudo, and then I could open and browse to the File System > /boot/ directory where I could edit the file config.txt to include the following lines:
hdmi_group=2
hdmi_mode=82
After a restart my monitor’s resolution is correct.
- So now to make sure my OS is up to date. By default the version I installed is
Linux raspberrypi 4.4.9-v7+ #884 SMP Fri May 6 17:28:59 BST 2016 armv7l GNU/Linux
So it is time to run an update. It’s so nice that the distro is debian-based and the familiar apt package management system is installed. No dist-upgrade necessary.
sudo apt-get update
sudo apt-get upgrade

