In this post, we will be visiting the Exchange Control Panel (ECP) to see all the new administrative control we have been given with SP1, without having to work on a system with the EMC Management Tools installed. You may recall our first visit to the Exchange Mangement Console in Part 8 of this series.
To get to the Exchange Control Panel, log into your OWA site as an administrator. From here, you will see the options button in the upper right-hand corner of OWA, this contains the link to the ECP.
From within the Administrative Control Panel we can perform the following (new w/SP1) administrative tasks:
Manage default access for mobile devices
Configure email alerts when a mobile device is quarantined
Create personalized recognition or quarantined messages
List quarantined mobile devices
Create and manage device access rules
Allow/Block specific devices
Initiate password recovery or remote wipe of a user’s mobile device
To manage the default access for mobiles, go OWA as administrator, then go to options -> View all options -> Manage My Organization -> Phone and Voice:
Click Image to Enlarge
Here, when a device that isn’t managed by a rule or personal exemption connects to Exchange we can allow access, block, or quarantine (on a case by case basis) mobile devices. If we choose, we can send out notification warnings that will go out to administrators.
Under ActiveSync Device Policies, we have a duplicate of what is in the EMC, in that we have a default policy, and the ability to look at, and change, policy settings (Device Security, Sync Settings, Device Settings).
We can create additional activesync policies here as well. Polices created here will be replicated in the EMC. There are some options/tabs that exist only in the EMC however; Device Applications Tab and the “Other” tab: discrete management of Applications on Mobile Devices.
So this is a short post but I think is worthwhile looking at the new enhancements for the Exchange Control Panel in SP1.
A good majority of the content provided in my Blog’s Exchange series is derived from J. Peter Bruzzese’ excellent Train Signals Exchange Server 2010 Video Disk Series, as well as my own Exchange 2010 lab. Trainsignal.com is an invaluable source for accurate, easy to understand, IT information and training. http://www.trainsignal.com
Concepts and Management of Outlook Web App and ActiveSync
In this post, first, we will explain virtual directories and how they are related to the CAS services.
Next we will help you understand Outlook Web App (OWA) and ActiveSync features.
Last, we will use a Scenario to help guide us in the creation and application of OWA and ActiveSync policies.
Scenario: OWA and ActiveSync Management
First, we will help our IT team gain a greater understanding of OWA and ActiveSync.
Next, we will perform the following OWA management tasks:
Adjust the authentication for the virtual directory to allow for Integrated Windows authentication. This allows for single sign-on for internal clients.
Disable WebReady Document Viewing for the virtual directory.
Create an OWA policy and apply it to a researcher user “Alex Heyne” that will ensure he only uses OWA Lite.
Finally, we will do the following ActiveSync management tasks:
Block “Unknown Servers” from the virtual directory.
Create an ActiveSync policy and apply to all users in the Chicago OU.
Virtual Directories
Web applications are represented by virtual directories that point off toward physical folders.
For example, Exchange Outlook Web App has an OWA virtual directory that points off to a literal folder on your system.
You access the virtual directory through its virtual directory name, not its physical folder name (although the two may be the same.)
You can see virtual directories in IIS and also quickly find the physical location on your system through the Properties of the virtual directory.
Although you have default virtual directories created for you when you install the CAS role, you can create additional virtual directories if you like.
In the EMC, go to Server Configuration -> Client Access. Here you will find owa (Default Web Site). Looking at the properties of OWA, we can see both the internal and external URL’s, as well as a number of tabs used to configure OWA.
Click Image to Enlarge
Each of the options in the tabs is part of IIS on the client access role. For the most part, if you want to see the location of the virtual directories and their physical location on the server, we would need to open ISS:
Click Image to Enlarge
Here, take note that some of the sites are considered Virtual Applications (highlighted in red), as opposed to Virtual Directories (highlighted in green). Sometimes you’ll need to use IIS to configure things like SSL.
But for now, lets look more into OWA in the EMC.
Virtual Directory Settings vs. Policy Settings
Virtual directory settings are made through the Server Configuration node
Some virtual directory settings are only found under the Server node, whereas others may be configured in a policy as well.
Policies are created under the Organization Configuration node
Policies override virtual directory settings
There are default OWA and ActiveSync policies create
Only one policy (one for OWA and one for ActiveSync) can be applied to a mailbox at a time and if no policy is applied, the virtual directory settings apply.
Understanding OWA Features:
Virtual Directory Property Tabs:
General
Authentication
Segmentation
Public and Private Computer File Access – WebReady Document Viewing
Remote File Servers
Policy Setting Tabs:
General
Segmentation
Public and Private Computer File Access – WebReady Document Viewing
Note: Public and Private Computer File Access provides two tabs but you cannot have different settings on each one.
In the EMC -> Server Configuration -> Client Access -> OWA Settings for this virtual directory.
General Tab: shows internal url and external url (informational) -config is actually in DNS
Authentication Tab: Use forms-based authentication. Logon format – Domainusername is secure but not completely secure without SSL.
Use one or more standard authentication methods:
-Integrated Windows Authentication. The client computer has to be a member of the same domain or in a trusted domain.
-Digest authentication for windows domain servers (users have an account in AD)
-Basic authentication (password is sent in clear text). Can be used in a secure way if you use SSL.
Segmentation Tab: you can determine if you wan to enable or disable certain features.
For example “Premium Client” is the full version of Outlook Web App. You can choose to use a “Lite version” of OWA. You can force the lite version of OWA for users of Firefox or Safari. You can disable things like Instant Messaging and Text Messaging.
Public Computer File Access tab:
-Direct File Access – determines how files will be allowed or denied access. If you connect on a “Public” computer, you can enable or disable the ability for users to open file attachments. Direct File Access allows you to allow or block or Force Save of even unknown files.
-In the Private File Access tab: same exact settings as above.
WebReady Document Viewing: allows OWA documents to be converted to HTML and shown in the browsers. You can force docs to be changed to HTML before being opened in a supported application.
You may not want a certain document to be shown in the browser. This provides an opportunity for users to view the document at least even if they don’t have a supporting application.
Remote File Servers Tab: you might want to allow or block file servers here. You can enter the domain suffixes that should be treated as internal.
You have an opportunity to use Policies to override the settings placed on the virtual directory settings.
Under Organization Configuration -> Client Access role.
Provide a new policy name. Enable/disable features -> New. Now after creating the policy, go back and open up the policy. You will have more features available now that the policy has been created. It’s important to consider these items again. If you do not enable direct file access, users will not be able to download attachment files.
Once the policy has been created, you need to apply the policy. Take for example, you wish to apply a new policy to an individual user. Go into Recipient Configuration, pick the mailbox, go to Mailbox Features tab -> Select OWA ->Properties. Now you can choose an OWA mailbox policy to take precedence over the virtual directory settings.
Outlook ActiveSync Features:
Virtual Directory Property Tabs:
General
Authentication
Remote File Servers
Policy Setting Tabs:
General (Allow non-provision-able devices -this allows mobile phones to sync even if they do not support policy settings)
Password
Sync Settings
Device
Device Applications
Other
Note: Some features require Exchange Enterprise Client Access Licenses for mailboxes that have policy setting restrictions
Go to the EMC ->Server configuration -> Client Access -> Exchange Activesync tab properties.
Password tab -> many options here for passwords (length, expiration, require encryption, etc.)
Sync Settings -> Include past calendar items, Include past email items, Allow Direct Push when roaming (you can force it so that roaming users will not get Direct Push). Allow attachments.. etc.
Device tab -> Allow removable storage, allow camera, allow wifi, allow infared, allow bluetooth etc.
To block unknown servers from the virtual directory (by default is allow), go to the EMC -> Server Configuration -> Client Access -> Exchange ActiveSync Tab -> Virtual Directory Properties. Go to the Remote file servers tab -> Unknown servers by default is set to allow. OWA has the ability to access file shares and SharePoint libraries. If there are no dots in a URL a user clicks, it is considered internal. If there are one or more dots in the URL, then it will only be considered internal if the domain suffix has been added to the configuration.
The following Exchange Management Console Shell commandlet will apply a custom activesync mailbox policy to the OU Chicago:
Get-Mailbox -OrganizationalUnit Chicago | Set-CASMailbox ActiveSyncMailboxPolicy “ASChicago”
So in this post, we reviewed:
The feature settings for Outlook Web App and ActiveSync
Both virtual directory settings (found under the Server Configuration node) and policy settings (found under the Organization Configuration note)
Made virtual directory adjustments and created policies and then applied those to users within our organization using a powershell commandlet.
A good majority of the content provided in my Blog’s Exchange series is derived from J. Peter Bruzzese’ excellent Train Signals Exchange Server 2010 Video Disk Series, as well as my own Exchange 2010 lab. Trainsignal.com is an invaluable source for accurate, easy to understand, IT information and training. http://www.trainsignal.com
Exchange 2010 – Part 14 – Creating Recipient Types
In Exchange 2010, you can have a wide variety of recipients. In this post we will discuss and create the various recipient types, including:
User Mailboxes
Resource Mailboxes (Room and Equipment)
Contacts
Mail Users
Distribution Groups
Dynamic Distribution Groups
If you have multiple sites or locations with their own Exchange servers, you may wish to prepare, or create and train, a “Recipient Creation Team” in each location. Often times the creation of recipients is something that can be handled by a junior level admin, and so you could give their user account permissions to do just that, after they have been trained.
A review of Recipient Types that we can create:
The EMC makes it easy for us to create recipient types. On our mailbox server, we can open the Exchange Management Console, and expand Recipient Configuration which is under Microsoft Exchange -> Microsoft Exchange On-Premises->Recipient Configuration
Click Image to Enlarge
– The Mailbox Type:
User Mailbox (can use an existing user account or create a user account at the same time if you have permission)
Resource Mailboxes: Room Mailbox/Equipment
Linked Mailbox
– The Mail Contact
– The Mail User
– The Distribution Group
– The Dynamic Distribution Group
The “Disconnected Mailboxes” feature controls mailboxes that you disconnect from their active directory user (and can be connected to a different user).
The “Move Requests” feature is used if we might need to move users from different versions of Exchange or move them from one MB DB to another, and can view those move requests here.
When we highlight the Recipient Configuration in the EMC, in the Actions pane we have two options:
Modify Recipient Scope… Lets say we only want to see those recipients that are in a specific Organizational Unit (narrow the scope).
Modify the Maximum Number of Recipients to Display… – lets say we have a large organization with over 2000 mailboxes, by default, in the Results Pane, the Maximum recipients to display is set at 1000. We can change this number higher or lower to organize the results to our preference.
We will typically use the Mailbox Type -> User Mailbox. A UM is an AD user account that is connected to a mailbox on the Exchange user.
The Resource Mailbox types:
Room mailbox – a mailbox that represents a conference room (we need one of these for the bathroom at home) *Note – when created, these accounts are disabled by default
Equipment – projector that has a schedule; is it available or not available
Linked Mailboxes: an individual in one forest may have a mailbox in another forest. Requires a specific scenario; linked mailboxes rarely created.
Mail Contacts: allow you to have an AD contact object that can be searched and located but is external mailbox and cannot be assigned to a user. Someone working with your company but not for your company. This user cannot log into the domain.
Mail User: AD user, someone that can log into the domain. From a recipient perspective, they may have a gmail or hotmail account. Has an AD account but not a mail account.
The Distribution Group: Groups of mail contacts and users
The Dynamic Distribution Group: For example, adding a user to a Dynamic Distribution group named Marketing, a marketing user will become a member of the Marketing Distribution group. If that person moves to sales, that attribute changes that they will automatically become a member of the Sales Distribution Group.
Creating the different recipient types in the EMC is pretty straight-forward with the Wizard. The only sticky part is when it asks for the Mailbox Database to use. You should by now know how to locate your current Mailbox Database, if not, see my earlier post.
Functionality Changes in SP1:
Hierarchical Address Books
Internet Calendar Publishing
The Calendar Repair Assistant enhancements
Hierarchical Address Books
With hierarchical address book support you have the ability to configure address lists and offline address books (OABs) in a hierarchical view for your users
Note: this is not new to SP1 but most admins never used this because it involved such convoluted adjustments through ADSI Edit that it was passed over as a feature.
Now? You still have to jump through many flaming hoops with doggies following behind but you can now do it through the Exchange Management Shell and it isn’t as difficult.
For example in Outlook, in the Address Book – All Users – you typically have all the users listed. With SP1, you have a new organization tab. Once you set up a hierarchy, you will see the hierarchy in that tab.
Click Image to Enlarge
Internet Calendar Publishing
Exchange RTM allowed for the sharing of calendar information through a federation trust and an organization relationship or sharing policy. SP1 introduces Internet calendar publishing. Allows users of Exchange the ability to share calendar information to anyone on the internet.
Key points include:
Federation is not necessary
Internet users are not required to belong to any form of authentication group (like Windows Live) and all they require is a browser to access it.
Users can invite friends, family, business persons to view their calendar by providing them a link
Exchange admins can control who can publish their calendar and what can be shared
The Calendar Repair Assistant Enhancements
Introduced in the RTM of Exchange 2010, the CRA repairs problems with the calendar assistant
New scenarios that are detected and repaired with the Calendar Repair Assistant in SP1 include:
If an attendee’s calendar is missing an occurrence or an exception of a meeting
If an attendee’s start/end time doesn’t match the organizer’s star/end time (*includes time zone inconsistencies)
The location of the attendee is different from that of the organizer
Organizer is missing an item
Recurrence patterns of an attendee and an organizer are different
Thanks for reading through this post and I hope you gained some understanding of the different Recipient types in Exchange 2010 as well as learned about new SP1 features.
A good majority of the content provided in my Blog’s Exchange series is derived from J. Peter Bruzzese’ excellent Train Signals Exchange Server 2010 Video Disk Series, as well as my own Exchange 2010 lab. Trainsignal.com is an invaluable source for accurate, easy to understand, IT information and training. http://www.trainsignal.com
In this post, we will look at Public Folders in Exchange 2010. More specifically:
We will review the purpose and use of Public Folders within your organization (and discuss the fact that they may no longer be used in some future version of Exchange).
We will go through the creation of a Public Folder database in the Exchange Management Console and see the properties that we can configure.
We will work with the Public Folder Management Console and the Outlook client to create and manage Public Folders.
We will review permission settings and delegating permissions for folders and sub-level folders.
In review, the purpose of Public Folders:
Public Folders are Nostalgic (out of date) – Public Folders were introduced with the first version of Exchange and have been used for many years as a means of collaborating with persons in your organization through a shared folder structure.
Users will see the Public Folder structure in their Outlook client and can view items that have been either posted or emailed to the folder (if it is mail-enabled) and they may have the ability to add content, create sub-folders and so-forth if they have permissions to do so.
Are Public Folders required in Exchange 2010?
If you have Outlook 2007 and/or 2010 clients only, than the answer is no (it is completely optional if you want to).
If you have Outlook 2003 clients, then the answer is yes. They use the Public Folder structure for Offline Address book distribution, free/busy lookups, organization form library, and security settings.
The Offline Address Book distribution in Exchange 2010 is now done with the BITS HTTP connection to the Exchange Client Access server. The Free/Busy look-ups are now done through the Availability Web Service. Security settings are done through Group Policy. Organizational Forms have been pushed aside in favor of InfoPath forms.
Starting with Exchange 2010, Public Folders are De-emphasized
Public Folders have become the dumping grounds for anything and everything your people want to share with each other. Public folders tend to sprawl out of control.
Public Folders are so late-1990’s. They aren’t designed for two very important 2010+ aspects of corporate life: Archiving data, and Document Sharing and Collaboration (check-in/check-out, versioning). Associates tend to try to hide their personal mail archives in Public Folders so that they are backed up.
As a result, the Microsoft Exchange Team has been making threats to pull Public Folder support from a future version of Exchange.
The idea is to encourage organizations toward SharePoint (although you are welcome to research and use some other collaboration solution).
While SharePoint has great features, any collaboration software has the potential to become the NEW dumping grounds for your organization.
How do I create the Public Folder database in Exchange 2010?
During the installation of the first Exchange 2010 Mailbox Server in your organization you see the question: “Do you have any client computers running Outlook 2003 and earlier or Entourage in your Organization?” If you answer “Yes” then the Public Folder database is automatically created.
You can also manually create a Public Folder database on any Mailbox Server in your organization and then determine if you want to replicate folders to that server.
How do I establish or create a High Availability structure for my Public Folders?
In Exchange 2010 there are no HA solutions you can use by default. The only way to ensure content is available is to create a new database and replicate content to that server.
Options for configuring Public Folder databases:
Maintenance Schedule
Replication Interval – specific to DB
Storage Limits
Deletion Settings
Age Limits
Public Folder Referral
Options for configuring individual Public Folders:
Replication (Both server choice and replication schedule)
Limits (Storage, Deleted Item, Age)
Path to managing the Public Folder in the Exchange Management Console (EMC):
MS Exchange -> MS Exchange On Premises -> Organization Configuration -> Mailbox -> Database Management Tab -> Right-click on Public Folder DB file and choose Properties.
Maintenance Schedules run from 1-5am by default. (ESE scanning check sum is an option as well. For smaller databases, you can get away with un-checking this option).
Circular Logging, again, is not having transaction logs building up. This is a space saver but not good when trying to recover from an emergency.
Replication Tab – replication of messages between PF databases.
Limits Tab – storage limits on the database. There is by default a maximum size of message of 10MB for each item placed in a Public Folder by default.
Public Folder Referral – Use Active Directory site costs. Essentially PFR comes into play with large organizations with multiple PF DBs, multiple Mail Box servers hosting PF DB’s. Certain PF’s may not be hosted at that same location. Site costs can be used to determine or manage PF locations.
You can configure certain items on individual public folders like replication. Replication at the database level can be scheduled, or you can establish on the individual folder themselves.
Go to the Public Folder Console by going to the EMC -> Toolbox -> Public Folder Management Console:
Default Public Folders – include existing public folders created by an administrator. Try to maintain and organize Public Folders with a structure to maintain focus. One possibility is organizing by location. To add new folders, select New Public Folder… in the Action Pane. You can create sub-folders inside each Public Folder. You can delegate permissions on Public Folders to allow users the ability to create new sub-folders. Right-Click on a Public Folder, choose Properties. Under the Replication tab, you can add servers to replicate the content to and if you want High Availablity, you will select a different MailBox server and replicate the folder. You might replicate content to put them closer to actual user’s locations. You can use the default public folder replication schedule, or create your own. For limits, you can use the default quotas, or establish your own.
System Public Folders – we will cover these later.
Key Focus Points of Public Folders:
What are some of the key concepts of Public Folders?
Public Folder Trees
Default Public Folders (IPM_Subtree – folders that users are typically aware of)
System Public Folders (System PF structure known as the Non_IPM_Subtree – used by outlook for free/busy data, eforms registry and events root, for outlook clients that do not support 2010 or 2007 features (Availability service etc.) Legacy clients don’t know where to look for this, but can get their legacy data from these structures)
Replication
Hierarchy – Properties of the folders, and organizational information, name of public folder, which server holds the replicas, and permissions are replicated with the heirarchy
Content (Requires configured replication) – you decide which mailbox servers have copies of the content.
Referrals
If a client looks for somethign in the Public Folder heirarchy, if they click on the folder, do they get it from their local Mailbox server? If it can’t find the data from their Mailbox, it will look for a replica in the same site. If it can’t find it there, it will look for the lowest cost site.
What are Mail-enabled Public Folders?
They provide a bit more functionality to PFs
Users can post to a PF through email.
Permissions: The Reality vs. The Potential
Exchange Administrators should consider delegating folder creation and management to others.
The easiest way to delegate is to assign persons to the Public Folder Management Group and let them worry about creating and managing Public Folders through Outlook
If you wanted to see the permissions or set the permissions on Public Folders, you cannot use the EMC/Public Folder Management Console. You must use the Exchange Management Shell.
– Cmdlet used to add administrative permissions: Add-PublicFolderAdministrativePermission
– Cmdlet used to add client permissions: Add-PublicFolderClientPermission
In an Outlook 2010 client, if a user does not have permissions to create a sub-folder in a Public Folder, check the properties of the folder first -> Summary Tab.
To add a user to a Public Folder Management Group so that they can make changes/add folders to a Public Folder, you’ll need to open the Exchange Management Shell:
Edit – you can change permissions now through the Public Folders Management Console if Exchange 2010 SP1 is installed
After hitting Enter, nothing appears to happen, but when logged in as the user, and visiting the properties of a Public Folder in Outlook, you will see the additional properties/permissions available. And from here you can give additional permissions to other users.
If a Public Folder is mail-enabled, in the Global Address List, you can change the address book to Public Folders, which will list all available Mail-Enabled Public Folders.
Permissions: Rights vs. Roles
When using Outlook to assign permissions to a Public Folder you assign Roles (like Editor, Author and so forth).
Those Roles have underlying Rights assigned to them. For example, a Reviewer (role) has the rights ReadItems and FolderVisible.
There are 10 different Rights that mix and match for each role:
ReadItems
CreateItems
EditOwnedItems
DeleteOwnedItems
EditAllItems
DeleteAllItems
CreateSubFolders
FolderOwner
FolderContact
FolderVisible
Each of these is a different set of permissions that combine to create a different role. A “none” role doesn’t allow any permissions and the user will not be able to even view items.
If you are the type that doesn’t want to delegate to users rights and roles, and want to adjust them on the EMShell, you can use the following commands:
It can be more simple to use the Outlook client GUI, but using the above commands, you can make the changes in the Exchange Management Shell.
With Exchange SP1, you can change permissions (rights and roles) for public folders using the Public Folder Management Console -> Right-click on Default Public Folders -> Choose Properties -> Permissions Tab.
A good majority of the content provided in my Blog’s Exchange series is derived from J. Peter Bruzzese’ excellent Train Signals Exchange Server 2010 Video Disk Series, as well as my own Exchange 2010 lab. Trainsignal.com is an invaluable source for accurate, easy to understand, IT information and training. http://www.trainsignal.com
A quick overview of the Exchange Management Console, or EMC; a very capable management console accessed via the OWA web interface.
We can access the EMC through Outlook Web App. On the Exchange Mailbox server itself, you can get to OWA through the address https://localhost/owa
Note: I encountered an issue here. When first logging into OWA I received the following error message: “Your mailbox appears to be unavailable. Try to access it again in 10 seconds. If you see this error again, contact your helpdesk.”
My first instinct when I receive a message like this is to check services. Yes, as I suspected, upon viewing my primary Exchange server services, the Microsoft Exchange Server Information Store Service was not started. I started the service manually, logged into OWA again, and found I could now completely log in and see my OWA inbox.
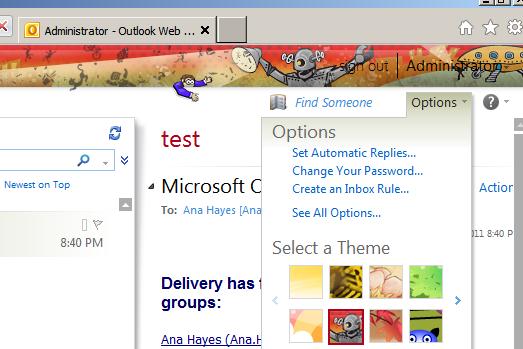
Once inside the administrator’s mailbox, you can manage the organization by clicking on the Options drop-down in the upper right-hand corner, and then on “See all options…”
Now that you’ve clicked into all of the options, you will want to change the Mail > Options: “Manage Myself” drop-down to “My Organization”. You are now in the Exchange Management Console.
Once inside the EMC you have the following Options:
Users and Groups – contains Mailboxes, Distribution Groups, and External Contacts
Roles and Auditing – contains Administrator Roles, User Roles, and Auditing. There are some nice Auditing controls available here including * Run a non-owner mailbox access report… * Run a litigation hold report… * Run an administrator role group report… * Export Mailbox Audit Logs… * Export the Administrator Audit Log…
Mail Control – contains Rules, Journaling, and Delivery Reports
Phone and Voice – contains ActiveSync Access (Quarantined Devices and Device Access Rules); and ActiveSync Device Policy
Take note that Multi Mailbox Search (which is under mail control in RTM). RVAC, even the admin is not able to see the Multi Mailbox Search; you have the add the administrator into the Discovery Management Role Group. Once added to that group, you will see MultiMailbox search in the Administrators EMC.
A good majority of the content provided in my Blog’s Exchange series is derived from J. Peter Bruzzese’ excellent Train Signals Exchange Server 2010 Video Disk Series, as well as my own Exchange 2010 lab. Trainsignal.com is an invaluable source for accurate, easy to understand, IT information and training. http://www.trainsignal.com
* There are 3 tools for managing Exchange. 1. The Exchange Management Console, 2. The Exchange Management Shell, and, 3. The Exchange Control Panel, which is accessed through Outlook Web App (OWA)
* We will first look at the use of the EMC and explore its various nodes, panes, and actions we can perform
* Then we’ll look at the purpose of PowerShell and the EMS, focusing on how commands are formed using cmdlets and how they are made more complex and useful through pipe-lining.
The EMC has 4 primary interface elements:
Console Tree
Result Pane
Work Pane
Action Pane
The EMC is based on MS MMC 3.0 and the GUI version used for Exchange.
Organization Configuration
Server Configuration
Recipient Configuration
Under Server Configuration, when you click on Mailbox, Client Access or Hub Transport, you’ll notice that there are two middle panes. A results pane and a work pane.
The Actions pane can be turned off by clicking Show/Hide the action pane button on the toolbar. When you turn it off, you can still perform functions by right-clicking on objects.
One thing to note in the Console Tree is that you have by default the “Microsoft Exchange on-Premises.” It is designed so that you can manage Exchange Servers in the cloud.
The Exchange Management Shell is a requirement for Exchange Administrators (and there are questions about it in exams). Learning PowerShell is not an option, it is a necessity.
The EMS is built upon PowerShell (PS)
PS is both a command-line tool and a scripting platform.
Exchange 2010 requires PowerShell v2.
PowerShell commands are built using cmdlets
Through PowerShell commands, you can manage EVERY aspect of Exchange, whereas the EMC you can manage ALMOST every aspect of Exchange
Local Shell and Remote Shell
The EMC allows you to make configuration changes to the Organization or to individual Servers. In Exchange 2007, you could only run the POwerShell compone3nts on the local machine.
With Exchange 2010 you can connect to a remote session on a remote Exchange 2010 system.
When you open the EMS it connects to the closest exchange session
you cannot connect remotely to an Edge Transport Server
Remote Sessions are created using the New-PSSession and Import-PSSession cmdlets
What are CMDLETS?
Simple verb-noun structure
Common verbs are : Get, Set, Remove, Test, Enable, Disable, Install, Uninstall, New and Move
Pipelines | help to string cmdlets together
Examples:
Get-Mailbox
Get-MailboxStatistics <Mailbox>
Get-Mailbox -OrganizationalUnit Sales
Get-Mailbox | Set-Mailbox -prohibitsendquota 500MB (this will take every mailbox in the organzation and set the prohibit send quota to 500MB – manually would take forever!
The Exchange Management Shell contains modules we need. You can import them into PowerShell, but the EMS already is loaded.
Try for example:
>get-excommand – quite a number of different cmdlets! To investigate how to use one of these commands?
>get-help test-systemhealth
This outputs
Name:
Synopsis:
Syntax: (might want to port out to txt and print)
Description:
Related Links:
Remarks: (Examples)
>Get-Service -> shows all the services running on our system
>Get-Mailbox -> shows all the mailboxes on the server – names, where they reside, quota.
To give a number of users mailbox with one line of code you can do the following:
Andy Grogan created a script to create (fake) users on a domain. You can create several hundred users.
Go to UserTools, and you can see a .csv file which contains basic info for creating users. You can change these, and use your real names and create an entire domain of your users.
The script will create an Organizational Unit called “Exchange Users”
and here is a screenshot of the script and .csv files:
Click image to enlarge
Run the powershell script within powershell, and you should see the users scroll down the screen as they are created.
Now that the users have been created, go to your Mailbox server and go to Organization Configuration -> Mailbox -> “MailboxDatabase” is the database where we will be placing our new users. We will use the ExchangeUsers OU to help build mailboxes for our lab users.
Under Recipient Configuration, we do not yet have users listed. We do not have mailboxes for them.
Now that your users have been given mailboxes, goto OWA at https://yourdomain/owa , log in as one of the users and test sending/receiving to the administrator.