IIS 7 and IIS 7.5 – How to renew a self-signed certificate and bind to your website.
Almost one year ago I built an Act server for a client. Act includes a web interface which can be reached by a secured SSL website on port 443. When I setup the site, I used a self-signed certificate as the client is budget conscious and is ok with using a non-third-party trusted certificate.
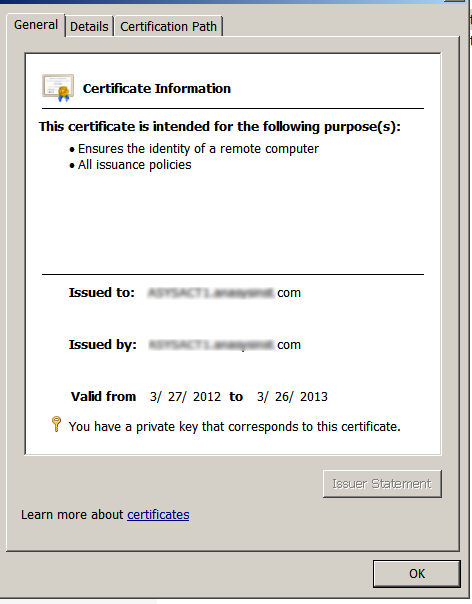
We monitor all of the servers for certificates that will expire and we received an alert that the SSL Certificate on server ***, port 443, is going to expire in 7 days. I browsed to the website, accepted the certificate warning and then opened the certificate itself. Sure enough, the clock is ticking and the cert was to expire on 3/26/13.
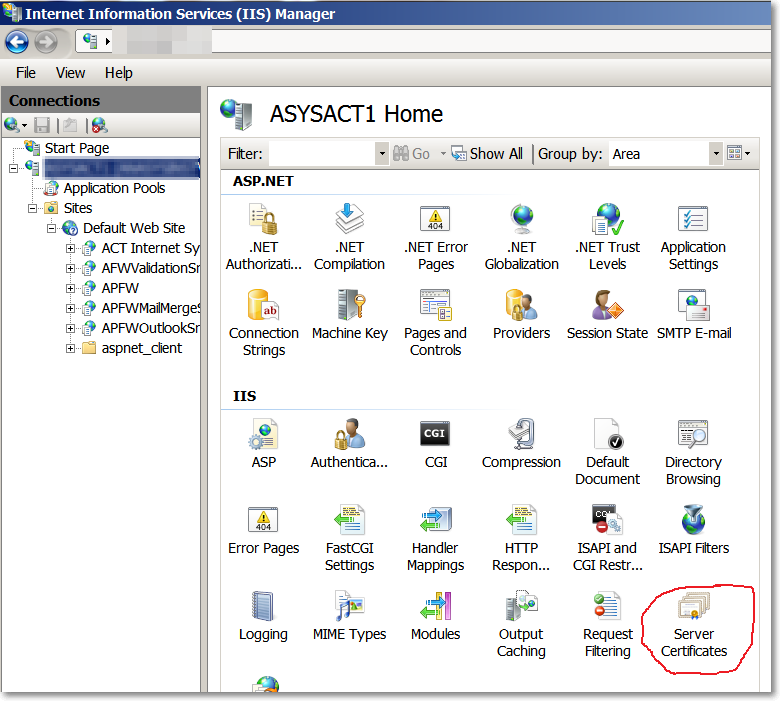
To replace the certificate with a new self-signed certificate, hop on to the server’s console that hosts the IIS site and open Internet Information Services (IIS) Manager.
- Select the server (name) under the Connections Pane on the far left of the application.
- Under the middle pane, double-click on the Server Certificates icon.
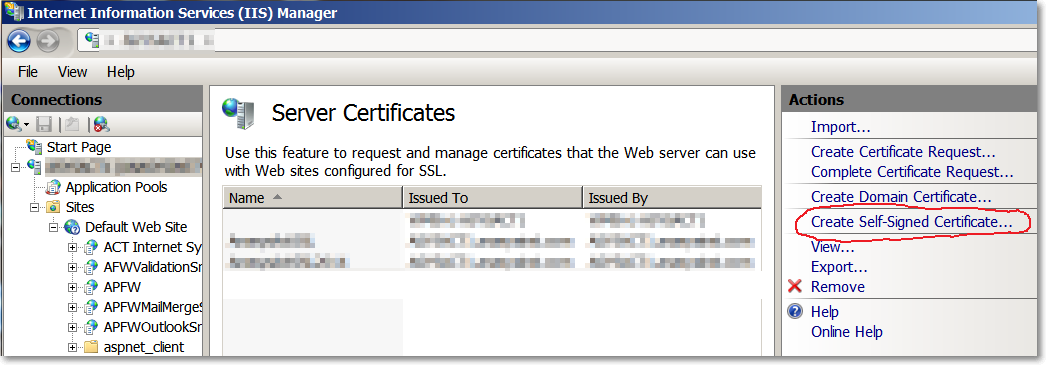
3. Here you will see all of the listed self-signed certificates including the one that will expire. On the right-hand pane under Actions, click on Create Self-Signed Certificate…
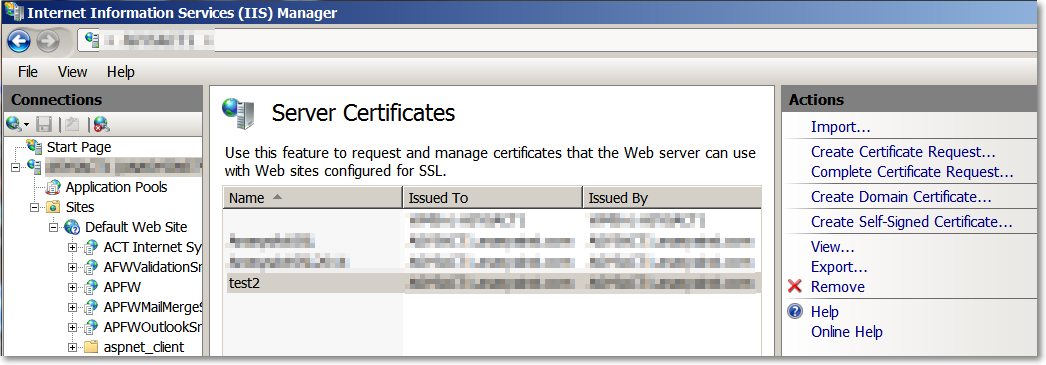
4. Specify a friendly name for the cert. I used companynameservername2014. Click OK. You should now see your new self-signed cert available in your list of certificates.
5. Now that the certificate has been created we need to bind it to our website. Under the Connections pane, right-click on the Default Web Site and click on Edit Bindings. Find https, click on it to select it and then click Edit…
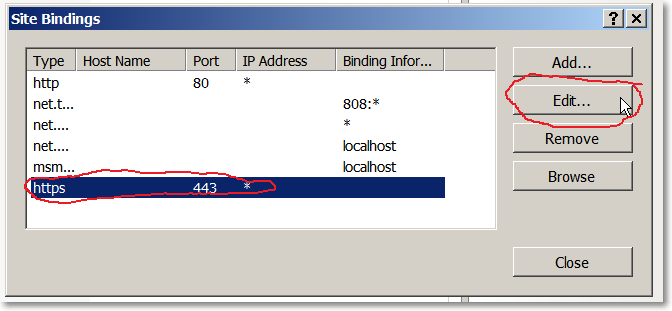
5. Inside the Edit Site Bindings, change the Drop-down combo box to the SSL certificate you want to use. Click ok – you’re done!
6. To test, browse to the site you host with https:// and look at the certificate, you should see it is now set to expire 1 year from now.
