
After having created a Resource Room in the Office365 Admin console (with an Enterprise E1 license,) you may find that meetings which are created in Outlook and which are sent, are not automatically processing and sending verification confirmations back to the person that created the event. Nor will new events populate the event in the new room’s Outlook calendar. In this case, there are a few things we can check to ensure the room behaves as intended.
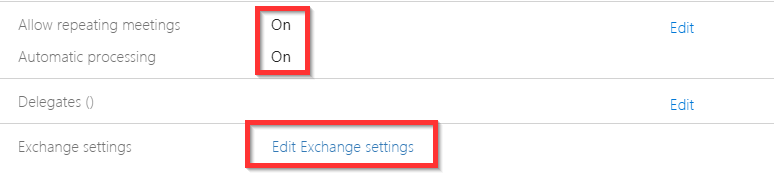
- First, after creating the room, ensure that you, as an admin, are set as an owner of the room. Under O365 > Admin Center > Rooms and Resources > place a checkmark next to the room in question. Ensure that Allow repeating meetings and Automatic Processing is On. Then, click on Edit Exchange Settings:
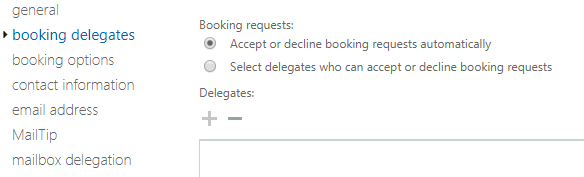
2. In this example, we don’t use booking delegates. In the Exchange Settings for the new resource room, make sure Booking requests are accepted automatically.
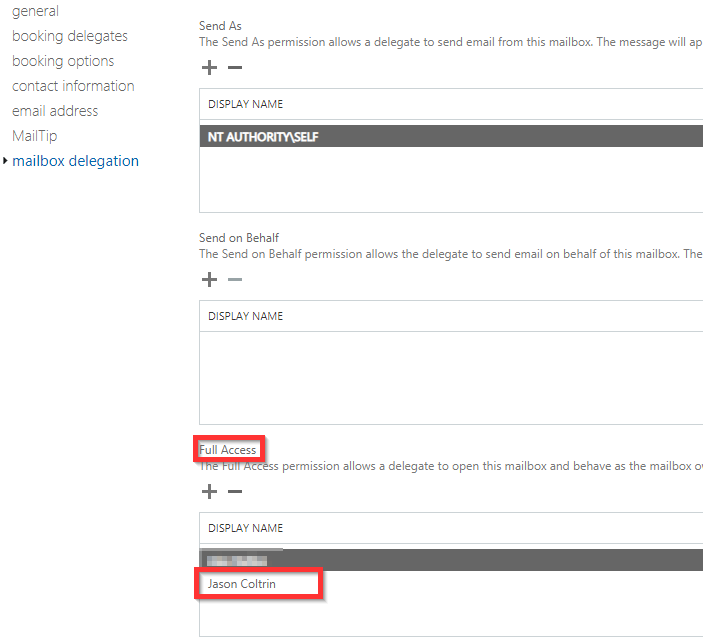
3. Edit the booking options, contact information, email address, and
4. Next, log into your own OWA admin Outlook online inbox. In Outlook, click your profile photo in the upper right corner and click “Open another mailbox.” Type the address of the room and open the webmail for the room.
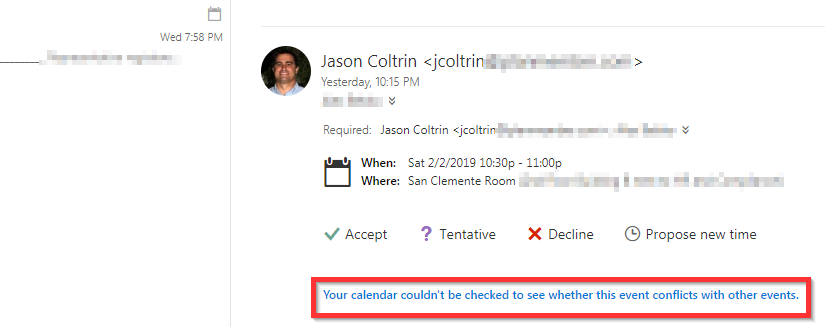
5. Here you may see some emails of previous attempts to book events like the following with the error “Your calendar couldn’t be checked to see whether this event conflicts with other events.“:
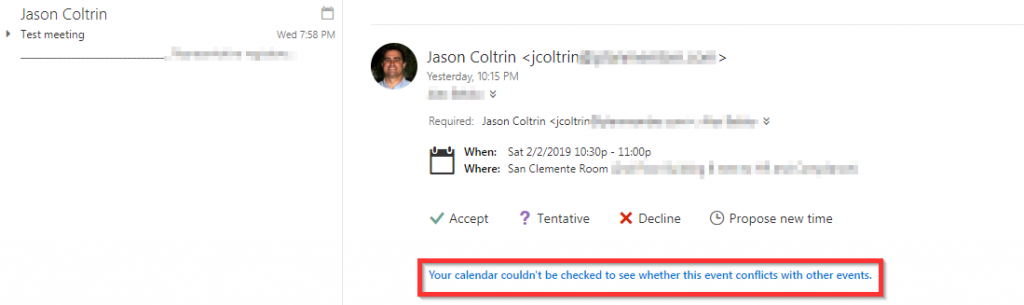
6. This error lets us know that automatic processing is not working even though we have it set to “On” in our first step. Had the processing worked correctly, we wouldn’t even see this event email in the mailbox of the room in question.
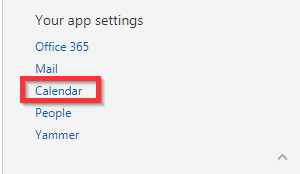
7. In the upper right corner, click the Gear icon, then under Your app settings, click Calendar.
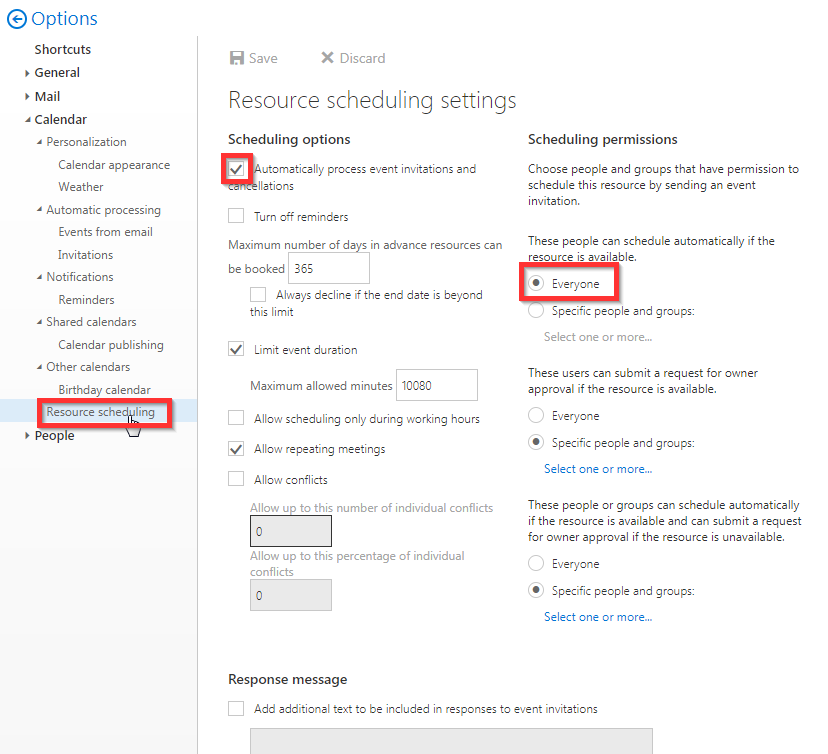
8. In the calendar resource scheduling settings, ensure that under the scheduling options, “Automatically process event invitations and cancellations” is checked, and then click Save.
9. In theory, these settings should be enough to get the calendar to auto process and verify, however, your results may vary. Test by creating a meeting event in outlook with the new room. When you send the meeting, you should receive a verification email in your inbox in less than a minute. If you don’t receive the verification, check the inbox of the calendar again. You’ll probably find more emails with the “Your calendar couldn’t be checked…” errors.
10. Time to open PowerShell and connect to your O365 Exchange. If you’ve enabled MFA (two-factor authentication) use the guide on how to connect to Exchange with Hybrid/Modern Authentication here. If you don’t use Modern 2FA authentication, use the following commands:
$LiveCred = Get-Credential

$Session = New-PSSession -ConfigurationName Microsoft.Exchange-ConnectionUri https://ps.outlook.com/powershell/ -Credential $LiveCred -Authentication Basic -AllowRedirection

Import-PSSession $Session
11. Run the following command to get the calendar processing conditions:
Get-CalendarProcessing -Identity "[email protected]" | Format-List
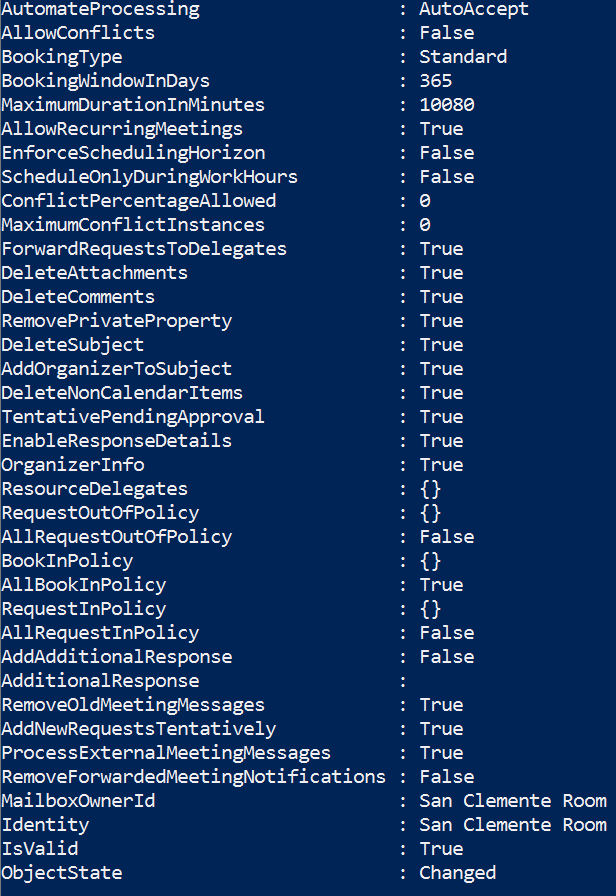
12. It’s helpful to first get a list of all calendar processing objects of a room that already works correctly to refer to when editing your new room’s permissions. If you don’t already have a room that you can reference, below is a list of my room that is not behaving normally:
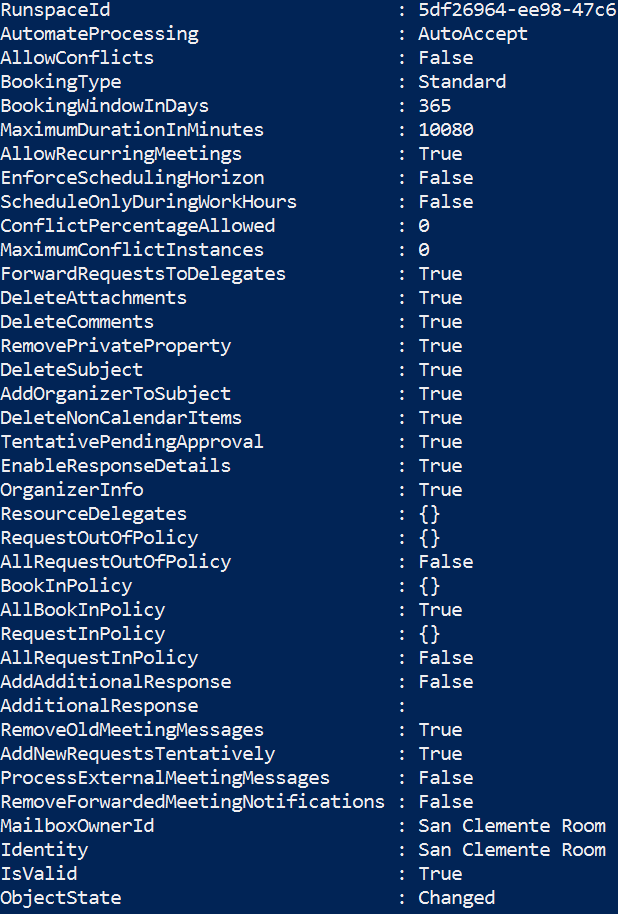
13. Notice that ProcessExternalMeetingMessages is set to False. Let’s change this to True with the following command:
Set-CalendarProcessing [email protected] -ProcessExternalMeetingMessages $True
14. After making this and a few other changes displayed in the following screenshot, go ahead and try creating another test meeting and see if the autoprocessing behaves as it should. If you’re still having trouble, try referring to the screenshot below as an example, and use the “Set-CalendarProcessing” command to edit the values.
15. Once you successfully receive verifications and the calendar populates with events as it should, you may want to set the calendar to display the owner of the event and details of the event (rather than the event is listed in the calendar as only “Busy”.) To do so, follow the instructions I wrote in my article here.