
To enable Bitlocker on your Windows computer, you first need to be running the Windows 10 Pro operating system. Windows 7, Windows 8, and ‘Windows 10 Home’ versions do not support Bitlocker.
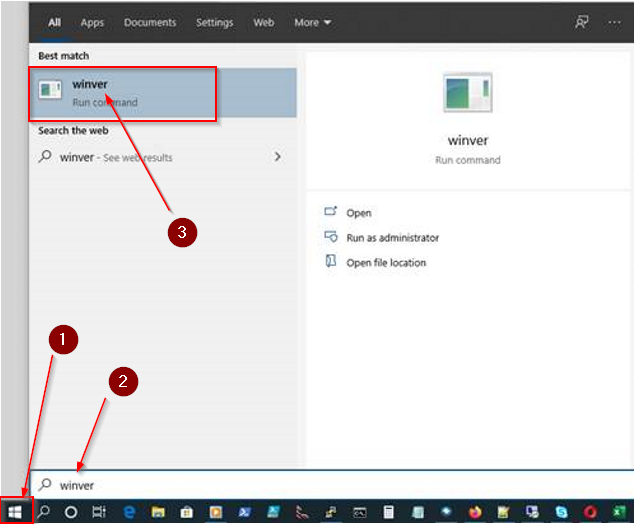
It’s a good idea to first know your current operating system version. To do so, click on the Start Button and type “WinVer” and then press Enter:
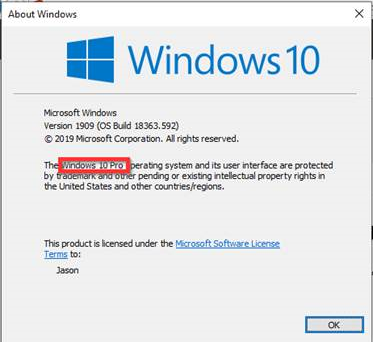
Check the version of operating system. You need to have Windows 10 Pro. As of the time of writing this article, the most version of Windows 10 is Version 1909 (OS Build 18363.592).
If you have Windows 7, follow the upgrade instructions below. If you have Windows 10 Home, then you need to purchase the upgrade to Windows 10 Pro, and follow instructions here.
You need to upgrade from Windows 7 Home to Windows 10 Home before you can upgrade to Windows 10 Pro.
Upgrade from Windows 7 Home to Windows 10 Pro
If you are on Windows 7 or Windows 8, do a web search for the Windows Media Creation Tool, or you can find it here: https://www.microsoft.com/en-us/software-download/windows10
When running the Media Creation Tool, run the Upgrade option. It will take a while and several reboots to upgrade from Windows 7 or 8 to Windows 10. If you started with Windows 7 Home or Windows 8 Home, the tool will most likely upgrade your PC to Windows 10 Home.
After you’ve finished the ‘Windows 7 Home’ to ‘Windows 10 Home’ upgrade, you now need to upgrade from Windows 10 Home to Windows 10 Pro in order to get the Bitlocker feature.
Upgrade from Windows 10 Home to Windows 10 Pro
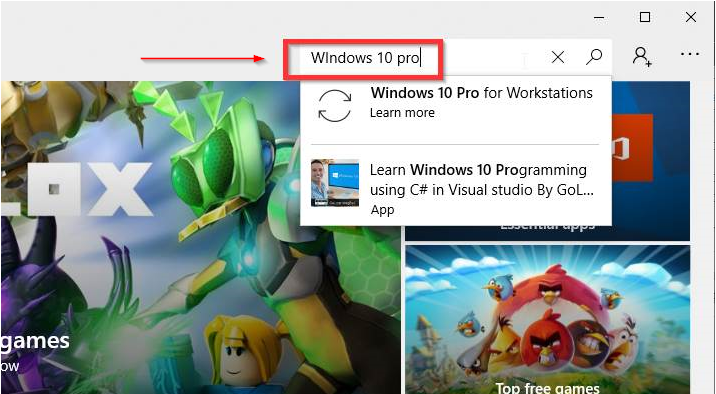
To upgrade from Windows 10 Home to Windows 10 Pro, click on the start button and type ‘Microsoft Store‘ and press Enter.
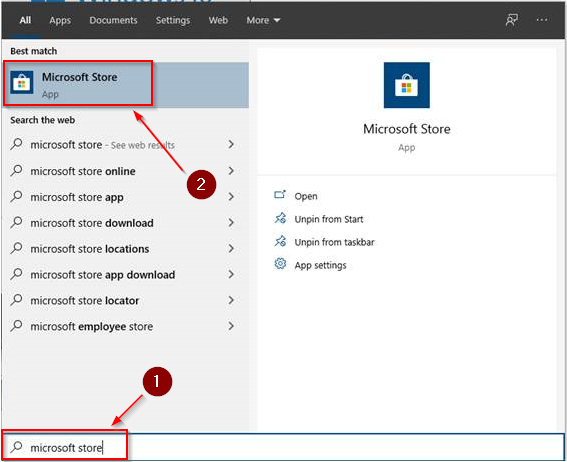
In the store, search for Windows 10 Pro in the upper-right corner of the store:
Purchase the upgrade ($99) and then run the upgrade. The process will take a while and several reboots.
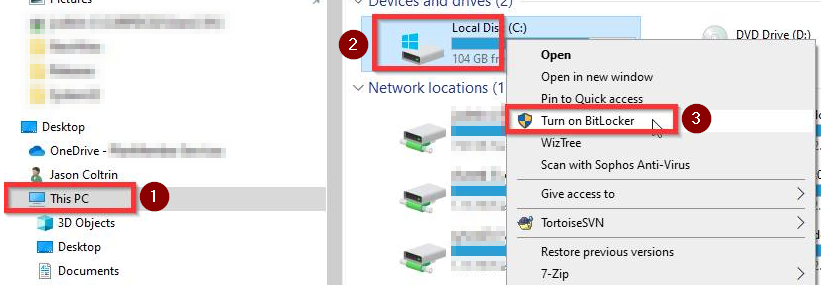
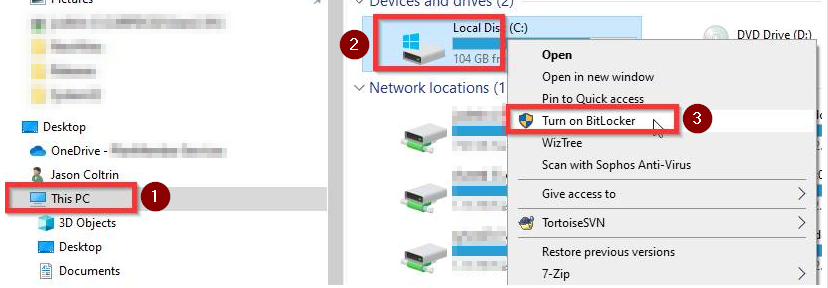
Once you are on Windows 10 Pro, open the File Explorer, click This PC, then Righ- click on the C: drive and choose Turn on Bitlocker or Manage Bitlocker.
Follow the prompts and enable bitlocker.
- You may encounter a problem where an old PC does not have a TPM chip, so you will have to edit the local Group Policy in order to allow Bitlocker without TPM enabled. The guide for doing so can be found here: https://www.digitalcitizen.life/how-enable-bitlocker-without-tpm-chip-windows-7-windows-8
- Enable Bitlocker for the C: drive – Save the Bitlocker encryption/decryption key to a removable USB drive, save to the cloud, and print for a hard copy. This password to unlock the drive and the Recovery/Decryption key are very important, do not lose them.
- Follow the default prompts (ok to skip system check) and the drive will begin encryption. You should see a status bar and progress indicator showing the percentage of encryption. When it reaches 100%, the encryption process has finished.
- Reboot the system to complete the encryption of the drive.
After the reboot, log in to the desktop again, and use the Windows Control Panel to check the status. Please follow instructions here: