Exchange 2010 – Part 17 – Using the ECP to manage ActiveSync

Using the ECP to Manage ActiveSync

In this post, we will be visiting the Exchange Control Panel (ECP) to see all the new administrative control we have been given with SP1, without having to work on a system with the EMC Management Tools installed. You may recall our first visit to the Exchange Mangement Console in Part 8 of this series.

To get to the Exchange Control Panel, log into your OWA site as an administrator. From here, you will see the options button in the upper right-hand corner of OWA, this contains the link to the ECP.

From within the Administrative Control Panel we can perform the following (new w/SP1) administrative tasks:

  • Manage default access for mobile devices
  • Configure email alerts when a mobile device is quarantined
  • Create personalized recognition or quarantined messages
  • List quarantined mobile devices
  • Create and manage device access rules
  • Allow/Block specific devices
  • Initiate password recovery or remote wipe of a user’s mobile device

To manage the default access for mobiles, go OWA as administrator, then go to options -> View all options -> Manage My Organization -> Phone and Voice:
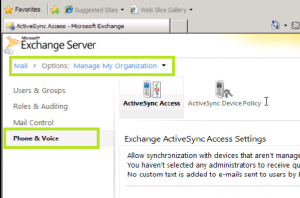
ECP Mobile
Click Image to Enlarge

Here, when a device that isn’t managed by a rule or personal exemption connects to Exchange we can allow access, block, or quarantine (on a case by case basis) mobile devices. If we choose, we can send out notification warnings that will go out to administrators.

Under ActiveSync Device Policies, we have a duplicate of what is in the EMC, in that we have a default policy, and the ability to look at, and change, policy settings (Device Security, Sync Settings, Device Settings).

We can create additional activesync policies here as well. Polices created here will be replicated in the EMC. There are some options/tabs that exist only in the EMC however; Device Applications Tab and the “Other” tab: discrete management of Applications on Mobile Devices.

So this is a short post but I think is worthwhile looking at the new enhancements for the Exchange Control Panel in SP1.


A good majority of the content provided in my Blog’s Exchange series is derived from J. Peter Bruzzese’ excellent Train Signals Exchange Server 2010 Video Disk Series, as well as my own Exchange 2010 lab. Trainsignal.com is an invaluable source for accurate, easy to understand, IT information and training. http://www.trainsignal.com

Exchange 2010 SP1 Installation – Part 6

Exchange 2010 SP1

Exchange Team Points For Deployment Prepraration

The installation of SP1 can be very frustrating, despite it’s great features. There is always some side-IIS elements that were not installed, and they need to be installed before you can move forward. The hotfixes are the key. When you start with an OS, e.g. Server 2008 R2, make sure you first have all of the OS updates installed. Visit Windows Updates and make sure you install any that are available. Then you want to visit the Microsoft Exchange Team site and find all the hot fixes for your Exchange 2010 installation. Make sure all of those hot fixes are installed as well. Then, even though you can install roles and features with checkboxes, it’s better to use the import-modules servermanager commandlet with PowerShell and copy the text for installing roles and features.

Do a google search for “Install Exchange 2010 SP1” and go to the EHLO blog. http://blogs.technet.com/b/exchange/archive/2010/09/01/3410888.aspx

Go to the Upgrade order if you’re going to upgrade from 2007.

Use the Matrix of Updates Required chart. Use the chart and don’t just go with what the Exchange installer tells you. You don’t want to miss one; you may be shown that you finished completely, but end up having to go back to ADSI edit etc. So make sure you have the hotfixes based off the chart.

In my case, all of the updates in the matrix were not required by my system, and the SP1 install went well with my latest install. After the SP1 install, it’s a good idea to install the update roll-up #5 released by Microsoft here:

http://www.microsoft.com/download/en/details.aspx?id=22090

After the update roll-up has been installed, be sure to check Windows Update a few times to ensure you have the latest patches and updates.

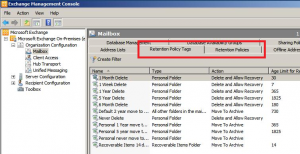
After SP1 is installed, and the updates have been installed as well, open up the Exchange console, click on the Organization Configuration, and then Mailbox, and you should see two new Retention tabs:

ExchangeSP1
Click image to enlarge


A good majority of the content provided in my Blog’s Exchange series is derived from J. Peter Bruzzese’ excellent Train Signals Exchange Server 2010 Video Disk Series, as well as my own Exchange 2010 lab. Trainsignal.com is an invaluable source for accurate, easy to understand, IT information and training. http://www.trainsignal.com