Exchange 2010 – Part 19 – Client Access Server Security and Secure Socket Layer Certificates

Client Access Server Security and Secure Socket Layer Certificates

In this post we will review:

– CAS security through digital certificates and how these vary.

– We’ll also review the different SSL certificate types.

– Lastly, we’ll work through the following:

  1. Create a Certificate Signing Request (CSR)
  2. Obtain a certificate from a Certification Authority (CA)
  3. Install the SSL Certificate on the Client Access Server

Up until this point in your Exchange deployment, you may have configured access with the default self-signed certificate. This may be problematic because it doesn’t support all of the access methods (Outlook Anywhere) and isn’t the most secure method of authentication. You may decide to obtain a trusted certificate from a third-party commercial Certification Authority (CA) and install that certificate on the Client Access Server. You do also have the ability to use a PKI certificate through Microsoft Certificate Services which you can setup internally, however, the infrastructure costs and labor may not be worth the trouble.

Managing Authentication

  • A digital certificate will authenticate to the client that the server with the certificate is trust-worthy. The server can prove, they are who they say they are.
  • In addition, a digital certificate will ensure the data that is exchanged is protected.
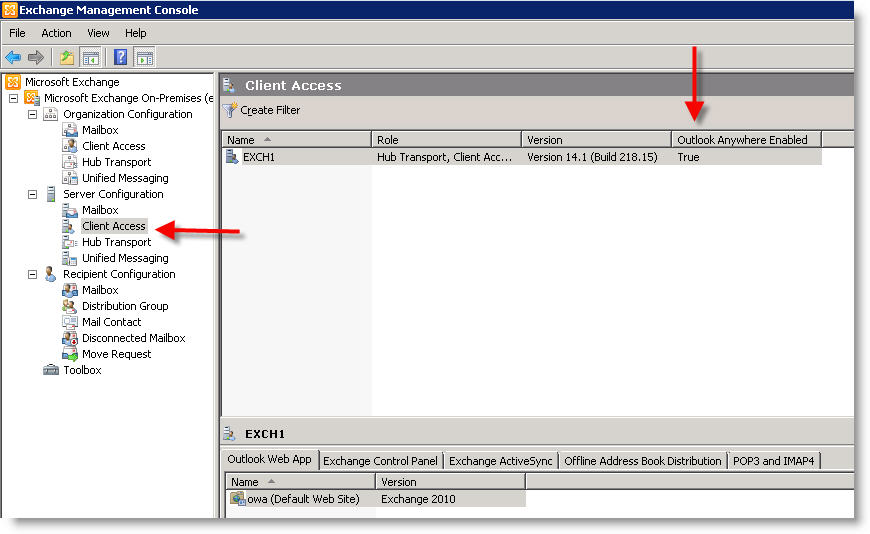
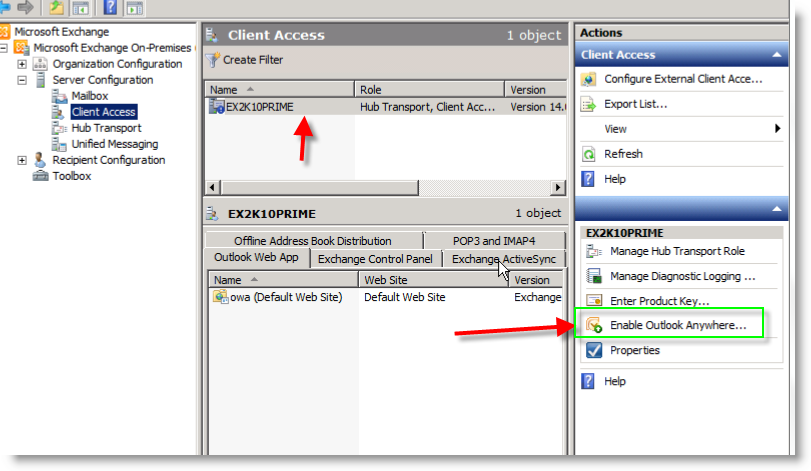
  • By default, with Exchange 2010, client communications are encrypted using SSL with Outlook Web App, Exchange ActiveSync, and Outlook Anywhere (SSL will not use the Self-Signed Certificates). By default, POP and IMAP aren’t configured to communicate over SSL. You will use the IIS Manager to ensure SSL is enabled on the virtual directory.

Go to the IIS Manager on your mailbox server. Select the server itself, scroll down to Server Certificates. Here you’ll find the Microsoft Exchange Certificate (Issued to itself by itself).

Click Image to Enlarge

You can double-click on the certificate and check out the properties and see that it’s not trusted.

In IIS, expand Sites and then Default Web Site.  If we look at the different sites in IIS, as far as SSL turned on, click on OWA, and then Secure Socket Layer settings, and see if it says “Require SSL”. We can test to see if that works by browsing to localhost in the web browser. An easy way to do this is to click on the “Browse: 443 (https)” link in the Actions pane:

iissslbrowse443
Click Image to Enlarge

This will open the browser and we’ll be brought to our Outlook Web App. We will have a certificate error. Users will have to install the certificate if they want to get rid of the Red Security Trust Bar in their browser. In this case we will want to install the certificate into the Trusted Certificate Store. Windows cannot validate the certificate, but since we know where the certificate is from we can install it and accept the warning.

Three types of Certificates:

  1. Self-signed: Signed by the application itself (in our case Exchange 2010) and will allow for OWA and/or ActiveSync functionality but not Outlook Anywhere. *For these to work you have to manually copy them over to the trusted root certificate store of the client computer or mobile device.
  2. Public Key Infrastructure (PKI): Requires setting up certificate servers and establishing the certificates for communication.
  3. Trusted Third-Party Certificates: Provided by a CA, these are automatically trusted by clients (unlike the two options above), so the deployment is simplified.

Certificate Types

When you go to purchase a certificate from a CA you’re going to find that different types to purchase.

  • Wildcard Certificates: Can represent multiple domain names (for example *.jasoncoltrin.com), however these types of certs provide a less secure method because the wildcard can be used for any sub-domain. Microsoft does not recommend wildcard certs, but to use SAN’s.
  • Subject Alternative Name (SAN) or Unified Communications Certificates (UCC) certificates are considered better in this regard because you specifically list out each of the trusted domain names. *It is considered best practice to use as few host names as possible (perhaps as few as three).

The CA Process for Obtaining and Installing Certs

  • Take a look at the GoDaddy website for SSL Certificates
  • Begin the process of managing a purchased certificate
  • We will return to our Exchange Server and use the Exchange Certificate Wizard to obtain a Certificate Signing Request (CSR)
  • Use the CSR to complete the GoDaddy certificate process
  • Once that certificate is provided (up to 72 hours), we will install it on our Client Access Server
On our Mailbox Server, open the EMC, browse to Server Configuration.
Under the Server Config Node, beneath the servers, we will have our Exchange Certificates.
What we really want is an SSL certificate from a CA.
In the GoDaddy website, we’ll purchase our cert, manage our Products -> manage my certificates, and then in the SSL management, we will click “Request Certificate”. It will ask where the cert will be hosted. We will want to choose Third Party or dedicated server. Now we will need to Enter your Certificate Signing Request (CSR). Use at least a 2048 bit key.


Go back to the EMC, under server configuration, in the Actions Pane, click on New Exchange Certificate. For Starters, enter a friendly name for the certificate.
If we want to Enable Wildcard Certificate we can do that here. But we don’t want that at this time, we want a literal domain name so leave unchecked and click next.
Now depending on the cert purchased, our options here will be different. For example we have 5 certs purchased and can only use 5 names.
For Federated Sharing, we will place a checkmark in the Public Certificate because in the future we may want to Federate with a different site.
For Client Access Server (Outlook Web App), for the Intranet – you may want to use a local name like mail.jasoncoltrin.local and for the Internet – use mail.jasoncoltrin.com
New Exchange Certificate
Click Image to Enlarge
We want Exchange ActiveSync, so perhaps sync.jasoncoltrin.com is the name we’ll want to use. Most use mail.domainname.com.
Go down the list and have Exchange Web services enabled; Outlook Anywhere enabled.
Autodiscover used on the internet: Autodiscover URL to use: autodiscover.jasoncoltrin.com.
The use of sync.jasoncoltrin.com differentiates and relates to mobile devices. When you set up the cert, that’s when it (the name) counts. For the dropping of POP and IMAP support, in all honesty is probably a good thing, and we prefer a more secure protocol and have everyone come in through ActiveSync. With ActiveSync we have the ability to wipe devices.
At this time we don’t need a cert that supports POP or IMAP.
For Unified Messaging, you can go with a self-signed cert.
At this time we are going to skip Hub Transport server mutual TLS and Hub Transport server for POP/IMAP.
At this time we are not going to use Legacy Exchange Server.
Clicking next will give us a review of our cert (request). In our case we have 6 names. To bring this down to 5, we can change intranet/internet mail.jasoncoltrin.local to mail.jasoncoltrin.com and save a name.
Click next, and the wizard will ask for some information. The full legal organization name, Org unit (none), Country, City, State, Certificate Request File Path – name the file something like “SSLRequest”, then New and Finish. Make sure the CSR generated is 2048 bit. Once finished, browse to where the file was placed, open the Certificate request with notepad, and copy and paste the entire string including –Begin new cert —  to   —End New Cert..— into the GoDaddy.com CSR text box.
SSLCertcopytoCSR
Click Image to Enlarge

After submitting the encrypted data to GoDaddy, you will see the Subject Alt Names and Primary Domain Name. Your cert will be issued shortly (72hrs), and at that time we will be able to import it. Once the cert is issued, you can download it from GoDaddy. The cert will come down zipped, so unzip it.

Go back to the EMC, You will still see your requests and your self signed cert. Right-click on the SSL Cert and choose Complete Pending Request.

CompleteCertRequest
Click Image to Enlarge

Browse to the downloaded cert (domain.com – not the intermediate cert), click complete, and that’s all there is to it. So we’ve installed it but don’t have any services using it. Right-click on the cert and choose Assign Services to Certificate.

AssignCertServices
Click Image to Enlarge

Use SMTP, IIS, click Next, and then Assign.

AssignServices
Click Image to Enlarge

Do we want to override? Yes.

When we downloaded and unzipped the SSL Certificate, we also received an Intermediate Certificate. The intermediate certificate is used to enhance the security of the root certificate. These are also called a Chained Root Certificates. There are instructions on the GoDaddy site for installing the Intermediate Certificate. It is optional, but you should install the Intermediate certificate if the CA provides you with one, but we will forego that for now. Your CA may or may not issue Intermediate certificates.

In conclusion, in this lesson we discussed the benefits of SSL digital certificates, encouraged SAN certificates, worked through the process of requesting a certificate from the GoDaddy Certificate Authority, and installed and enabled services using that cert on our Exchange Client Access Server.


A large majority of the content provided in my Blog’s Exchange series is derived from J. Peter Bruzzese’ excellent Train Signals Exchange Server 2010 Video Disk Series, as well as my own Exchange 2010 lab. Trainsignal.com is an invaluable source for accurate, easy to understand, IT information and training. http://www.trainsignal.com

Exchange 2010 – Part 18 – Understanding and Managing Outlook Anywhere and POP/IMAP

Exchange 2010 – Part 18 – Understanding and Managing Outlook Anywhere and POP/IMAP

In this post, we’ll look at two main parts to Outlook Anywhere and the POP/IMAP protocols:

  1. We will explain the concepts of Outlook Anywhere, POP, and IMAP.
  2. We will look at the implementation of Outlook Anywhere, POP and IMAP.

Outlook Anywhere, POP and IMAP are different from Outlook Web App and ActiveSync. You can get OWA and ActiveSync to work with an Exchange self-signed certificate. Although for a production environment, it’s best to setup your own cert server or purchase a certificate from a Third-Party Certificate Authority. But with Outlook Anywhere, POP/IMAP, to go live, you need valid certificates. If you’re tempted to setup a PKI infrastructure, it’s not as easy as you might think. It usually isn’t worth the headache when you can purchase certs from CA’s for a very low cost.

Outlook Anywhere Overview

  • Outlook Anywhere allows external clients to use Outlook 2003/2007/2010 to connect directly to their corporate network email, without using a VPN connection.
  • Outlook Anywhere uses a networking feature called RPC over HTTP (in fact, in legacy Exchange versions that was the name of Outlook Anywhere). RPC over HTTP is a component in Windows – where Outlook Anywhere takes client connections using Remote Procedure Calls, boxes it up in HTTP and passes it through the firewall.
  • All you have to do is enable Outlook Anywhere on a CAS server
  •      *Install a valid SSL certificate – because certs touches on many areas which we will cover in a later post.
  •      *Install the RPC over HTTP component – this component is probably installed already during an initial installation. If we still need to install, you go to Server Manager -> Features -> Add Feature
  •      *Enable Outlook Anywhere.
  • You can enable Outlook Anywhere from EMC or EMS
  •      *”Enable-OutlookAnywhere” cmdlet.
  • To test Outlook Anywhere you can use the following tools:
  •      *Run the Test-OutlookConnectivity cmdlet to ensure your RPC over HTTP connections and TCP/IP settings are right.
  •      *Run the Exchange Remote Connectivity Analyzer (ExRCA) tool.
  • Testing looks for the following:
  1. Autodiscover connectivity
  2. DNS validation
  3. Certificate Validation
  4. Firewall configuration
  5. Client connectivity

POP and IMAP Overview

  • Protocols for connecting to Exchange (disabled by default) most organizations would prefer you do not use POP as a security liability.
  • The old standard: POP was designed for ‘offline mail processing’
  •       * POP removes emails from the server and brings them down to a local client (unless configured otherwise)
  •       * POP doesn’t provide calendaring, contacts, or tasks
  • The new standard: IMAP
  •      * Provides both online and offline access but still no extra features like calendaring, contacts, or tasks
  • Note: These are ‘receive protocols’ not ‘send protocols’ so they still rely on SMTP to send email
  • With both POP and IMAP, the client is responsible for checking in for mail, it isn’t pushed down to the client.
  • Enabling POP and IMAP is as easy as enabling the services on the system
  • After the services are running you can enable your users to use POP or IMAP
  • You can configure various properties for each protocol including:
  •      * Connection Limits
  •      * Security
  •      * Message Retrieval format options

To enable Outlook Anywhere, open the EMC and browse to Server Configuration and then the Client Access Role:

OutlookAnywhereCA1

Click Image to Enlarge
In the screenshot above, you can see that Outlook Anywhere is already enabled. However if it was not, and you wanted to enable it, you’d highlight the Client Access server, and then in the Action Pane, click on Enable Outlook Anywhere.
ScreenShot004
Click Image to Enlarge

From here you will be directed to a simple Wizard. Here you will enter the External Host Name:

ScreenShot005

Click Image to Enlarge

Here we will want to provide an External Host Name that an external client will use to connect to the server, something like site.jasoncoltrin.com or mail.jasoncoltrin.com.

Client Authentication method:

Basic Authentication – A client will need to provide a domain/username/password and will need to be entered every time when connecting to the server. When Basic Authentication is used, the information will be sent in clear-text over the wire.

NTLM Authentication – The user doesn’t have to enter a Username/Password, the windows network authentication is used and is encrypted and a hash is passed through the networks. NTLM Authentication can cause problems when trying to pass the encrypted traffic through firewalls, and some Exchange Admins will want to use Basic authentication if users are not members of the Exchange Server’s domain. Clients that have already logged into a domain, are simply passing cached credentials to Exchange.

Allow Secure Channel (SSL) offloading – This is all about if you have a separate server for SSL encryption/decryption. Some choose to use a SSL accelerator to offload the CPU processing power used for SLL.

First, make sure that under the Server Manager -> Features -> make sure the RPC over HTTP Proxy feature is Installed/Added.

The command for enabling Outlook Anywhere with the Exchange Management Shell will something like the following:

enable-OutlookAnywhere -Server ‘EXCH1’ -ExternalHostname ‘mail.jasoncoltrin.com’ -DefaultAuthenticationMethod ‘Basic’ -SSLOffloading $false

 To configure POP3 and IMAP4, we do not enable/configure it through the Exchange Console, we will actually go into the server’s services:

Start -> Administrative Tools -> Services (control panel)

Find the service named Microsoft Exchange POP3 ->Startup = Automatic -> Startuptype: Automatic (then start the service)

Find the service named Microsoft Exchange IMAP4 ->Startup = Automatic -> Startuptype: Automatic (then start the service)

To make changes to the protocols, you can change them in the EMC -> Client Access -> POP3 and IMAP4 tab.

To Configure the Clients i.e., to decide which recipients are allowed access to Outlook Anywhere/POP3/IMAP4, go into EMC ->Recipients ->Right-click on users -Properties ->Mailbox Features Tab -> Enable/disable POP3/IMAP4

Using the Set-CASMailbox cmdlet

In order to control the access to some of our client access server settings, we want to use the Set-CASMailbox cmdlet.

  •  The Set-CASMailbox cmdlet is used to set attributes related to client access for ActiveSync, OWA, Outlook Anywhere, POP and IMAP for specified users.
  • You can use the command with the -MAPIBlockOutlookRpcHttp parameter to determine if clients can connect to Outlook using Outlook Anywhere. For example, if you want make sure users in a certain location deny them the ability to use Outlook Anywhere.
  •      * Get-Mailbox “UserHere” | Set-Casmailbox -mapiblockoutlookrpchttp:$true
  •      * Get-Mailbox -OrganizationalUnit “OU here” | Set-Casmailbox -mapiblockoutlookrpchttp:$true (anyone who has this applied will not be allowed to use Outlook Anywhere).
  • Or you can use ISA or some other solution to block entry (or other proxy filtering software)
To verify Outlook Anywhere has been enabled, you can see an event in the Application Log event 3006, “The Outlook Anywhere feature has been enabled.”

In review, we learned the purpose of Outlook Anywhere, POP and IMAP. We reviewed the initial configuration of these different access methods. It’s not all that complicated to setup.

A couple of EMS points to remember:

*Enable-OutlookAnywhere (can enable through shell)

*Test-OutlookConnectivity (ensures connectivity is solid) – an excellent tutorial for using the Test-OutlookConnectivity cmdlet is located here: http://blogs.catapultsystems.com/tharrington/archive/2010/09/17/troubleshooting-the-client-access-server.aspx

*Set-CASMailbox (cmdlet configures users for access to the Client Access Server)


A large majority of the content provided in my Blog’s Exchange series is derived from J. Peter Bruzzese’ excellent Train Signals Exchange Server 2010 Video Disk Series, as well as my own Exchange 2010 lab. Trainsignal.com is an invaluable source for accurate, easy to understand, IT information and training. http://www.trainsignal.com