How to find the Windows Experience Index in Windows 10 with Powershell

Use PowerShell to get the Windows Experience Index in Windows 10

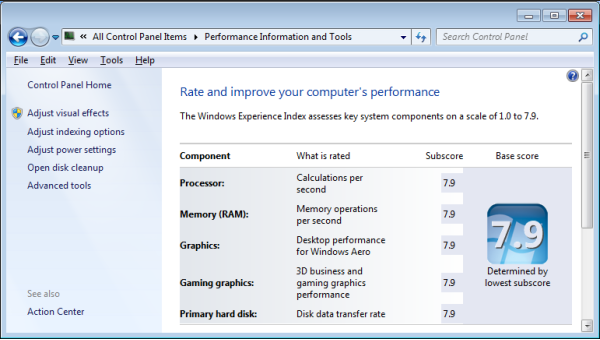
Windows 7 has the Windows Experience Index which is used often by hardware techs to get a good idea about the kind of hardware installed in a PC. It also allows you to quickly find  where improvements can be made to get the machine to run faster. The following screenshot is an example of the Windows 7 Windows Experience Index:
You can get an idea about how fast the components of your Windows 10 computer are by running the Windows System Assessment Tool, but the readout is a little hard to understand. Skip this part (winsat formal) to get the Windows Experience Index in Windows 10 or Windows 7 with PowerShell below.

First open an elevated command prompt and run the command:

winsat formal

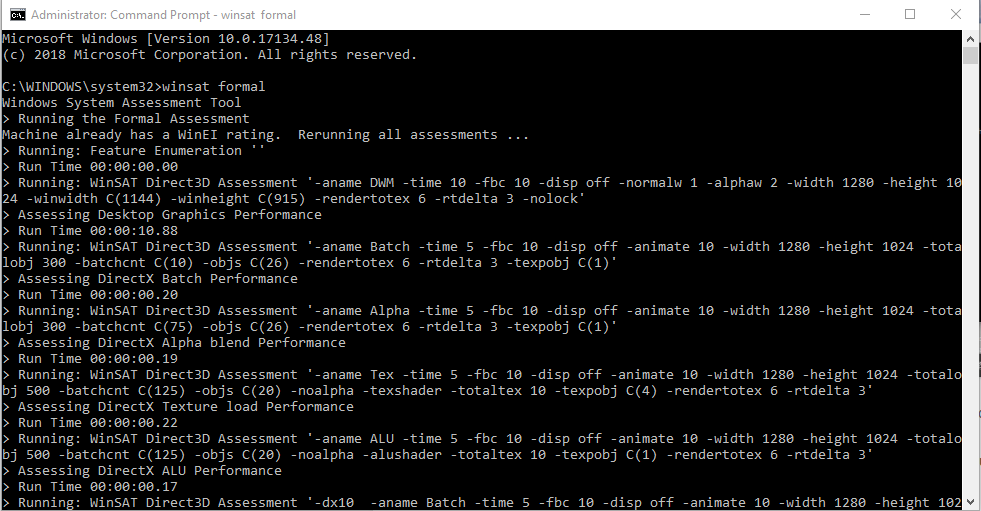
Below is a screenshot of the command running and it’s output. Running this tool will slow down your PC for a few minutes as it runs the tests:
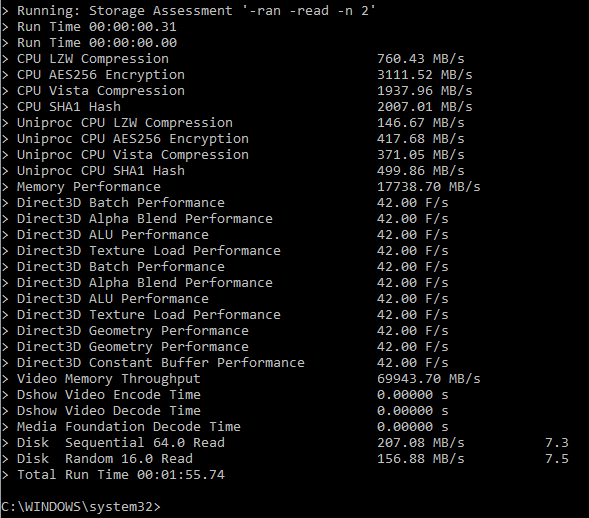
Results:
The Windows Experience Index WMI modules are still available in Windows 10, however, the scores are not readily apparent in the Windows 10 system settings.
To get your Windows 10 Windows Experience Index subscores with PowerShell, first open up the Windows PowerShell ISE. Next, go to the following link: https://pastebin.com/i5M81xsV, -credit goes to reddit user:
*(as of 12/20/18 this code was no longer available on pastebin, so I’ve copied below)
$SysInfo = Get-CimInstance -Query "SELECT WinSPRLevel,CPUScore,MemoryScore,DiskScore,GraphicsScore,D3DScore From Win32_WinSAT"

    $SysParams = @{
                    Perf_WinExp_All = $SysInfo.WinSPRLevel
                    Perf_WinExp_CPU = $SysInfo.CPUScore
                    Perf_WinExp_RAM = $SysInfo.MemoryScore
                    Perf_WinExp_DSK = $SysInfo.DiskScore
                    Perf_WinExp_VID = $SysInfo.GraphicsScore
                    Perf_WinExp_D3D = $SysInfo.D3DScore
                    Perf_WinExp_AVG = "{0:N2}" -f ((($SysInfo) |
                    ForEach-Object {$_.CimInstanceProperties.Value})[0..4] |
                    Measure-Object -Average).Average
                   }
                   
    New-Object -TypeName PSobject -Property $SysParams
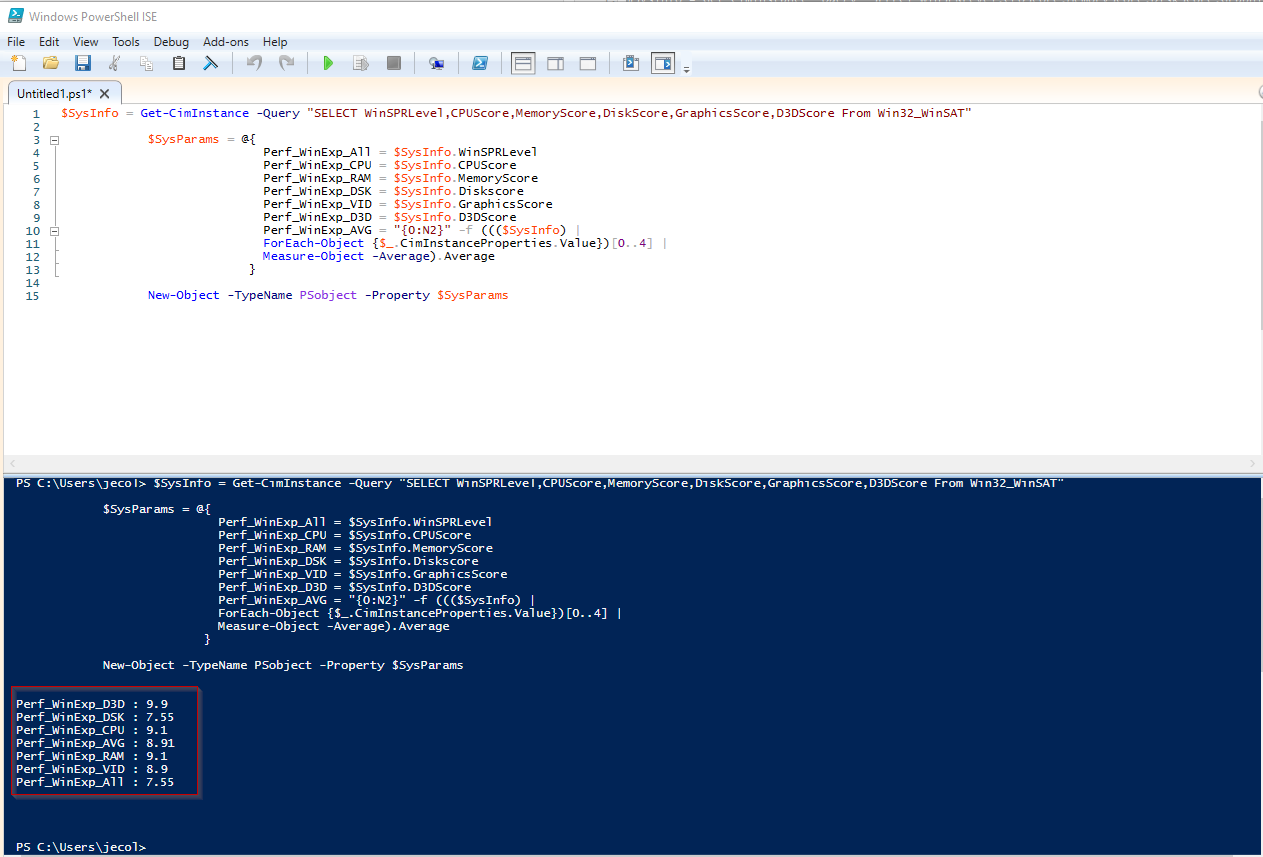
Copy the code into the Windows 10 PowerShell ISE and then run the script, or create a .ps1 file, and you can get the Windows Experience Index with PowerShell in either Windows 10 or Windows 7:

Here’s my results

Perf_WinExp_D3D : 9.9
Perf_WinExp_DSK : 7.55
Perf_WinExp_CPU : 9.1
Perf_WinExp_AVG : 8.91
Perf_WinExp_RAM : 9.1
Perf_WinExp_VID : 8.9
Perf_WinExp_All : 7.55
Here are the scores from my friend’s laptop (thanks Stan):
Perf_WinExp_D3D : 9.9
Perf_WinExp_DSK : 8.15
Perf_WinExp_CPU : 8.2
Perf_WinExp_AVG : 8.09
Perf_WinExp_RAM : 8.2
Perf_WinExp_VID : 6
Perf_WinExp_All : 6

So you can see that in my results, my WEI score would be 7.5 – where the lowest subscore determines my overall result. Looking at the scores, I can improve my score and upgrade my computer by increasing the DSK (disk) performance. To do this I would probably have to upgrade my motherboard to one that supports an NVME hard drive.

My friend’s laptop’s lowest score is VID (video) which means his laptop GPU is keeping the score low. There are a few options for upgrading a laptop GPU, such as an external GPU, but this isn’t surprising as most laptops GPUs can’t compete with a full-sized computer and GPU.

How to format a large external usb hard drive for use between both an OS X Mac and a Windows 10 PC

All versions of Windows since Windows Vista should be able to access a GUID drive. Because OS X is able to partition a GUID partition, we want to partition our large external hard drives with this compatible partition table. So, any modern computer since 2006 should be compatible. GUID doesn’t suffer from the restriction of a maximum partition size of 2TB, so if we have a hard drive larger than 2TB, we won’t be required to build multiple partitions with MBR.

Here’s a good quote for other important features regarding GUID (GPT stands for GUID Partition Table).

“On an MBR disk, the partitioning and boot data is stored in one place. If this data is overwritten or corrupted, you’re in trouble. In contrast, GPT stores multiple copies of this data across the disk, so it’s much more robust and can recover if the data is corrupted. GPT also stores cyclic redundancy check (CRC) values to check that its data is intact — if the data is corrupted, GPT can notice the problem and attempt to recover the damaged data from another location on the disk. MBR had no way of knowing if its data was corrupted — you’d only see there was a problem when the boot process failed or your drive’s partitions vanished.”

exFAT was released in 2006 as well, but Microsoft added backwards-compatibility to previous Windows versions from before Vista. The main benefit to it is that it doesn’t have the file size restrictions of FAT32, so individual files with exFAT can be larger than 4GB each. It probably isn’t super important for smaller files, but it could be a necessity for people working on larger files like videos or disk images.

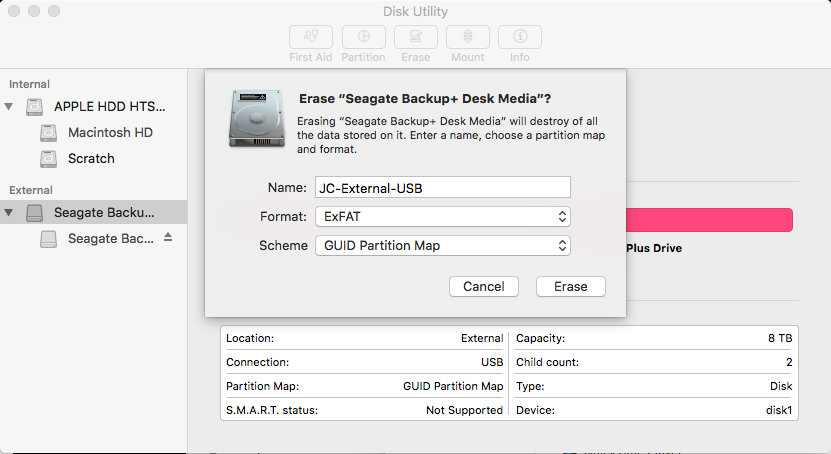
Below is a step-by-step procedure for formatting a large External USB drive which can be used by both a Mac and a PC. This setup will utilize the newest, most fault-tolerant partition tables, and allows for the largest volume and file size capabilities. In my case I am formatting an 8TB Seagate Backup Plus+ USB 3.0 external HDD hard drive.

First, plug a new USB drive into a Mac:

  1. The Mac will automatically prompt if you want to use the drive as a Time Machine backup Disk – click “Don’t Use”
  2. Open Disk Utility
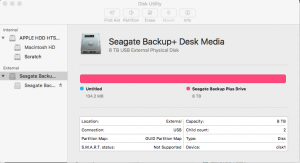
  3. On the left side of Disk Utility, under External, you should see your drive listed.
  4. Select the “highest-level” of the drive, not the partitions located underneath. In my case, Seagate Backup+ Desk Media.PC Mac External drive format (1)
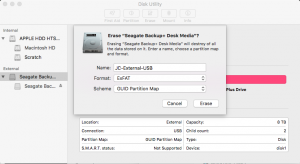
  5. At the top of Disk Utility, click the “Erase” button.PC Mac External drive format (2)
  6. Name your disk, such as “JC-External”.
  7. Under “Format” drop-down menu, select “ExFAT”
  8. Under “Scheme” drop-down menu, select “GUID Partition Map”PC Mac External drive format (3)
  9. Click “Erase”
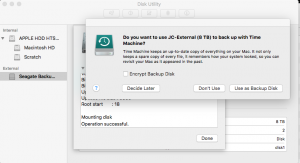
  10. Once the drive has been erased, again, Time Machine will prompt to use as a backup disk – select “Don’t Use”PC Mac External drive format (4)
  11. Click “Done”
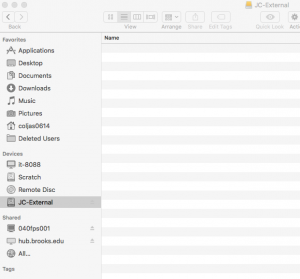
  12. Your drive should now be listed under Devices in the Finder.PC Mac External drive format (5)
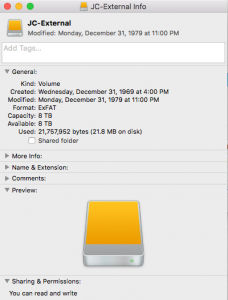
  13. Control-click or right-click on the device in the Finder, and click “Get Info”.  You can see that indeed it created an 8TB ExFAT Volume, but the Sharing and Permissions cannot be modified. Permissions can only be set if the drive is formatted with  “OS X Extended”. Also, notice that the Created/Modified dates may not be accurate, however, files and folders contained in the drive will display accurate modified dates/times.PC Mac External drive format (6)
  14. One thing to note, is after initially formatting the drive on a Mac, and then attaching the external drive to a Windows 10 PC, the drive may not immediately display with a drive letter by default in the Windows File Explorer. Go into Windows 10 Disk Management and find the drive listed in the discovered drives, but you may find that a drive letter is not associated with the volume.
  15. To fix this, in Disk Management, right-click on the large/unidentified new data volume and click “Change Drive Letter and Paths…”. Next, click the Add.. button, assign a drive letter (D:) and then OK. You should now find your external drive listed in Windows Explorer and see the files and folders you copied into it while it had been connected to your Mac.

How to Setup User Account for Child on Windows 10 Tutorial

This video shows you how to setup a user account for your kid/child without creating an email address. Windows 10 wants you to use an email address to create a user account. When you try to setup an account, it asks you to use an existing email and if not, it tries to force you to sign up for an outlook.com account. This video shows you how to bypass the Windows User account setup and use Computer Management to create a normal/local user account on Windows 10 Pro version for your kids.

How to create and shrink partitions in Windows 10 – video

I’ve posted a new video here that demonstrates how to shrink an existing partition with Disk Management and then create a new partition with the empty space in Windows 10.

Sometimes you’d like to have a separate partition for data or scratch drives to keep your data safe when you run backups or re-install an operating system or software. Other times you create new partitions to install a different operating system and do a “Dual Boot” with the extra partition. Let me know if you’d like to see a video or a post about dual-booting Windows 10 and Linux/Debian/Ubuntu.