With the release of Windows 10 Creators Edition version 1709, comes more bells, whistles, tricks, and shortcuts for us to dig into and explore. In this article, we’ll look mostly at the Windows Key shortcuts available and how the shortcuts and key combos can help us in our daily workflow.
In the event you’re not already aware, the Windows Key on your keyboard (usually between the Ctrl and the Alt keys in the lower left area of most keyboards) has a lots of capabilities when held down while pressing other keys on the keyboard. Pressing this key on it’s own launches the Start Menu:
Windows Key + A – Brings up the Windows Notifications SideBar. Here we can find existing notifications, switch to tablet mode, get into the windows settings panel, join a WiFi network, and change our location settings.
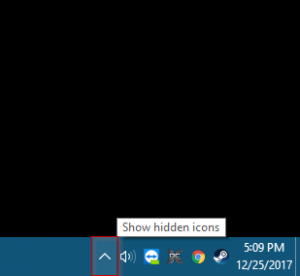
Windows Key + B – Select / Activate the Systray / Show Hidden Icons Expansion menu. This can come in handy as a few applications run as services and can only be accessed by right-clicking on the icon in the Systray; if your mouse stops working, this is a good shortcut to know.
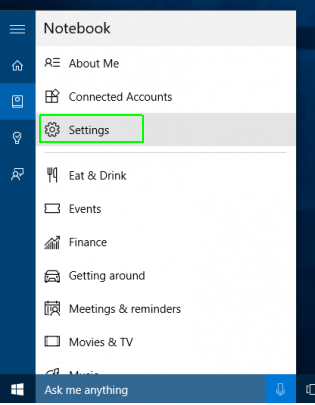
Windows Key + C – Opens Cortana in Listening Mode. “Hey Cortana!” This is disabled by default and can be activated in the Cortana Settings. (Enable in Cortana > Menu > Notebook
Windows Key + D – Show the desktop
Windows Key + E – Open File Explorer
Windows Key + F – Open the Feedback Hub and Take a screenshot (this didn’t work for me)
Windows Key + G – Open the X-Box Game Bar
Windows Key + H – Open the Dictation control bar
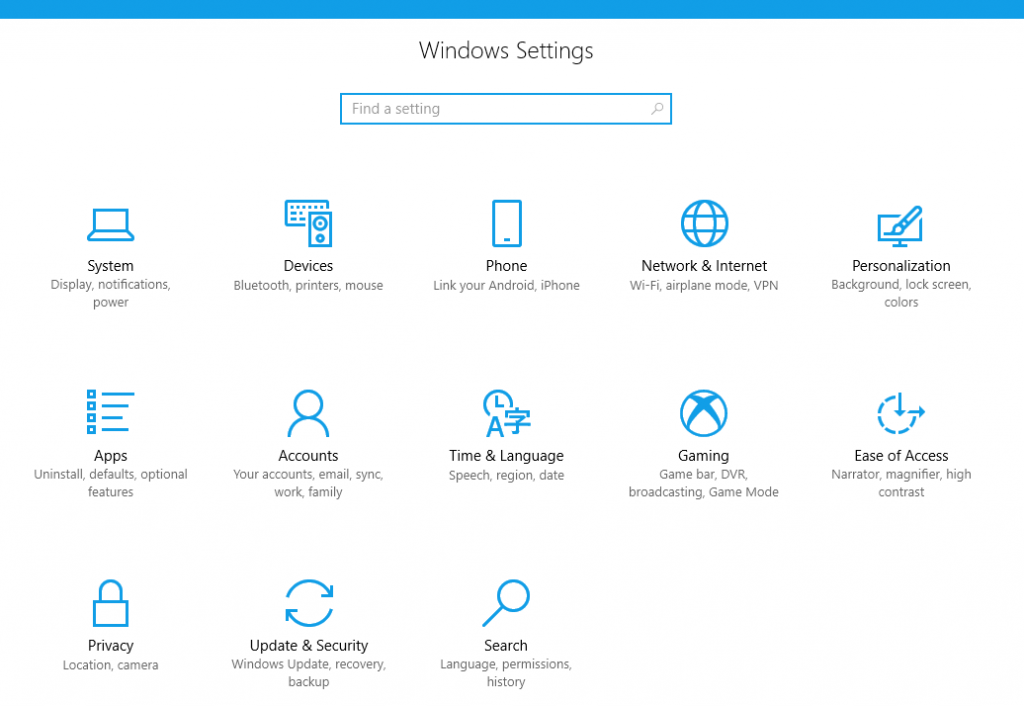
Windows Key + I – Opens the Windows 10 Settings
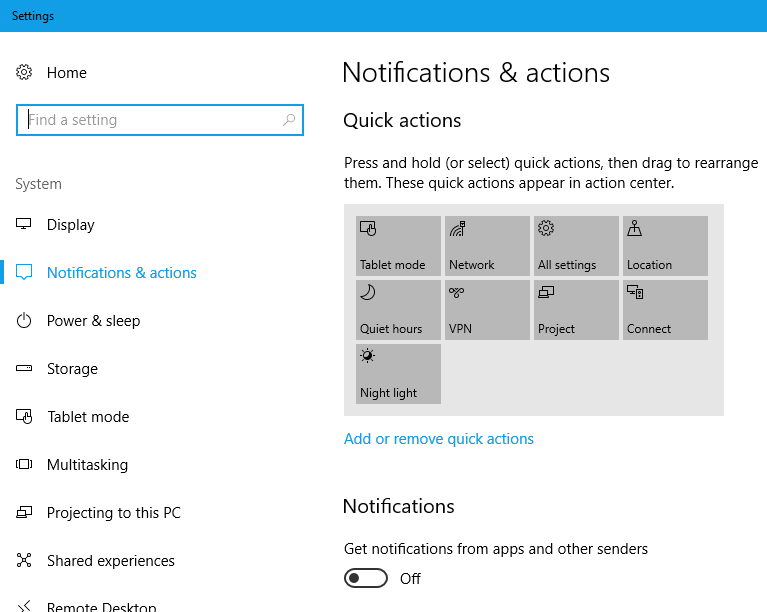
Windows Key + J – Sets focus to Windows Tips when one is available (Turn off tips in Settings > Notifications & Actions)
Windows Key + K – Open the Connect Quick action (connect to a wireless projector)
Windows Key + L – Lock your PC or Switch Accounts
Windows Key + M – Minimize all windows
Windows Key + O – Lock the device orientation (helpful for tablets)
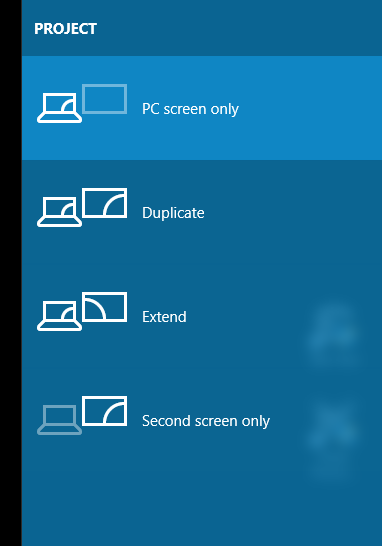
Windows Key + P – Choose a presentation display mode (Sidebar Projectors tool)
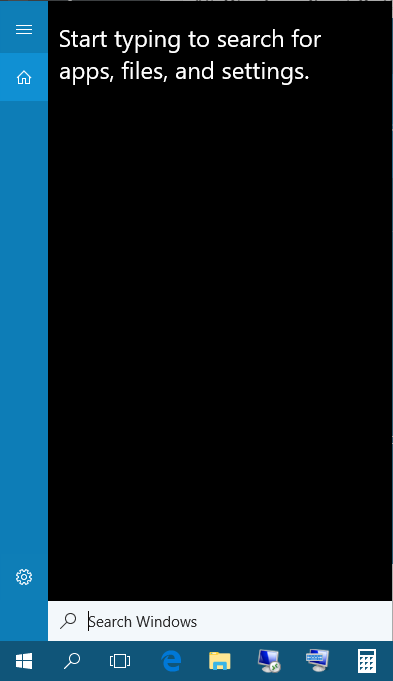
Windows Key + Q – Quick file search
Windows Key + R – Open Run dialog box
Windows Key + S – Open Windows Search (same as Windows Key + Q)
Windows Key + T – Cycle through apps pinned to the taskbar (cycle in reverse is Windows Key + Shift + T)
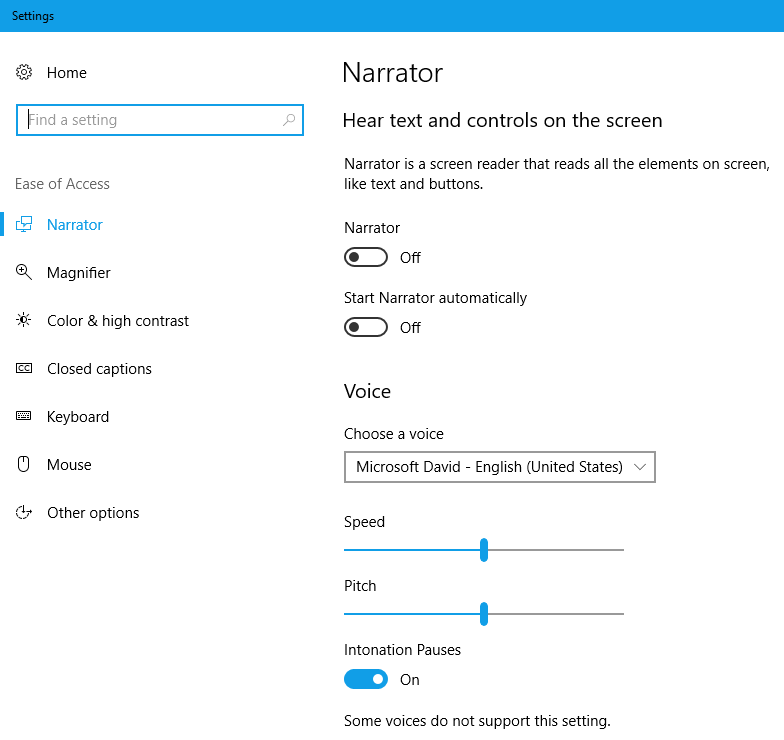
Windows Key + U – Open Ease of Access Center
Windows Key + V – Cycle through windows notifications
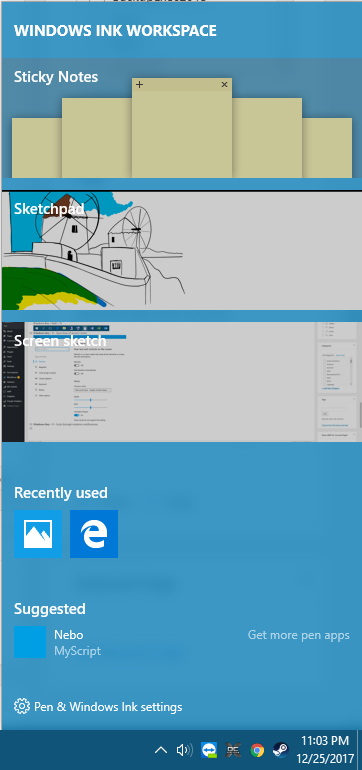
Windows Key + W – Opens the Windows Ink Workspace
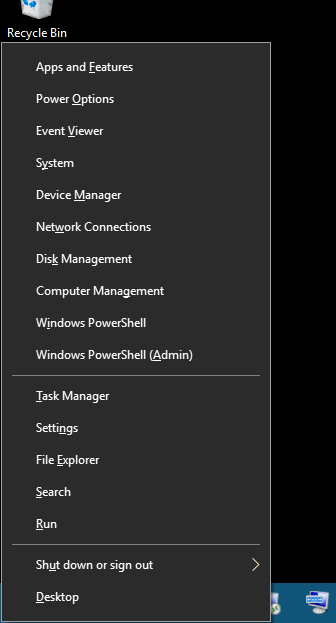
Windows Key + X – Opens the Quick Links Menu (right-click on the start menu)
Windows Key + Y – Switch input between Windows Mixed Reality and desktop (Your PC may not meet the minimum specs for Windows Mixed Reality)
Windows Key + Z – Shows menus or commands available when an app is in full-screen mode.
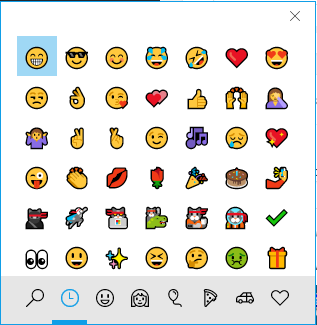
Windows Logo Key + period (.) or semicolon (;) – Opens the Windows 10 Emoji control panel 👍
Windows Key + Comma (,) – temporarily peek at the desktop
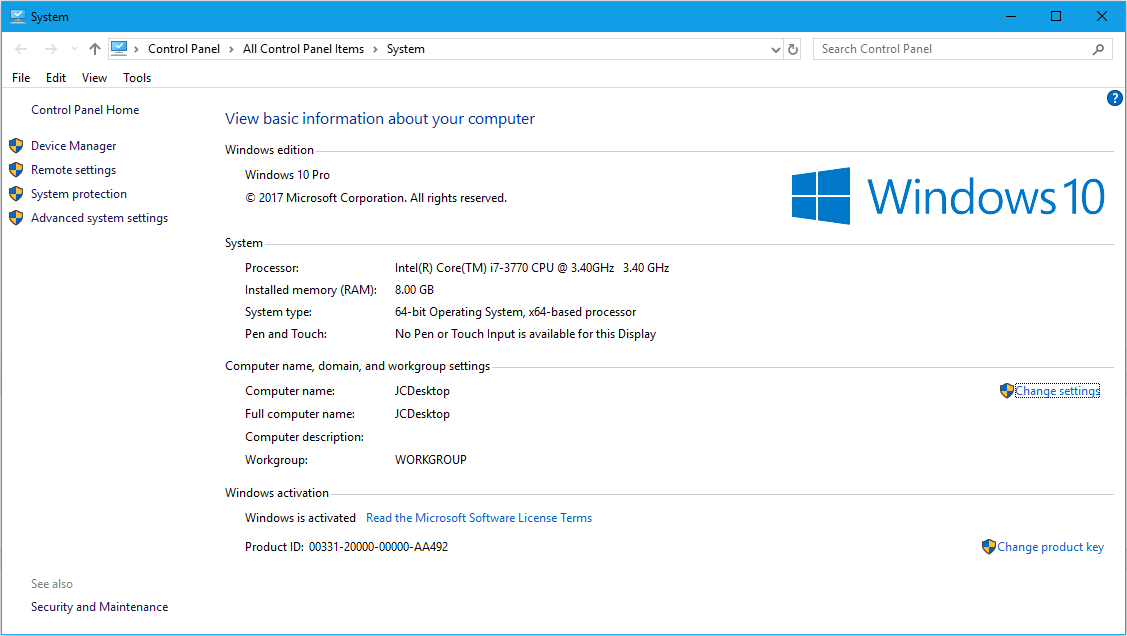
Windows Key + Pause/Break – Opens the System Properties
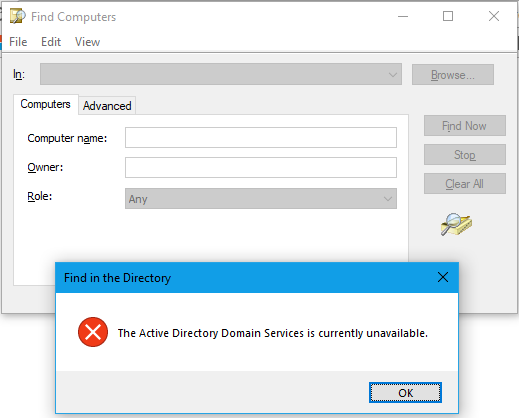
Windows Key + Ctrl + F – Search for Active Directory computers on a network
Windows Key + Number/Shift/Ctrl/Alt – Manage TaskView Virtual Desktops
I’m sure there are more so let me know in the comments if I missed any and let us know which are your favorites (mine is Windows Key + Pause/Break)
Use a Base Framework for your security project. There are a lot of standards available and the NIST government standards are a good solid foundation:
NIST 800-53
NIST Cybersecurity Framework
NIST CSF Tool
CIS Critical Security Controls
NIST-CSF tool – this is a nice visual tool – graphical interface for the stages of building a security program
Document everything
A core documentation repository is critical when setting up a security project – others will follow you and will need to look up the information you have recorded. It’s best to have a security incident response ticketing system and documentation before you need it. Have these tools up and ready.
For policy, procedure, how-tos, etc:
MediaWiki(free)
Atlassian Confluence ($10 for 10 users) – glyfee plugin for confluence
OneNote/SharePoint – not every company is entirely open source
NetDB – Uses ARP tables and MAC databases on your network gear. (use a service account and NetDB will use ssh/telnet to find every device connected, will give a nice http interface. You can setup a cron job that will scan NetDB database every hour. You can pipe new device connections to an email address. Knowing if something comes onto your network is critical.
Map your network – create a Visio document and have a good network map.
Visibility
Facebook-developed osquery and this tool can give you all you need.
Agents for MacOS, Windows, Linux
Deploy across your enterprise w/ Chef, Puppet, or SCCM
Do fun things like search for IoC’s (FBI file hashes, processes) – pipe the data into ElasticStack for visibility & search-ability
SpiderFoot: http://www.spiderfoot.net/info/ – automated reconnaisance that provides a rich set of data to pinpoint areas of focus.
User Data Discovery
OpenDLP – (github) or (download an .ova) – will scan file shares and using a normal user account you can scan for available shares and data. Run over the weekend and see what you can find. Find the data owners and determine where the data should reside.
Hardening Your Network
CIS Benchmarks – Center for Internet Security Benchmarks: 100+ configuration guidelines for various technology groups to safeguard systems against today’s evolving cyber threats.
Out of the box, windows 10 is 22% for the CIS benchmark.
It’s difficult to secure your network if everything is a snowflake. While not exciting, configuration management is important. Deploy configs across your org using tools like GPO, Chef, or Puppet.
Change management is also important – use git repo for trackign changes to your config scripts.
Safety vs. Risk
Scanning for Vulnerabilities:
OpenVAS (greenbone) is a fork of Nessus which is still maintained, is the default vulnerability scanner in AlienVault. It does a great job in comparison with commercial products. Be careful, do some safe scans first and it’s not recommended to scan critical life-support equipment for example in a hospital.
Scan web apps:
Arachni Framework – for finding bugs in your developer’s code
OWASP ZAP (Zed Attack Proxy)
Nikto2 (Server config scanner)
Portswigger Burp Suite (not free – $350)
Harden your web servers:
Fail2ban – python-based IPS that runs off of Apache Logs
How to import iCalendar events into SmartMail / SmarterMail Enterprise IMAP calendar
So one of my clients have a team that have been using iCalendar to share calendars, but have decided to migrate to SmarterMail Enterprise 15.5 IMAP/Exchange for their team calendar sharing. While there is no direct way to import iCalendar events into SmartMail directly, there is a two-step approach that works pretty well.
In this case, the clients only want to migrate historical data and not current/future events. It sounds harder than it is, but the migrations shouldn’t take long and with minimal effort. If you don’t have spare gmail accounts to use then you may want to create new gmail accounts just for this purpose, or delete all calendar events in an existing google calendar between migrations.
One thing that I did notice is that reoccurring appointments will be transferred over and this may in turn create duplicates if you already have appointments in SmartMail that are reoccurring. It may be wise to remove reoccurring appointments from the source calendar prior to doing the first export.
As always it’s best to first backup your data prior to doing anything, then run a few tests to make sure that all calendar events, items, and attachments transfer successfully during the migration.
But in our test case, the Outlook (icalendar) – to – GMAIL – to – SmartMail works perfectly fine.
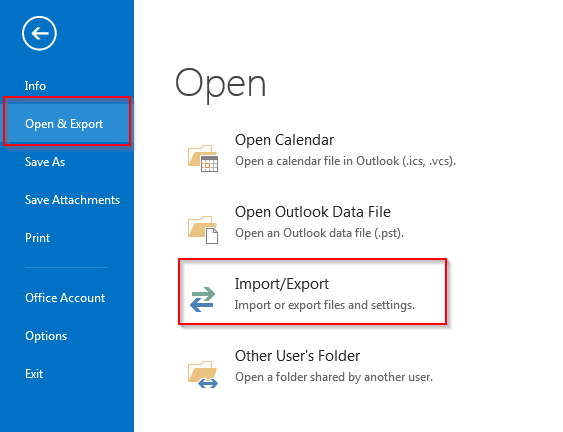
First go to Outlook > File menu > Open & Export > Import/Export > Select your iCalendar (and any other calendars you’d like to export):
Export to .CSV > Calendar (here you can select date range of events to be exported) > save to something like c:\Users\jcoltrin\Desktop\jasoncalendar.csv
Then
Login to any Google account/Gmail > Calendar > Gear Icon > Settings > Calendars > Import calendar > choose jasoncalendar.csv (import successful.)
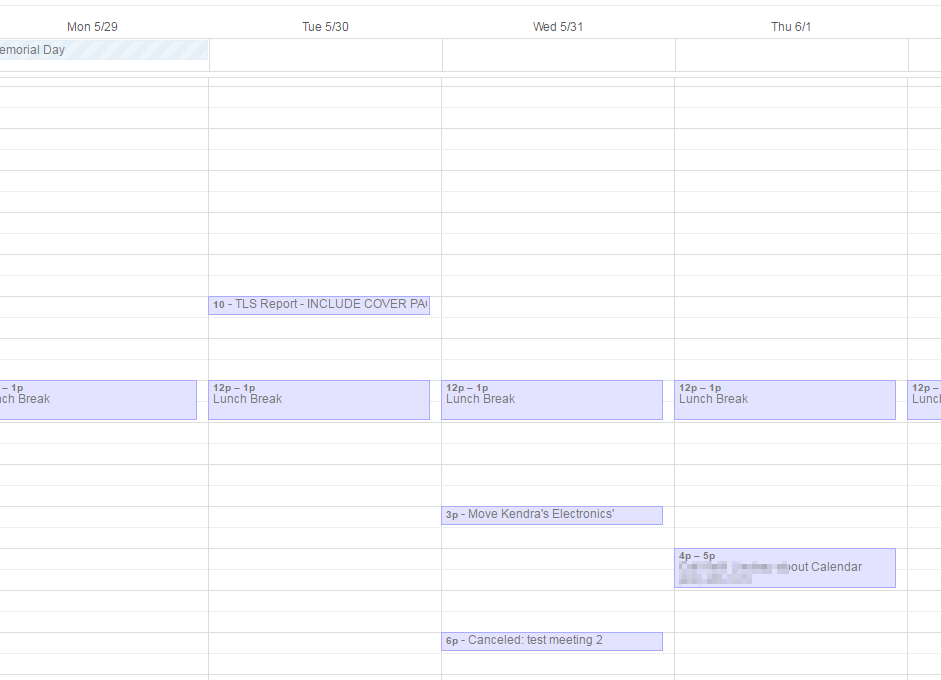
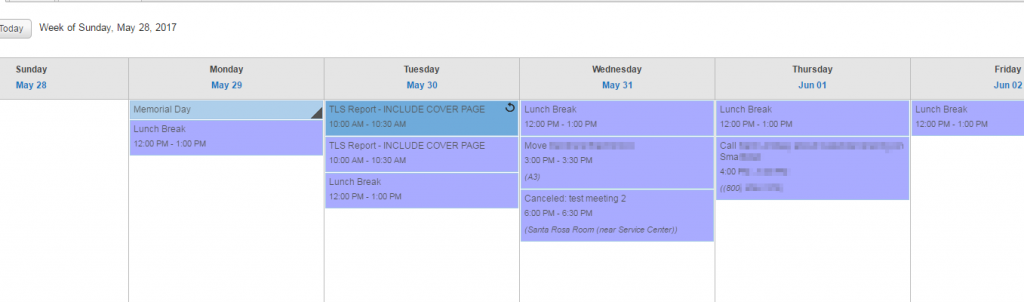
Calendar items display in my google calendar:
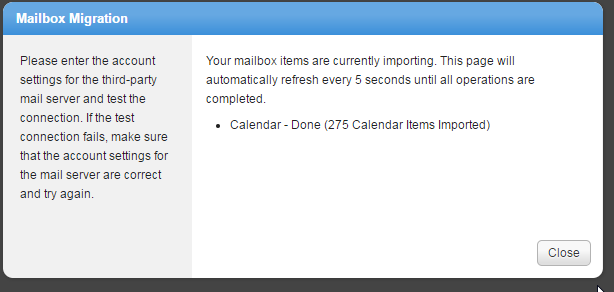
Then now that the calendar items are in my google calendar, I went into smartmail account > settings > Advanced Settings > Mailbox Migration > Account type: GMAIL > next > Check “Calendar” > do the Google authentication (which works well and uses Google’s authentication). > Import
Now the same calendar items are in my Smartmail Calendar.
How to find the original HDD hard drive disk size in a Clonezilla img image file
So if you’re a fan of Clonezilla like I am, you may have a library of .img images in a file share somewhere. I find that when taking an image of a system, it’s best to name the image/file with something descriptive such as (Win7-64-Optiplex7040-500GB-Date-img). But what happens if you want to restore data from an image onto a new hard drive, but you can’t remember, or didn’t write down the size of the disk that it originally was imaged from? As you may already know, Clonezilla doesn’t like to be restored onto disks smaller than the original disk on which it originated. There are some advanced options when saving a Disk-to-image in clonezilla, or Image-to-Disk, however I haven’t found a reliable way to restore an image to a smaller disk drive.
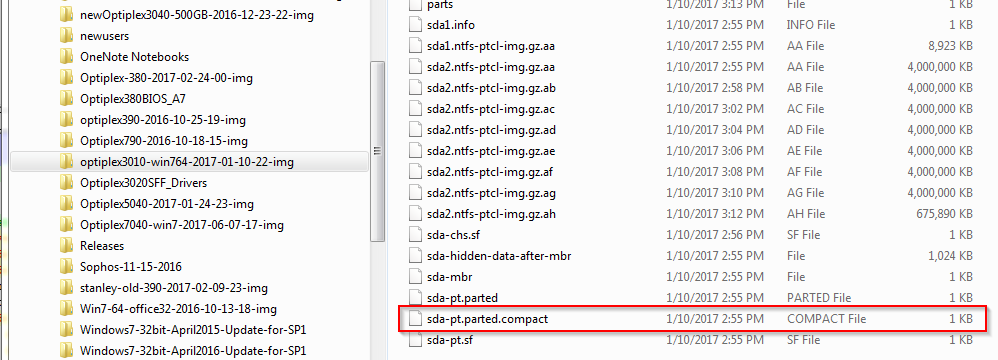
In the event you have an old image, but you’re not sure what size disk it came from originally, and you didn’t name your file with the original disk size, there is a way how to find the original disk size using the flat files that clonezilla creates when taking the image. To do this, go into the img folder, look for a file named sda-pt.parted.compact and open it with a text editor such as NotePad++.
This file will contain everything you need to know to determine the original size of a HDD that existed in the computer before you took the copy of the clone. For example, here is the contents of the file highlighted above:
Model: ATA WDC WD2500AAJS-7 (scsi)
Disk /dev/sda: 250GB
Sector size (logical/physical): 512B/512B
Partition Table: msdos
Disk Flags:

Number  Start   End    Size   Type     File system  Flags
 1      1049kB  106MB  105MB  primary  ntfs         boot
 2      106MB   250GB  250GB  primary  ntfs
As you can see we get a Model number, Manufacturer, disk size, partition sizes and file-system type.
I haven’t had trouble restoring Clonezilla images to different manufacturers of hard drives as long as the new drive is larger than the original drive. Also, I find that it’s invaluable to have at least a gigabit connection between the machine you’re trying to clone and the file share where you’re saving the img file.
How to test USB thumb drives for USB 3.0, USB 2.0, and test Read and Write Speeds on Windows 10
Determine if USB Port is 2.0 or 3.0 in Windows 10:
Below are some directions and screenshots of how you can tell if a USB drive is connected to Windows 10 with USB 3.0 or USB 2.0., first insert the drive into a USB port on your Windows 10 computer.
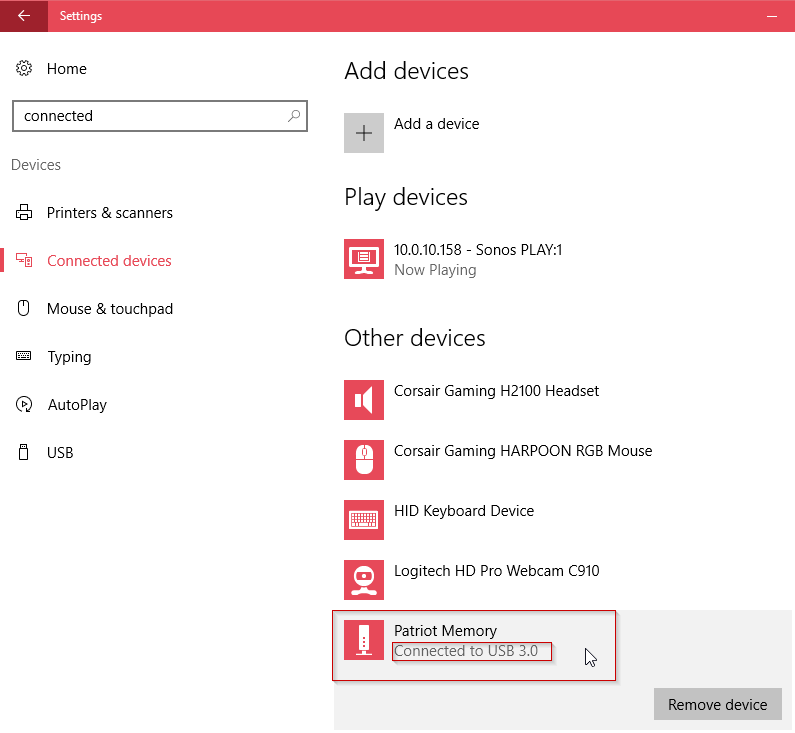
Click on the Start Button > then click on the Settings gear icon > in the “Find a Setting” box > type “Connected Devices” > then click on the “Connected Device Settings” icon. The USB 3.0 will show “Connected to USB 3.0”, the USB 2.0 drives will not display these words:
Testing Read and Write speeds of USB 2.0 and USB 3.0 with SpeedOut utility and Windows 10.
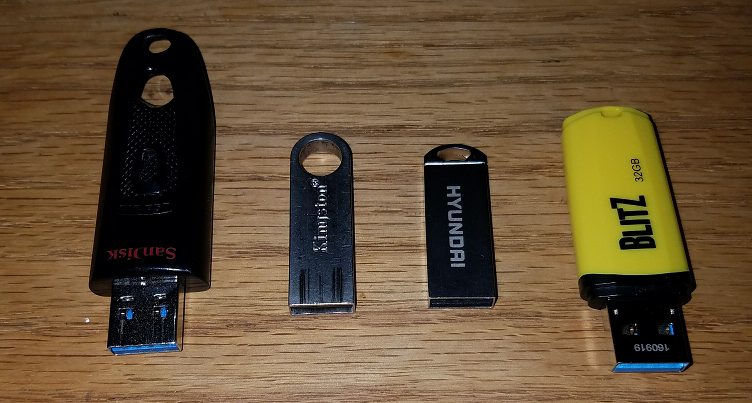
I picked up a couple thumb drives this weekend that were on sale at Frys. I like to have both USB 2.0 and USB 3.0 drives on hand in case a computer doesn’t recognize USB 3.0 as a boot drive. I wanted to determine the Read and Write speeds of my USB drives to test if they actually display a difference according to their listed specs (spoiler alert: numbers can be deceiving.) My PC workstation has an Intel SSD drive and USB 3.0 ports. I downloaded and ran the SpeedOut v0.5 utility against 4 different USB thumb drives:
Patriot Memory Flash PSF32GBLZ3USB 32GB USB3.0 BLITZ with a yellow plastic case.
Hyundai USB 2.0 Bravo 16GB with a metal case.
Kingston USB 2.0 DTS E9 Data Traveller 16GB with a metal case.
SanDisk Ultra USB 3.0 32GB SDCZ48-032G with a plastic case.
All four drives were formatted FAT32 (and I tested the Patriot drive as NTFS.) The way you know if a device is connected to 3.0 USB in windows 10: Start > Settings > Search “Find a setting” : type in “devices” > Show all results > Connected Device Settings > Other devices > Find your USB drive and it should say “Connected to USB 3.0”. More details on where to find this setting at the bottom of the article.
Anyway, I ran SpeedOut utility against the Patriot USB 3.0 drive first, and the results were: 23.7 MB/s READ and 27.8 MB/s.
I ran the same SpeedOut test against on the same USB port using a HYUNDAI USB 2.0 BRAVO 16GB drive (wasn’t recognized as USB3.0 by Windows 10) and it’s results were: 21.9 READ and 10.5 WRITE.
Then I ran the same SpeedOut test again using a Kingston DTS E9 Data Traveler and it’s results were 17.158 READ and 9.8 MB/s WRITE.
Lastly I ran the same SpeedOut test again using a SanDisk Ultra USB 3.0 32GB drive and the results were: 128.04 MB/s READ and 52.47 MB/s WRITE.
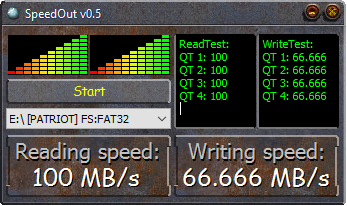
I gave the Patriot USB 3.0 drive another chance the results of a 2nd read write test against the drive were pretty good:
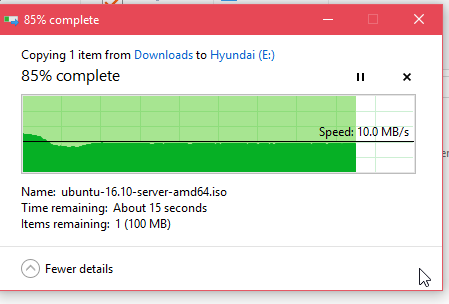
This test gave me hope that the drive would have decent write speeds but upon testing the copy of an ubuntu-16.10-server-amd64.iso (684.032 MB) file from my SSD drive to the Patriot USB 3.0 Drive, the results show surprisingly slow speeds after an initial burst of speed:
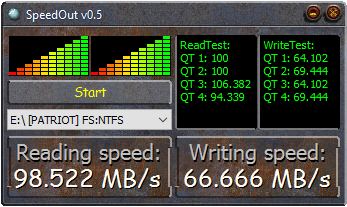
I thought perhaps this may have to do with the drive formatted as Fat32, so I formatted the drive as NTFS and tried again. Here is the SpeedOut result first:
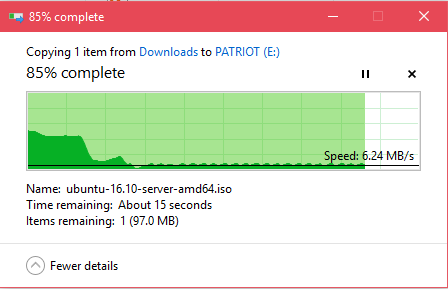
Now the same Ubuntu.iso copy and it’s results:
Same results. The write speed would alternate between 6.24 MB/s and 12 MB/s which is in all reality pretty abysmal for a USB 3.0 drive! The total copy time for the 684MB file was 55.12 seconds…
The total copy time for the HYUNDAI USB drive for the same ubuntu .iso was 1:10.02 seconds.
The USB Patriot USB 3.0 drive did not fare much better than the Hyundai USB 2.0 drive, but I did notice that there is an initial speed burst when copying data to the Patriot drive. To test this I copied a 100MB file to the Patriot drive and while the first copy of the 94MB file did quickly finish at around 60 MB/s, however subsequent tests were very low again in the 6-12MB/sec range. The Patriot drive is no other way to describe than flaky; fast sometimes for a little while, but ultimately pretty slow – just a little better than the USB 2.0 drives.
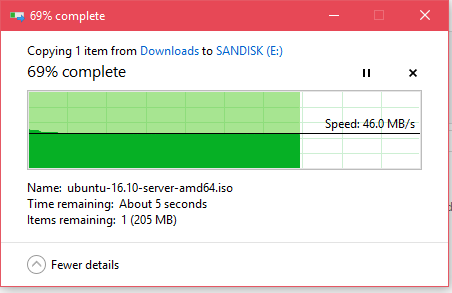
Lastly I tested the copy speed of the same Ubuntu .iso file to the SanDisk Ultra 3.0 32 GB drive formatted Fat32 and the amount of time to copy was 14.59 seconds!
Just because something says USB 3.0 and is on sale, doesn’t mean you’re going to get true USB 3.0 speeds reliably…
So I did a little upgrade project this weekend – went from a Dual-Core CPU workstation-class VMWare ESXi system running a pfSense VM with 512MB RAM & a SATA HDD plus 10/100Mb LAN, and moved to a Core i5 CPU workstation-class Proxmox hypervisor running the same version of pfSense with 2GB of RAM, SSD and gigabit NICs. The Core2Duo system had a 10/100Mb LAN card so the download speed was limited to 100Mb because of the hardware, not software, but I do believe the ping times can be attributed to the new hardware. Proxmox can be tricky to setup the NICs so I left notes on what I experienced below.
Proxmox Install notes:
3 NICs (one on board, and 2xintel NIC)
Initially I got my proxmox installed and running on my current network on a new workstation-class PC with just the on-board NIC connected. It picked up 10.0.10.175 from my dhcp server
On Proxmox I went to setup pfSense but prior to doing so I needed to bridge my NICs
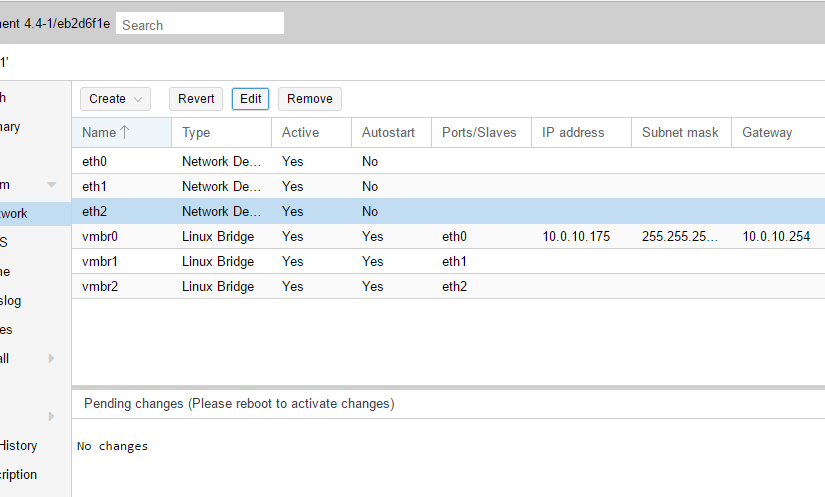
Here is my NIC setup after setting up the Linux bridge NICs:
When I initially setup the vm, I created pfsense pretty standard, then before starting the VM, I added System > Network > Create > Linux Bridge, and I chose the two other Intel NIC’s (did this twice, once for each NIC.
It seems the Proxmox underlying debian OS didn’t know about my other NICs:
I ssh’d into the new server with putty and edited the interfaces file:
Nano /etc/network/interfaces
and changed this config:
auto vmbr0

iface vmbr0 inet static

        address  10.0.10.175

        netmask  255.255.255.0

        gateway  10.0.10.254

        bridge_ports eth0

        bridge_stp off

        bridge_fd 0
To this:
auto vmbr0

iface vmbr0 inet static

        address  10.0.10.175

        netmask  255.255.255.0

        gateway  10.0.10.254

        bridge_ports eth0

        bridge_stp off

        bridge_fd 0


auto vmbr1

iface vmbr1 inet dhcp


auto vmbr2

iface vmbr2 inet dhcp
Then I had proxmox reboot by issuing the command:
reboot
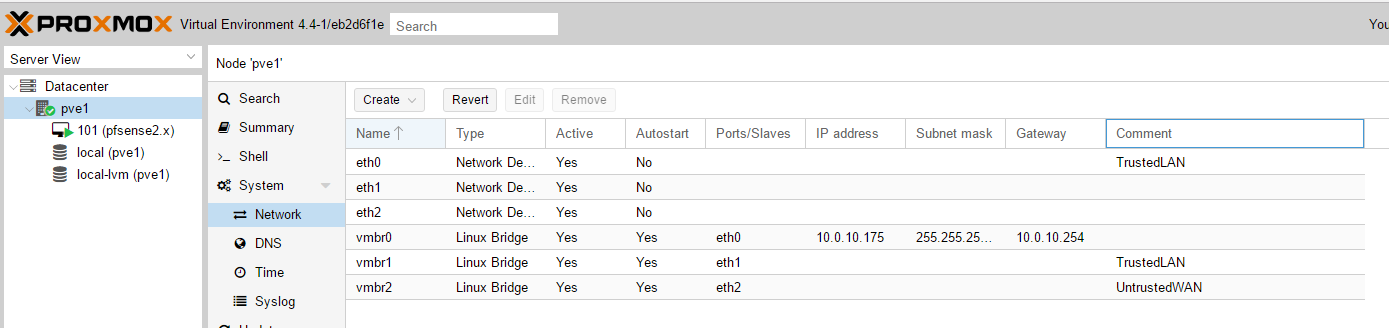
And my interfaces file ended up looking like this:
auto lo

iface lo inet loopback


iface eth0 inet manual

#TrustedLAN


iface eth1 inet manual


iface eth2 inet manual


auto vmbr0

iface vmbr0 inet static

        address  10.0.10.175

        netmask  255.255.255.0

        gateway  10.0.10.254

        bridge_ports eth0

        bridge_stp off

        bridge_fd 0


auto vmbr1

iface vmbr1 inet manual

        bridge_ports eth1

        bridge_stp off

        bridge_fd 0

#TrustedLAN


auto vmbr2

iface vmbr2 inet manual

        bridge_ports eth2

        bridge_stp off

        bridge_fd 0

#UntrustedWAN
I could now start the pfsense vm and the pfsense install now recognized my network cards <smiles>
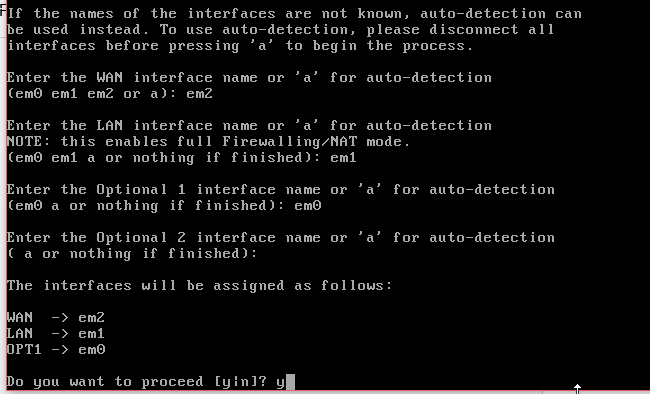
In the pfsense setup I choose 1) and I am offered the following options:
With a little bit of guessing and using my laptop to find the LAN, I was able to get up and connected into my pfSense web console. From there, reset the power to my cable modem, and got a new Cox IP address.
The change in speeds was actually pretty remarkable.
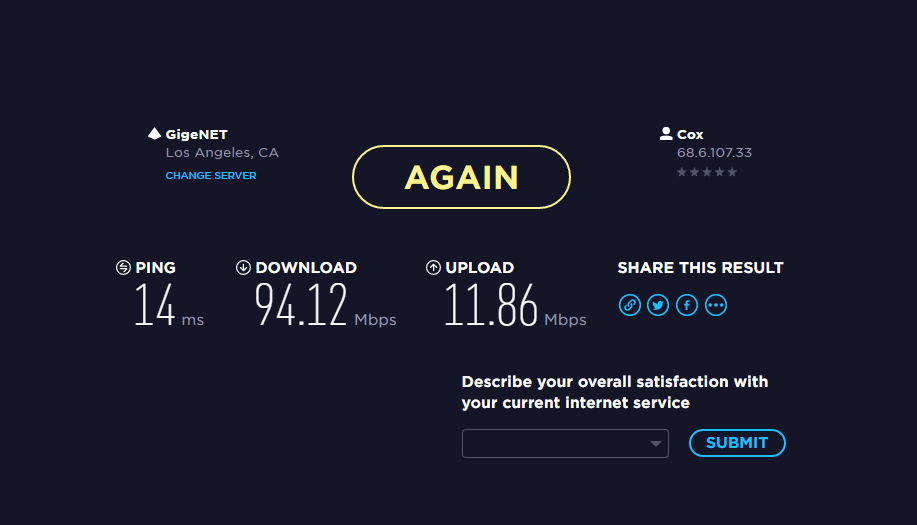
Here are the speedtest.net results with the old Dual Core (Core2Duo) with an ESXi VM on a SATA HDD 512MB of RAM and 10/100 LAN:
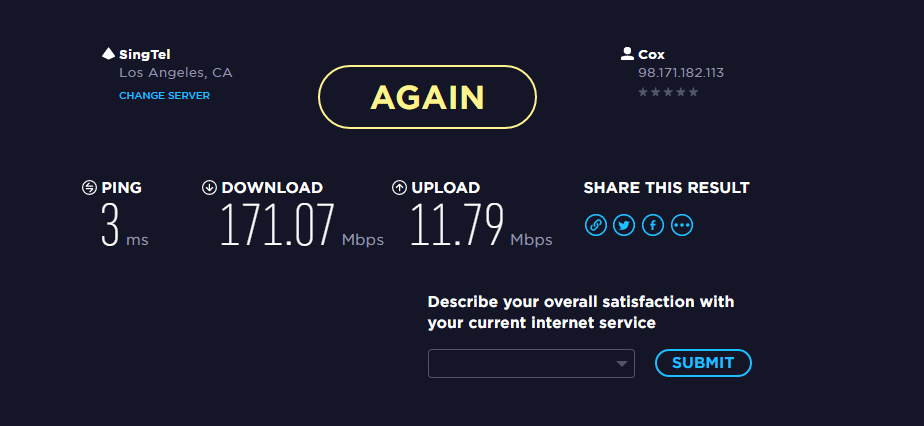
And here are my speedtest.net results with a core i5 4-core Proxmox VM on an SSD, 2GB of RAM, and Gigabit NICs:
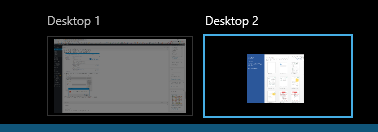
Below is an image of the old server on the left and a new server on the right.
VMWare is still running on the old server and I may keep it around, but also considering moving my domain controller & ISC DHCP server off of it and re-building it as another Proxmox VME as a cluster, but I’ve read that it’s best to have 3 servers for a Proxmox cluster.
All in all I’m pretty happy with the results of upgrading my home pfSense firewall from ESXi to Proxmox, and I hope this post helps someone with their Proxmox setup.
Solved – Unable to remove OneDrive for Business from Windows 7 – two versions of OneDrive on the same Windows 7 / Windows 10 PC. Remove / uninstall old version of OneDrive for Business.
This may not be the most elegant/logical way of stopping the old/bad OneDrive from running, so let me know in the comments if you found the correct “Microsoft way” of fixing this issue. Others have spent hours trying to resolve this issue and hopefully you’ll get some kind of resolution with this information.
In some instances OneDrive for Business will ask you to upgrade. When you Update or upgrade OneDrive for Business it could keep the old version of OneDrive for Business on your computer, making it so that you have two versions of OneDrive for Business (even the icons look slightly different.) This may come pre-packaged with a Click to Run (clicktorun) install of Office or pre-installed on your system. You probably want to remove the older version of OneDrive for Business, but even after trying to uninstall OneDrive for Business old version from Programs and Features in the Control panel, even after restarting, the program comes back and you can’t delete it!
You probably still want to use OneDrive for Business, but you should only use the updated version that works correctly with Office365 and SharePoint Online.
Anyway, once your updated/upgraded OneDrive for Business is updated and installed, make sure you have all your important files inside the new OneDrive for Business and that the files are synced with SharePoint or where ever they should be. Make sure you have backups of the important files somewhere else like an external drive as well just to be safe. Once we disable the old OneDrive for Business / Groove.exe, make sure those old files are already synced with the new OneDrive for Business service. Once you have your files all synced and what-not with the new OneDrive for Business, we can disable/remove the old/bad version of OneDrive.
The older version of OneDrive for Business actually runs as Groove.exe. While the Task Manager is open (tick the check-mark or hit the button that says ‘Show Processes from All Users), track down Groove.exe by right-clicking on the bad OneDrive in the systray and then in the OneDrive menu, choose Exit (down by the clock – there may be two cloud icons down there, be sure to exit the correct one.) Then launch the old/bad OneDrive again from the Start > Program Files > OneDrive for Business. Do this several times and you will see Groove.exe pop in and out of existence inside the Task Manager. While it’s up and running, right click on the groove.exe in the task manager and choose “Open File Location”. The file will probably live somewhere similar to the following location:
Be sure to End Task or Exit out of the bad OneDrive for Business or Groove.exe, then rename the Groove.exe file to Groove.exe.old .
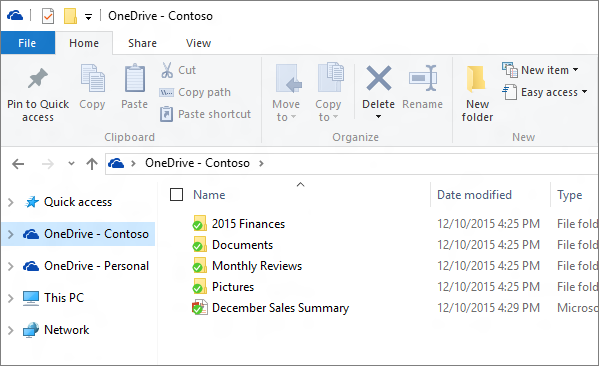
Now that this has been done, you may want to remove the old/bad OneDrive for Business link in your Explorer Favorites list. Do this with a left-click on the top-most Favorites link and in the right-hand pane, right-click on the old/bad OneDrive for Business shortcut and click Remove. Additionally you may want to remove the old/bad program shortcut in your Start Menu.
This how-to procedure for mapping network drives pertains to Windows 7 PC’s that are not joined to a domain, but are members of the same network Workgroup. This how-to map network drives is not the same as using the Windows “HomeGroup” feature – this tutorial is a little more advanced – but the method works for me consistently.
Make sure that both computers are on the same network and subnet. This should be already done in most cases as your computers should pick up IP addresses and network settings from a DHCP server/router/modem. Things might get weird if each PC trying to reach one-another are on different connections, i.e. one is on WiFi and one is on an Ethernet cable. Essentially both machines should have IP addresses that look similar, something like 192.168.0.5 and 192.168.0.6. You can find your IP address by right-clicking on the Network icon in the taskbar, down by the clock, or go into the Control Panel > Network and Internet > and choose: Network and Sharing Center > Change Adapter Settings > Right-click on Local Area Connection (the adapter which is connected to the network and internet) > Status > Details… button > IPv4 Address.
Each computer should be able to ping one another by IP address and by hostname. In a command prompt (Start button > All Programs > Accessories > Command Prompt) you can test this with the following command to ping by IP address:
ping 192.168.0.5
You should receive “Reply from 192.168.0.5…” and not “Request timed out.” Again, this should be done from each computer to the other.
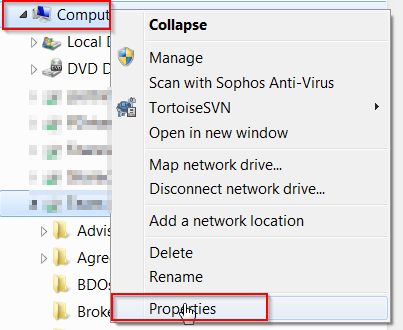
Next determine what the computer name is for each computer. Do this by Right-clicking on the Computer icon in Windows File Explorer and choose Properties.
Windows 7 Computer Properties
Look for “Computer name:” – use this computer name to do another ping test. From a command prompt, type in:
ping computername
where you replace ‘computername’ with the name of the other computer you want to ‘talk to’. Again, you should get ‘reply from…’, not ‘error/no host/time-out’. If you get replies when you ping the IP address but not the computer name, then you can still map the drive/share from your computer, but it won’t look pretty.
If you can ping by IP address but not computer name, for testing purposes, make sure the Windows Firewall is turned off (temporarily), and that both computers are members of the same Workgroup. In the same Computer Properties as above, where you found the Computer name: … you should see the “Change settings” link to the right of the Computer Name:. under the Computer Name tab, click on the “Change…” button > select Workgroup: and then enter the same workgroup name on both of the computers that will share files. Most people do Workgroup: WORKGROUP. Once you’re able to ping each computer from one another (at least by IP address), you should be ready to share out a folder and then map a drive letter to that share.
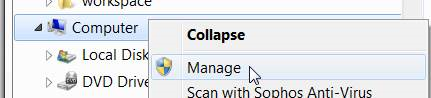
Next, make sure that the folder you want to access on, for example, Computer Name: PC1 is actually shared out by the PC1 computer. In PC1 Windows file Explorer, Right-click on Computer and choose Manage.
Computer management
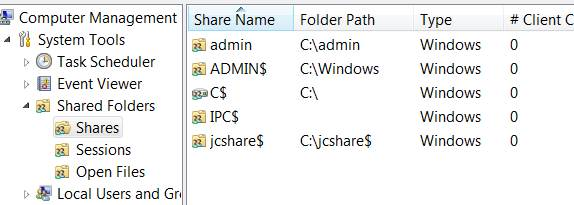
6. In the management tool, expand Shared Folders and then click on Shares:
Shared folders
7. If you don’t see the folder you want to share listed, click on More Actions > New Share > follow the wizard (don’t worry about the offline settings.) Typically if you’re in an environment where you trust everyone, you can set the share to be accessible (read/write/execute) by Everyone (Everyone is the name of an actual user group that resides in all Windows computers). Do this by selecting “Customize Permissions” then place check-marks in Allow: Full Control, Change, Read > OK:
Windows 7 share permissions
If you’re wondering what the $ is for in the shares I have on my machine, the $ is used to hide a file share. If the folder name has a $ at the end, it’s hidden from people browsing the computer’s IP address or UNC name (explained later), but since you know it’s there you can still get to it. For example, in my shares screenshot above, I could browse to the share by typing in \\jasonPC\jcshare$ . But had I only typed in \\jasonPC\ then it would not be displayed.
8. Now that the share is available, from PC2 you can browse to the share by the UNC computer name (Universal Naming Convention used by all windows computers – in Apple/Mac’s it’s actually weird and to browse to a share on a Mac you would use smb://jasonPC/share.)
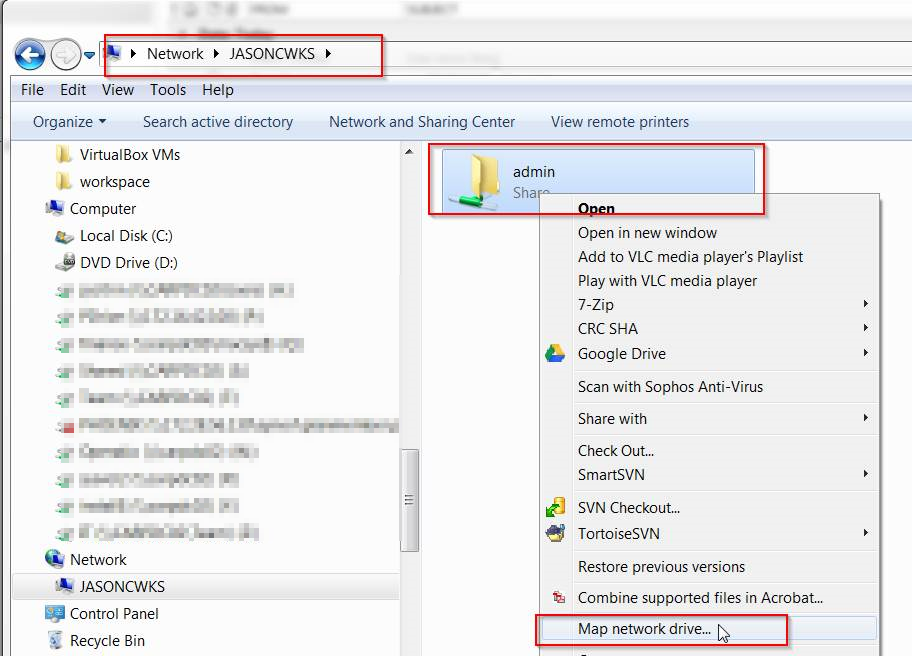
Open Windows File Explorer, in the address bar, type in the computer name that has the share you want to connect to preceded by two back-slashes (\\) and then followed by another backslash. So for example \\JASONCWKS\ and then hit the enter key. In the event if you could not ping the other computer by the UNC computer name, you can do the same action but replace the computer name with the IPv4 address, for example: \\192.168.05\ .
9. You will see a list of shares available on the computer. Next, right-click on the share and choose Map Network Drive.
Browse by UNC computer name
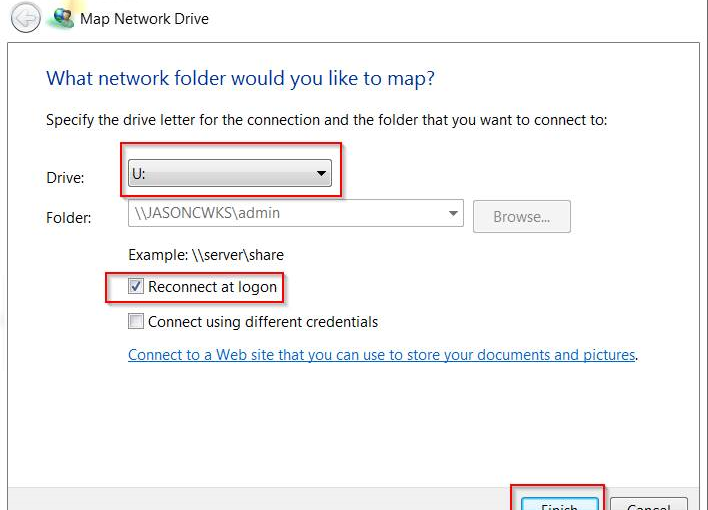
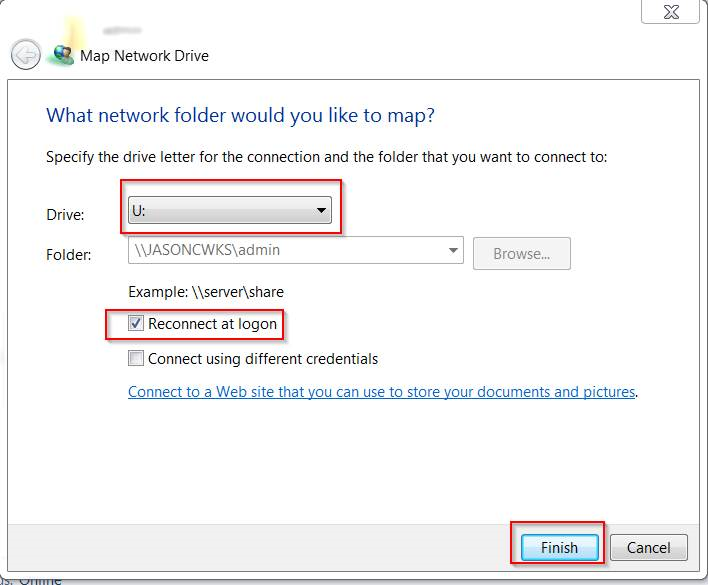
10. Now provide the drive letter you want, place a check-mark on Reconnect at Logon and then Finish
Map network drive
That’s about it! Your other computer should now have the drive mapped with full read/write permissions.
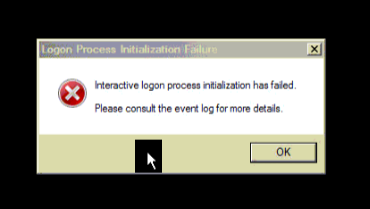
ESXi 5.5 – recently I tried to RDP into my Server 2008 R2 machine without success. Looking at the console, I get the message: ” Interactive logon process initialization has failed. Please consult the event log for more details. ” My first reboot of the machine did an automatic check disk. I can no longer log into the machine either via RDP or on the console. I’d like to not have to rebuild this system as it is my only stand-alone DC in my home lab. I’m going to bring up a separate DC, then do a DCPROMO, however, below are the steps I took to resolve the issue, albeit unsuccessfully – some of these steps may work for you. I was hoping I could mark this process as “Solved” but I haven’t gotten there yet…
Event log says:
Event 4005 Winlogon – The windows logon process has unexpectedly quit
Event 33 SideBySide – Activation context generation failed for “C:\Windows\system32\LogonUI.exe”. Dependent Assembly Microsoft.Windows.Common-controls.Resources,language=”*”,processorArchitecture=”amd64″,publicKeyToken=”6595b64144ccf1df”,type=”win32,version=”6.0.0.0″ could not be found. Please use sxstrace.exe for detailed diagnosis.
These errors all seem to have started on 8/8/16 when the following events occurred:
Error: 36888 – Schannel – The following fatal alert was generated: 10. The internal error state is 1203
Event 56 – The terminal Server security layer detected an error in the protocol stream and has disconnected the client. Client IP: 223.x.x.x which is a Hong Kong IP. Prior to that are many Event 1012 – Remote session from client name a exceeded the maximum allowed failed logon attempts. The session was forcibly terminated.
I pulled the machine off the internet and the network in case it’s been compromised. On second thought I should probably kill this machine with fire!
Things I have tried that did not resolve the problem:
Boot into safe mode
Edited RDP settings on my workstation to use less resolution and video bit depth
Increased Virtual Machine’s system memory size as suggested, went from 3GB to 7GB
Booted to SystemRescueCD and replaced c:\windows\system32\LogonUI.exe – did this by booting the VM to a SystemRescueCD.iso (startx) and then mount the NTFS file system with the instructions here. Next I changed the root password with passwd and then connected to the VM with Filezilla on port 22 and renamed/moved the files.
Hotfix 437977 – Windows6.1-KB2615701-v2-x64.msu – because I cannot get into the system to run this, I started Task Scheduler on the remote server from my workstation, and attempted to have the .msu run but get error: the application has failed to start because its side-by-side config is incorrect.
Booted the VM to a Server2008R2.iso, Repair your Computer > command prompt,
Any suggestions? Has anyone gotten past this error? I can still connect to the machine via any means (mmc terminals such as event viewer, and task scheduler) other than a GUI console.
Edit: I gave up on trying to fix the issue – this is the reason we backup our VM’s and in this case I’m glad I had a good working backup. If you find a way to resolve, please drop a note – otherwise, make sure you have good backups of your DC’s: The VM as a bare metal backup and the System State (Separately.)
If your email servers support, or are required to enforce transport layer security (TLS), then you can use Symantec TLS Business Partners to configure policies to enforce encryption between your mail servers and the broader public, as well as Symantec’s Email Security Services infrastructure. You can also configure policies to enforce TLS encryption between your domains and the domains of third-party business partner organizations. This article will provide a procedure that demonstrates how to generate a report with Symantec PBE Advanced Domains that displays mail which failed a TLS policy. We then go on to process that report and relax the enforcement of Certificate Validation with the following steps:
Scrub the Symantec Report for just email addresses of the intercepted mail.
Remove the first part of the email addresses, leaving only a list of the domain names.
Compare the domains from Step 2 to already-existing TLS Business Partners and leave only those domains that are unique.
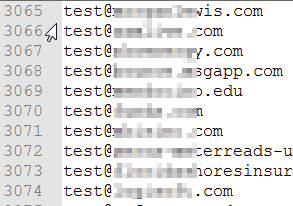
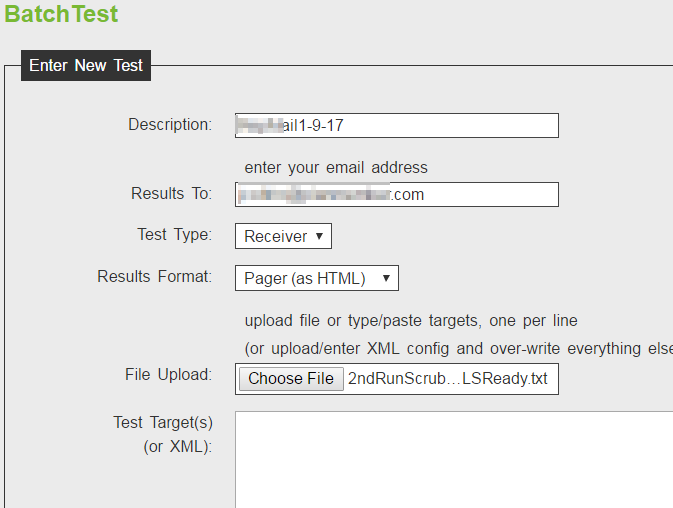
Create a new text .txt file with the unique domains, add ‘test@’ to the beginning of each domain to create an email address that can be tested at checktls.com.
Batch test the domains for certain TLS conditions.
Scrub and sort the checktls.com report for only those domains that meet conditions in Step 5.
Upload the list of unique, tested, and scrubbed domains into the Symantec Cloud TLS Business Partners.
Use Symantec to again test the domain for Certificate Validation, enable the domain, and enforce the encryption of traffic to that domain.
Often times, TLS encryption requirements will force end-users and recipients of TLS encrypted email to log into a secure mail portal to authenticate and retrieve messages. Depending on your organization’s policies, you may want to ‘relax’ the level of enforcement of TLS requirements so that users can receive mail in ‘plain text’ as a normal message in the user’s mailbox. These different levels of encryption are scored by traits including the availability of TLS encryption, TLS negotiation, the SSL/TLS Certificate trustworthiness, and other factors.
To a large degree, TLS email encryption has not quite become the standard for many mail servers out there. Many large mail providers such as earthlink.net do not support TLS encrypted email. Some mail servers will allow TLS encyrption (TLSAvailable=100), negotiate a TLS transaction (NegotiatedTLS=100), but not have a valid certificate (CertOK >= 33). Often times, the CertOK value will not reach 100 simply because the certificate on the receiving server is a self-signed certificate.
You can check the support of an email address or domain by visiting checktls.com, enter an email address into the address test, and hit the ‘Try It’ button. For example, when we test [email protected], our results are as follows:
TLS Receiver Test
In this case, if Symantec /MessageLabs were to try to send a message to the recipient, the message would not be delivered to the recipient mailbox, but quarantined in a secure mail portal. The recipient would then be required to create a secure portal account, log in, and retrieve the message.
If our results above were to demonstrate the passing of all checks with the exception of the CertOK column, then we may want to relax the enforcement of certificate validation in Symantec. But in order to find all of the domains that meet these conditions, (excluding those domains we already have validated and trust), we need to generate reports, scrub the data, and test for the conditions we accept. Once we find the unique domains, we’ll add them into our list of TLS Business Partners.
While the following procedure does not have long-winded explanations and exact step-by-step instructions, the information and screenshots should be enough to get you through the process, hopefully saving you the hours of research and note-taking that I endured. This article does not go over the initial setup of your domain’s email encryption with Symantec. The prerequisites for this guide are that you already have TLS email encyption setup with Symantec Cloud / MessageLabs.com. Also be sure to have Excel 2013 or newer and NotePad++ installed on your computer. Lastly, you may be required to purchase an account with checktls.com to run batch tests.
Lets get started!
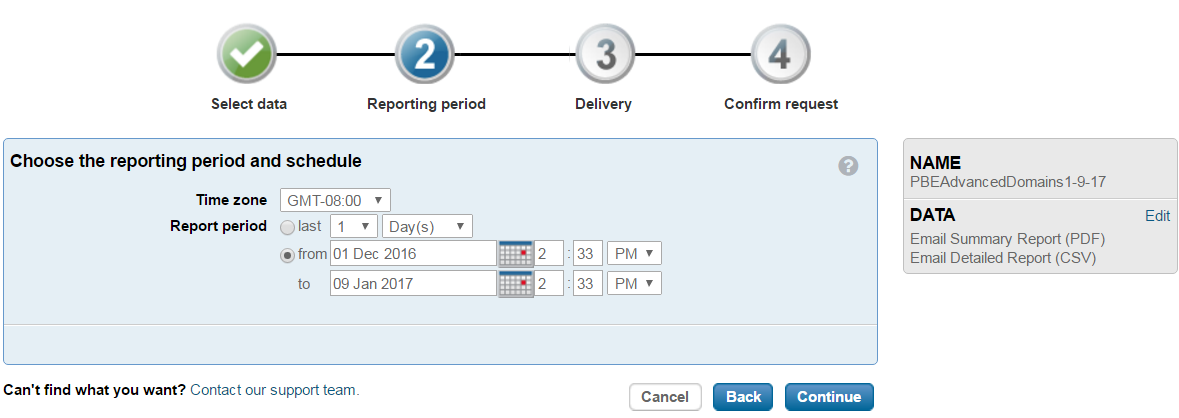
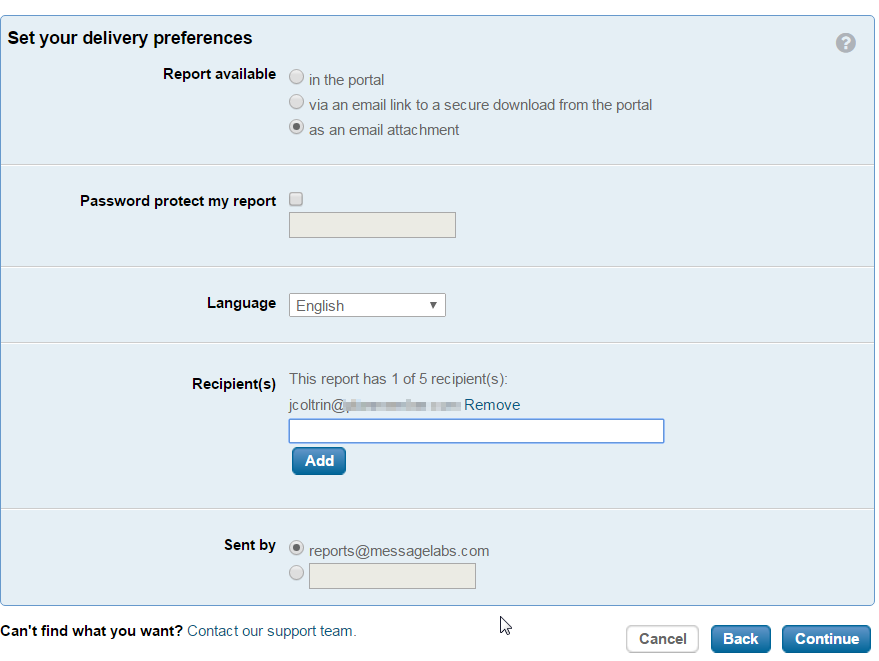
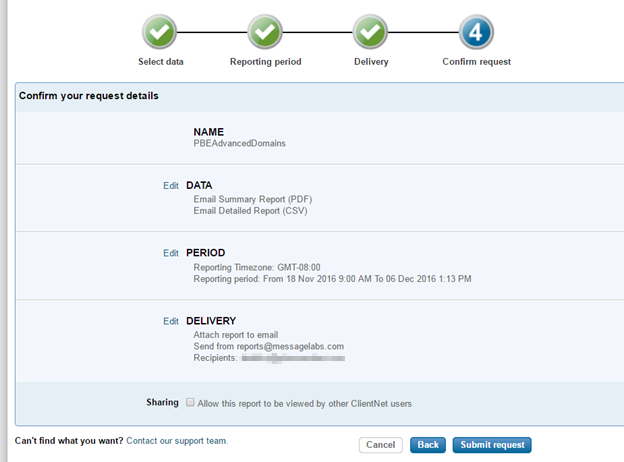
We’ll first run a report in the Symantec Cloud / clients.messagelabs.com to find emails intercepted by the service. Starting in the Dashboard, go to Reports > Report Request > Request a new Report > Request name: PBEAdvancedDomains-Date > continue > email summary report (PDF) >
The data we will include in the report are:
Email Summary Report (PDF) advanced settings
Emails intercepted by the service
Data Protection volume
Data Protection volume by domain
Top 20 Data Protection recipients
Email Detailed Report (CSV) advanced settings
Data Protection
Message Labs Report 1
MessageLabs Report 2
MessageLabs Report 3
MessageLabs Report 4
Download the Report.zip
Extract to Desktop\TLSReports\RepDomainsDate
Open the EmailDataProtectionDetail.csv
Copy the column “Email To” to a new spreadsheet named 1stRunRemoveNameAndAtSymbol.xlsx
In 1stRunRemoveNameAndAtSymbol.xlsx, delete the 1st row “Email To”
Excel wants you to type out the formula (instead of copy/paste) in the first cell B1, then apply formula down the column.
Apply formula to an entire column or row without dragging by Fill feature
In Excel, Select the entire Column B, and then click Home > Fill > Down.
Apply formula fill down
Copy and Paste (Paste – Special->ValuesOnly) the resulting Domains (only) to a new sheet and name
1stRunDomainsOnlyDate.xlsx
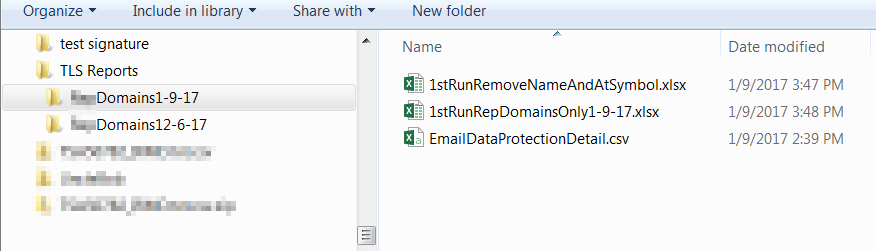
Now you should have 3 files:
1st Run Files
In Symantec Message Labs go to Services > Encryption > existing TLS Business Partners
Download All -> get TLSBusinessPartners.csv > rename to TLSBusinessPartnersDate.csv copy to same folder, so you should have 4 files. In the 1stRunRepDomainsOnlyDate.xlsx you may want to remove all the empty cells with #VALUE! From the bottom of the file.
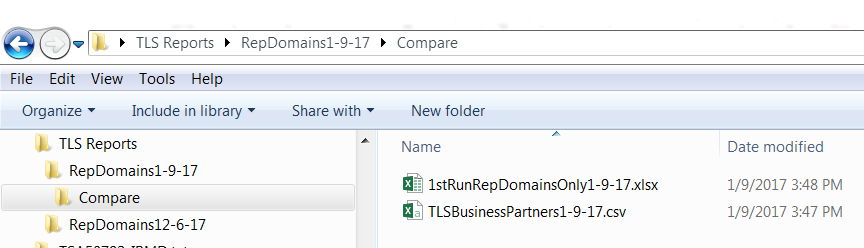
Create a new folder named Compare, and copy 1stRunRepDomainsOnlyDate.xlsx and TLSBusinessPartnersDate.csv into the folder:
Compare domains files
Remove all domains in TLSBusinessPartners file that are current Partners (as well as those existing in previously completed procedure runs.) – To do so,
Open 1stRunRepDomainsOnlyDate.xlsx. Create a new Sheet 2.
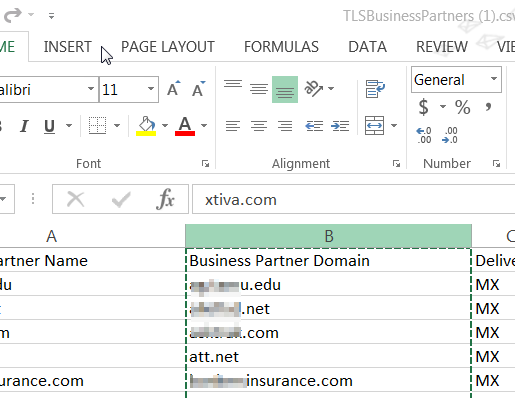
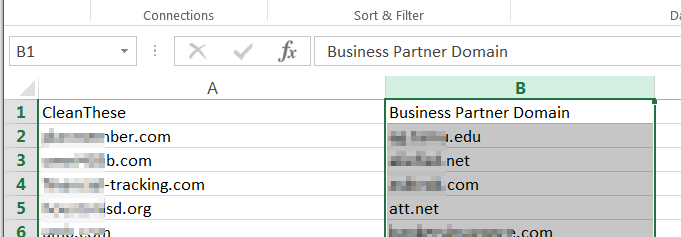
Open TLSBusinessPartners.. file and copy the column with only the domain names Column labeled “Business Partner Domain” into Sheet 2
Run compare and remove all domains that exist in TLS.BP.Date from 1stRunRDODate.
Scrub the domains of duplicates. Copy all the Business Partner Domains AND be sure to include all of the domains listed in TLS Enforcement page into Test sheet (selecting with the mouse, copy from website, and paste into excel works, just remove the hyperlinks).
Populate test worksheet with existing domains
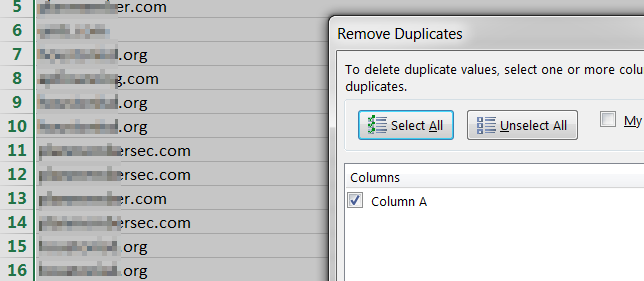
Next, select Sheet 1 then go to the Data tab and click Remove Duplicates:
Remove duplicate domains
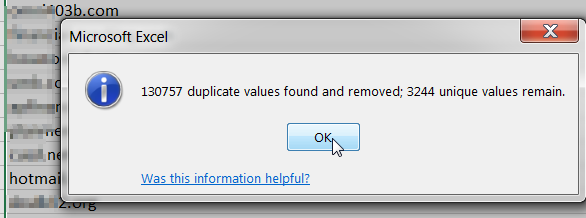
Click OK
Duplicate domains removed
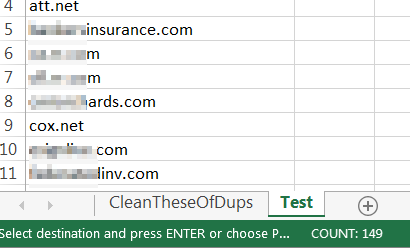
Add a new row to A1 top level and add header named: “CleanThese” for Column A and “Business Partner Domains” for Column B
Copy existing Business Partner unique domains in Test sheet to B1
Should now look something like this:
Clean domains of existing domains
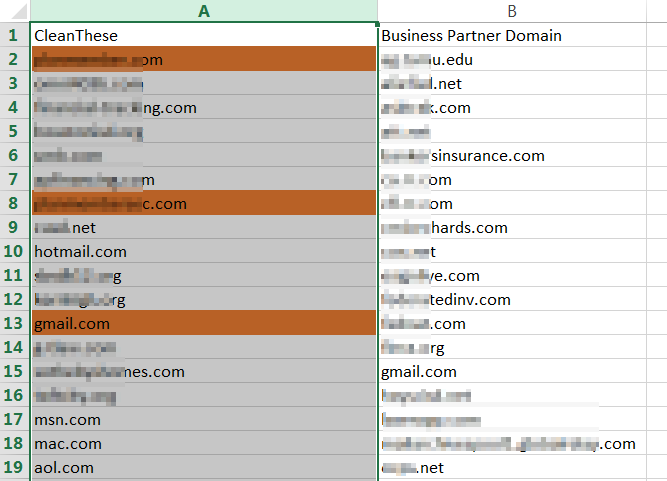
Now Filter for Unique values:
Click on the Column Header to highlight Column A. Select the Conditional Formatting button on the Home tab.
Select the New Rule option from the Conditional Formatting button drop-down list. Select “Use a formula to determine which cells to format" as a rule in the New Formatting Rule window.
Proceed by entering the following formula in the “Format values where this formula is true" box: =countif($B:$B, $A1)
Click on the Format button and specify the format you want to set. It is possible to set a different cell color for duplicate values by clicking the Fill tab and selecting a background color. (Orange)
After having specified the format you want click OK.
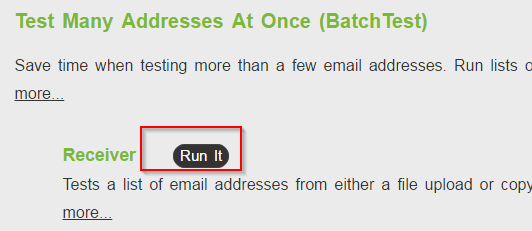
CheckTLS batch test: Once you’ve uploaded the file, hit R(u)n Test Now to initiate the testing. One domain takes 5 minutes, so 4000 domains can take 4 hours or so. An estimate from checktls.com will be given.
CheckTLS batch test 3
Once the report arrives via email, copy the data in email to a new file named TLSCheckReportResults1-9-17.xlsx
Next, find CertOK is a value of 33 or 0, but the TLSAvailable=100 and NegotiatedTLS=100
To do this, do Ctrl+A then Sort & Filter > Custom Sort > Sort by CertOK > Sort on Values > Order Custom List: 33, 0 > OK > OK
(Column H is Cert OK) so Select only those that are anything other than 100, copy the rows to a new spreadsheet named
TLSCheckReportResultsCertOK33-Date.xlsx
Sort the TLSCheckReportResultsCertOK33 file by TLSAvailable=100 and NegotiatedTLS=100
To do this, first remove all columns except EMailAddress, TLSAvailable, CertOK, and NegotiatedTLS=100
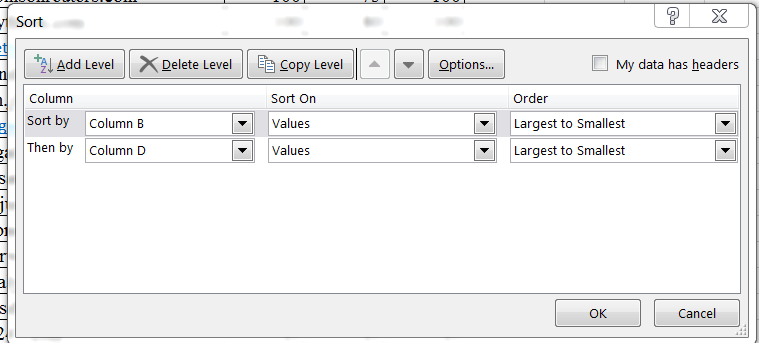
Do another custom sort; select columns labeled TLSAvailable, Cert OK, and NegotiatedTLS, and Sort by Column B (TLS) then by Column D (SenderOK/Sec) Largest to Smallest:
Excel custom sort columns on values largest to smallest
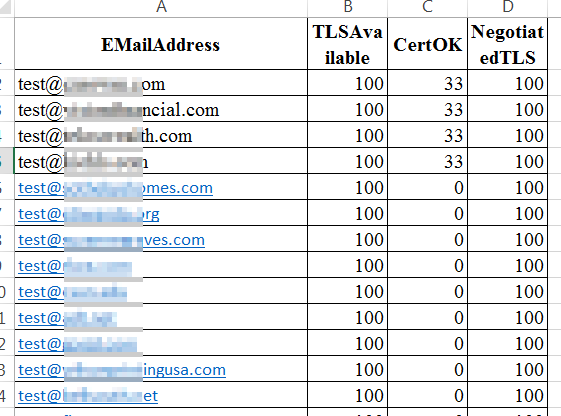
Select only those rows that have at least TLSAvailable = 100 … CertOK(%) … NegotiatedTLS = 100; where CertOK % is less than 100:
Excel custom sort results
Copy these values to a new .xlsx file and folder named:
TLSCheckSortTLSAvailable100Negotiated100-Date
Copy custom sort results above into a new .xlsx file and rename the filename the same as the folder name.
Remove everything except the domain name (remove ‘test@’) from this file. Follow instructions above – delete columns B, C, D, then formula =RIGHT(A1,LEN(A1)-FIND(“@”,A1)) – then fill down (select column first)
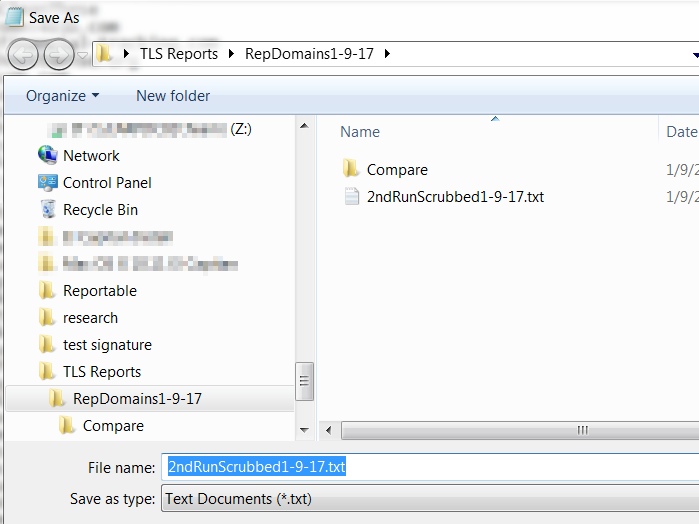
Copy resulting domains to a new .txt file named:
TLSCheckSortTLS-DomainOnly-Final-Date.txt
Now we need to add the tested domains to the Business Partner for the week. Eg. RepDomains-Date in Symantec.
Log into Symantec Cloud,
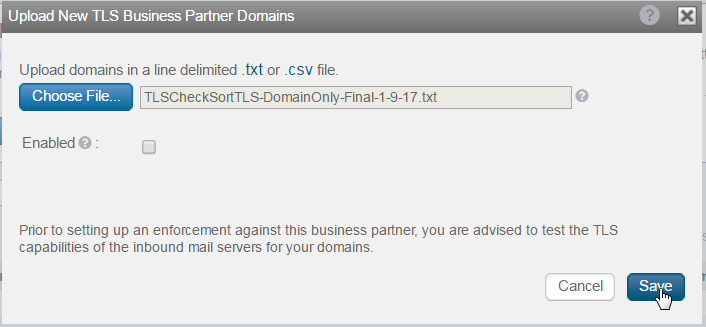
Services > Encryption > TLS Business Partners > Add new BP > RepDomains-Date > Upload New Business Partner Domains > Uncheck “Enabled” > choose file > select TLSCheckSortTLS-DomainOnly-Final-Date.txt > Save
Upload New TLS Business Partner Domains
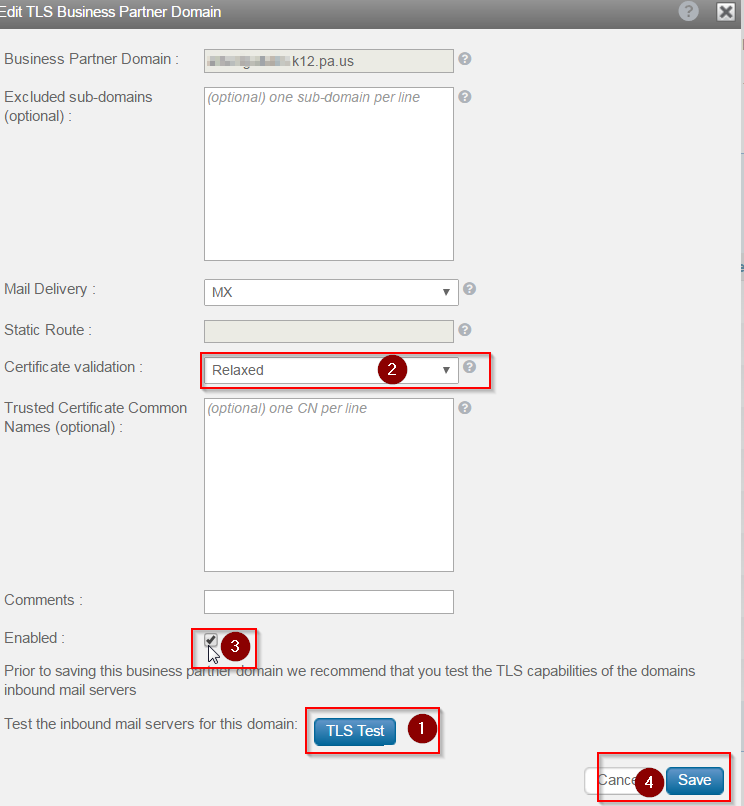
Now that all of the new unique domains have been imported, we need to test them within Symantec and change Certificate Validation from Strong to Relaxed if required.
Click on the domain name, hit the TLS Test button, and if the TLS connectivity fails, hit Close, change the Certificate Validation to “Relaxed” and then Save.
Relaxed certificate validation
Go through each of the newly uploaded domains, and when finished, make sure to ENABLE TLS Encryption enforcement in the TLS Enforcements tab.
Take those in the list that test correctly and are enforced and add to Data Protection Exceptions. Services > Data Protection > PBE Advanced TLS the Portal Trigger Template > (scroll down) Recipient Exclude Domain List > Edit List > Add List Items > Add
It’s a good idea to repeat this procedure every so often so that you catch mail that is being delivered to the secure portal unnecessarily. Hopefully, this procedure will help someone save some time if they have the same task, or at the least help someone sort and scrub email addresses and domains.