I’ve always had an interest in penetration testing and have messed around with nmap and nessus, but now I’m going to dig in my heels and become proficient using the tools in the pen-test theater. The following post is more of an outline of what is found in a youtube video I found here at Derbycon 2016. This speaker was inspiring as well as a few others who’ve spoken because they said that Sysadmins make good penetration testers. They mentioned that someone who is good at building systems and networks in general do well at breaking them down and actively locating and fixing problems in other systems. I am not looking to become a script kiddy, or a black hat/dark side cracker for that matter, but I do hope to become proficient with the tools they use, as well as work with python to build my own tools.
Since I last upgraded my vm server to proxmox, I’ve been kicking around ideas on how to use the hardware to it’s fullest potential. I’ve already gotten started by by first creating a new network on my proxmox host, and started up my first server in my segrated ‘insecure’ network by spinning up an isc-dhcp-server. I’ll probably post info on my build as I go along so stay tuned.
-Start of Video notes-
Credit: David Boyd Pentest lab requirements:
Core i5 CPU
16gb RAM
250-500GB HDD
7zip
VM software:
virtualbox
VMWare
Hyper-V
(I’ll be using) ProxMox
Pentesting platforms:
Kali Linux
Samurai WTF (WebAppTesting)
SamuraiSTFU(Utility Hacking)
Deft Linux (Forensics)
Old stuff:
olpix (?)
IWax(?)
backtrack (now Kali)
Offensive Security has – pre-compiled linux distro
Note: generate your own SSH keys
Now need something to attack… Vulnerable VM’s:
Metasploitable 2 (Metasploit) – intentionally vulnerable Ubuntu has remote logins, backdoors, default pwds, vulnerable web services
If your email servers support, or are required to enforce transport layer security (TLS), then you can use Symantec TLS Business Partners to configure policies to enforce encryption between your mail servers and the broader public, as well as Symantec’s Email Security Services infrastructure. You can also configure policies to enforce TLS encryption between your domains and the domains of third-party business partner organizations. This article will provide a procedure that demonstrates how to generate a report with Symantec PBE Advanced Domains that displays mail which failed a TLS policy. We then go on to process that report and relax the enforcement of Certificate Validation with the following steps:
Scrub the Symantec Report for just email addresses of the intercepted mail.
Remove the first part of the email addresses, leaving only a list of the domain names.
Compare the domains from Step 2 to already-existing TLS Business Partners and leave only those domains that are unique.
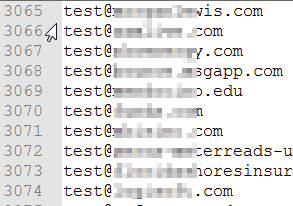
Create a new text .txt file with the unique domains, add ‘test@’ to the beginning of each domain to create an email address that can be tested at checktls.com.
Batch test the domains for certain TLS conditions.
Scrub and sort the checktls.com report for only those domains that meet conditions in Step 5.
Upload the list of unique, tested, and scrubbed domains into the Symantec Cloud TLS Business Partners.
Use Symantec to again test the domain for Certificate Validation, enable the domain, and enforce the encryption of traffic to that domain.
Often times, TLS encryption requirements will force end-users and recipients of TLS encrypted email to log into a secure mail portal to authenticate and retrieve messages. Depending on your organization’s policies, you may want to ‘relax’ the level of enforcement of TLS requirements so that users can receive mail in ‘plain text’ as a normal message in the user’s mailbox. These different levels of encryption are scored by traits including the availability of TLS encryption, TLS negotiation, the SSL/TLS Certificate trustworthiness, and other factors.
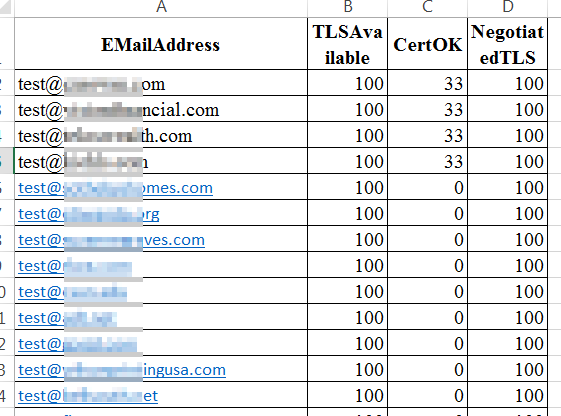
To a large degree, TLS email encryption has not quite become the standard for many mail servers out there. Many large mail providers such as earthlink.net do not support TLS encrypted email. Some mail servers will allow TLS encyrption (TLSAvailable=100), negotiate a TLS transaction (NegotiatedTLS=100), but not have a valid certificate (CertOK >= 33). Often times, the CertOK value will not reach 100 simply because the certificate on the receiving server is a self-signed certificate.
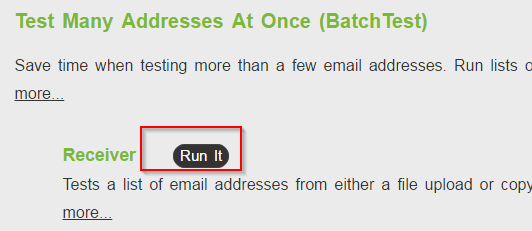
You can check the support of an email address or domain by visiting checktls.com, enter an email address into the address test, and hit the ‘Try It’ button. For example, when we test [email protected], our results are as follows:
TLS Receiver Test
In this case, if Symantec /MessageLabs were to try to send a message to the recipient, the message would not be delivered to the recipient mailbox, but quarantined in a secure mail portal. The recipient would then be required to create a secure portal account, log in, and retrieve the message.
If our results above were to demonstrate the passing of all checks with the exception of the CertOK column, then we may want to relax the enforcement of certificate validation in Symantec. But in order to find all of the domains that meet these conditions, (excluding those domains we already have validated and trust), we need to generate reports, scrub the data, and test for the conditions we accept. Once we find the unique domains, we’ll add them into our list of TLS Business Partners.
While the following procedure does not have long-winded explanations and exact step-by-step instructions, the information and screenshots should be enough to get you through the process, hopefully saving you the hours of research and note-taking that I endured. This article does not go over the initial setup of your domain’s email encryption with Symantec. The prerequisites for this guide are that you already have TLS email encyption setup with Symantec Cloud / MessageLabs.com. Also be sure to have Excel 2013 or newer and NotePad++ installed on your computer. Lastly, you may be required to purchase an account with checktls.com to run batch tests.
Lets get started!
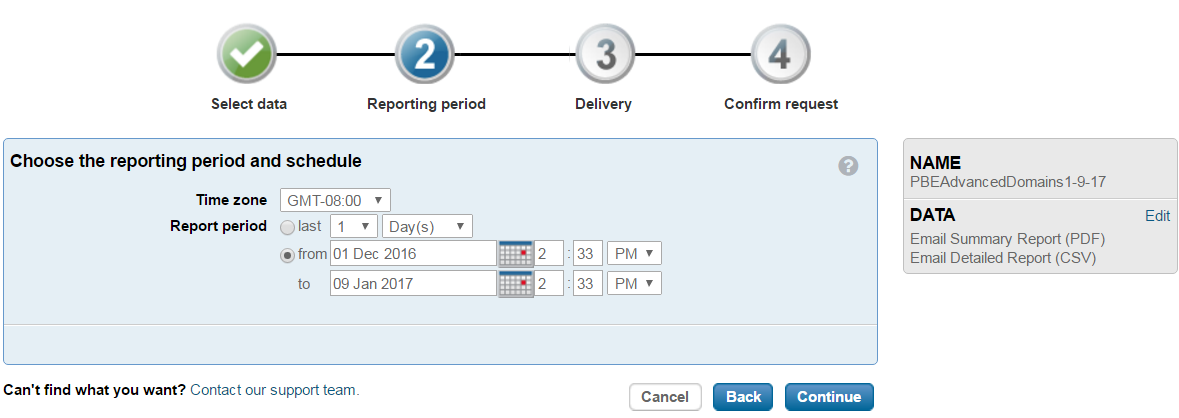
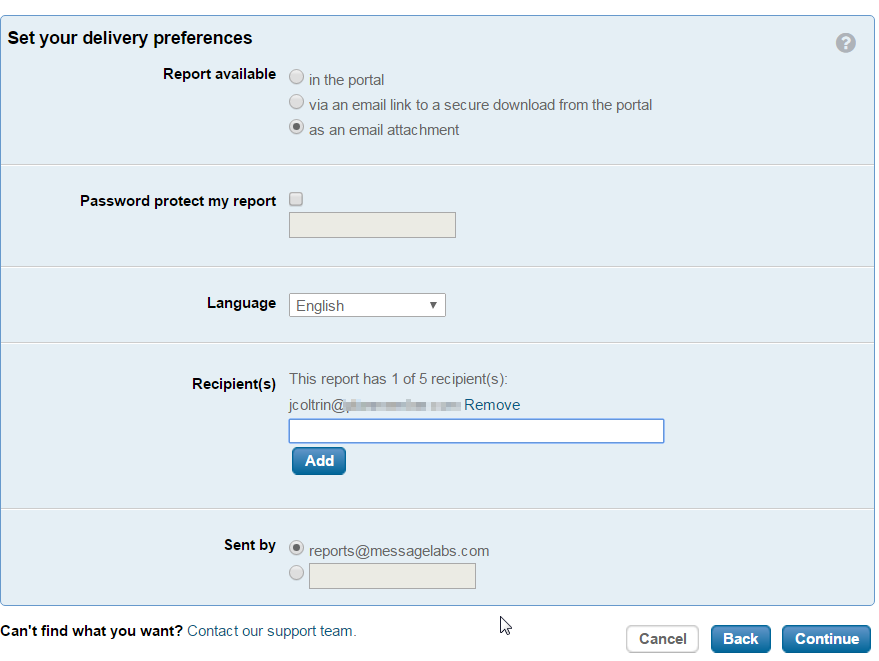
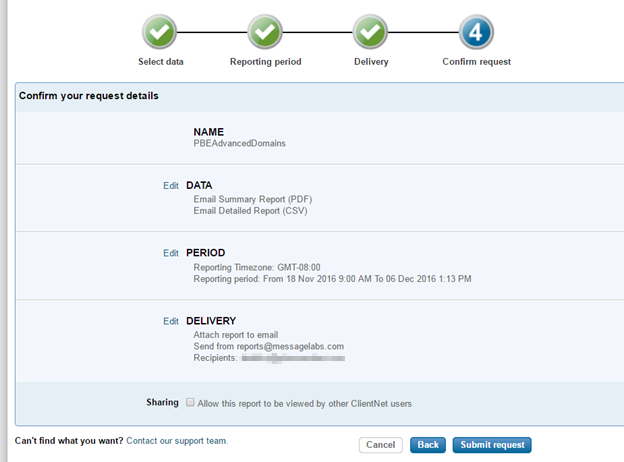
We’ll first run a report in the Symantec Cloud / clients.messagelabs.com to find emails intercepted by the service. Starting in the Dashboard, go to Reports > Report Request > Request a new Report > Request name: PBEAdvancedDomains-Date > continue > email summary report (PDF) >
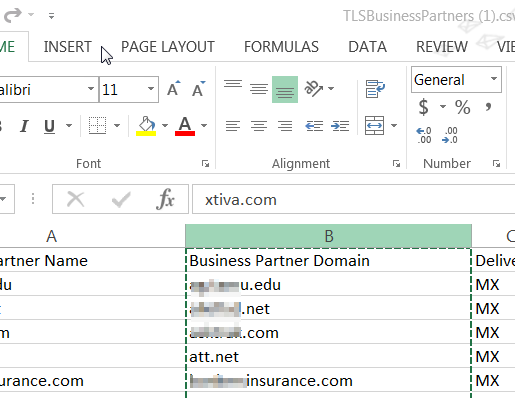
Excel wants you to type out the formula (instead of copy/paste) in the first cell B1, then apply formula down the column.
Apply formula to an entire column or row without dragging by Fill feature
In Excel, Select the entire Column B, and then click Home > Fill > Down.
Apply formula fill down
Copy and Paste (Paste – Special->ValuesOnly) the resulting Domains (only) to a new sheet and name
1stRunDomainsOnlyDate.xlsx
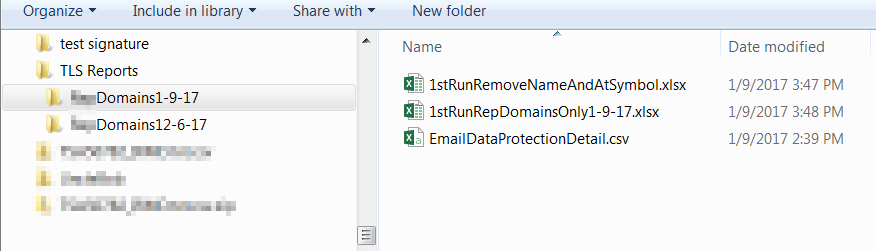
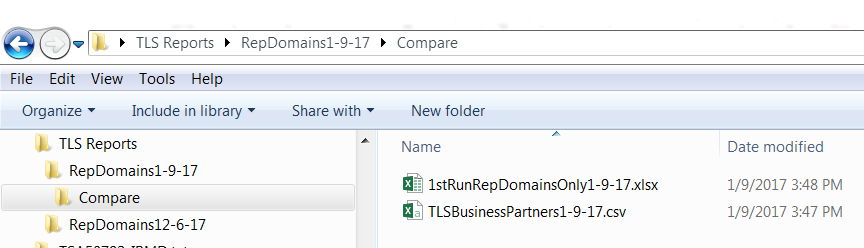
Now you should have 3 files:
1st Run Files
In Symantec Message Labs go to Services > Encryption > existing TLS Business Partners
Download All -> get TLSBusinessPartners.csv > rename to TLSBusinessPartnersDate.csv copy to same folder, so you should have 4 files. In the 1stRunRepDomainsOnlyDate.xlsx you may want to remove all the empty cells with #VALUE! From the bottom of the file.
Create a new folder named Compare, and copy 1stRunRepDomainsOnlyDate.xlsx and TLSBusinessPartnersDate.csv into the folder:
Compare domains files
Remove all domains in TLSBusinessPartners file that are current Partners (as well as those existing in previously completed procedure runs.) – To do so,
Open 1stRunRepDomainsOnlyDate.xlsx. Create a new Sheet 2.
Open TLSBusinessPartners.. file and copy the column with only the domain names Column labeled “Business Partner Domain” into Sheet 2
Run compare and remove all domains that exist in TLS.BP.Date from 1stRunRDODate.
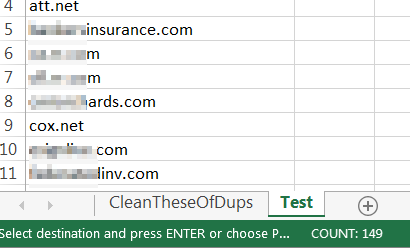
Scrub the domains of duplicates. Copy all the Business Partner Domains AND be sure to include all of the domains listed in TLS Enforcement page into Test sheet (selecting with the mouse, copy from website, and paste into excel works, just remove the hyperlinks).
Populate test worksheet with existing domains
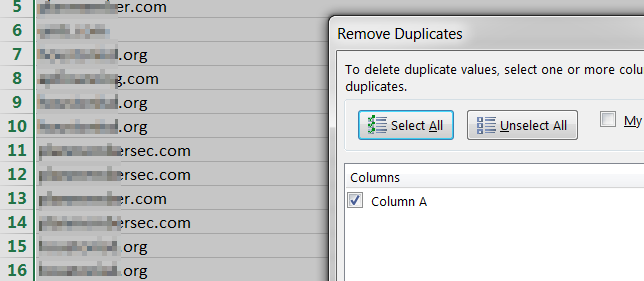
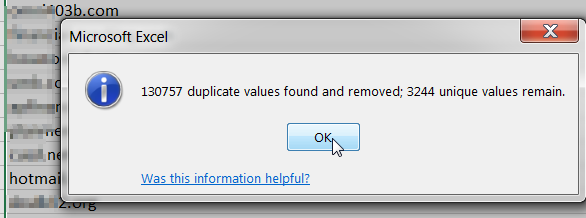
Next, select Sheet 1 then go to the Data tab and click Remove Duplicates:
Remove duplicate domains
Click OK
Duplicate domains removed
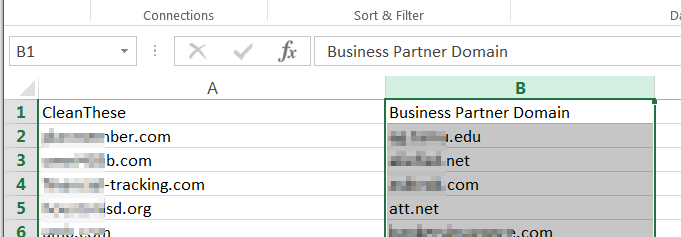
Add a new row to A1 top level and add header named: “CleanThese” for Column A and “Business Partner Domains” for Column B
Copy existing Business Partner unique domains in Test sheet to B1
Should now look something like this:
Clean domains of existing domains
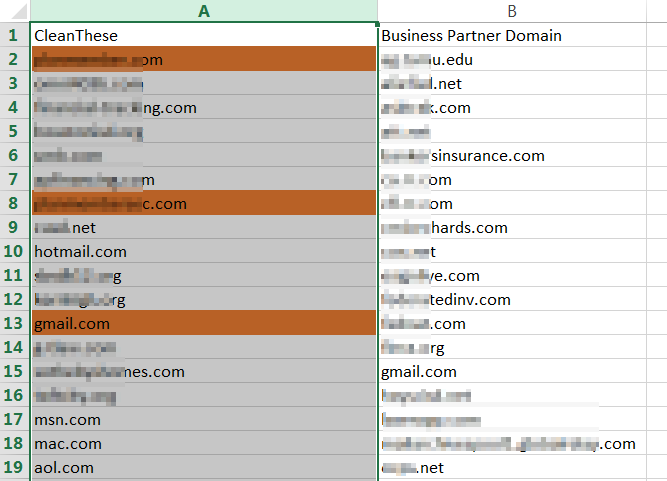
Now Filter for Unique values:
Click on the Column Header to highlight Column A. Select the Conditional Formatting button on the Home tab.
Select the New Rule option from the Conditional Formatting button drop-down list. Select “Use a formula to determine which cells to format" as a rule in the New Formatting Rule window.
Proceed by entering the following formula in the “Format values where this formula is true" box: =countif($B:$B, $A1)
Click on the Format button and specify the format you want to set. It is possible to set a different cell color for duplicate values by clicking the Fill tab and selecting a background color. (Orange)
After having specified the format you want click OK.
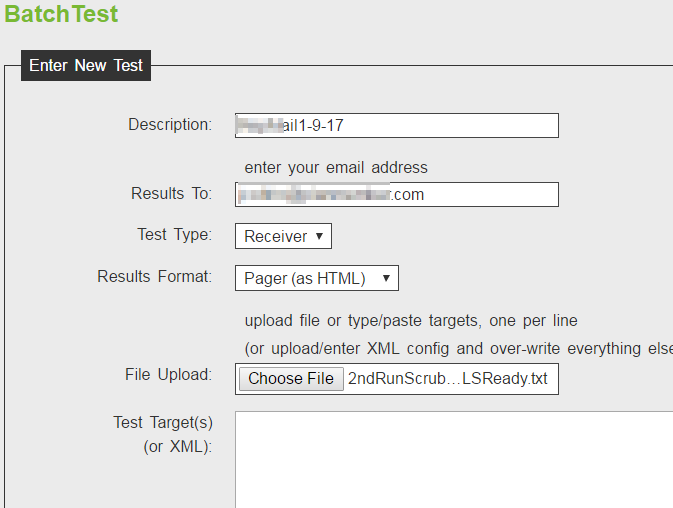
CheckTLS batch test: Once you’ve uploaded the file, hit R(u)n Test Now to initiate the testing. One domain takes 5 minutes, so 4000 domains can take 4 hours or so. An estimate from checktls.com will be given.
CheckTLS batch test 3
Once the report arrives via email, copy the data in email to a new file named TLSCheckReportResults1-9-17.xlsx
Next, find CertOK is a value of 33 or 0, but the TLSAvailable=100 and NegotiatedTLS=100
To do this, do Ctrl+A then Sort & Filter > Custom Sort > Sort by CertOK > Sort on Values > Order Custom List: 33, 0 > OK > OK
(Column H is Cert OK) so Select only those that are anything other than 100, copy the rows to a new spreadsheet named
TLSCheckReportResultsCertOK33-Date.xlsx
Sort the TLSCheckReportResultsCertOK33 file by TLSAvailable=100 and NegotiatedTLS=100
To do this, first remove all columns except EMailAddress, TLSAvailable, CertOK, and NegotiatedTLS=100
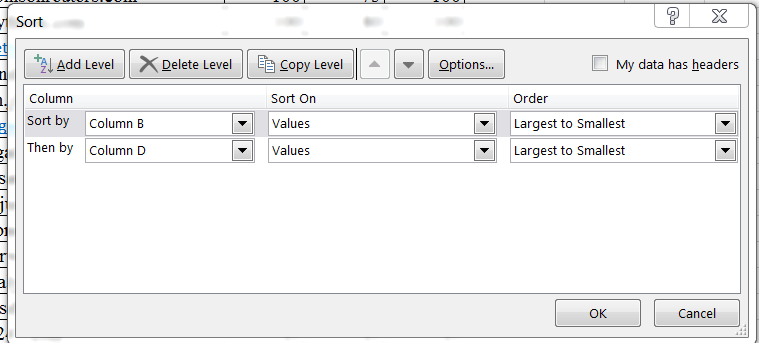
Do another custom sort; select columns labeled TLSAvailable, Cert OK, and NegotiatedTLS, and Sort by Column B (TLS) then by Column D (SenderOK/Sec) Largest to Smallest:
Excel custom sort columns on values largest to smallest
Select only those rows that have at least TLSAvailable = 100 … CertOK(%) … NegotiatedTLS = 100; where CertOK % is less than 100:
Excel custom sort results
Copy these values to a new .xlsx file and folder named:
TLSCheckSortTLSAvailable100Negotiated100-Date
Copy custom sort results above into a new .xlsx file and rename the filename the same as the folder name.
Remove everything except the domain name (remove ‘test@’) from this file. Follow instructions above – delete columns B, C, D, then formula =RIGHT(A1,LEN(A1)-FIND(“@”,A1)) – then fill down (select column first)
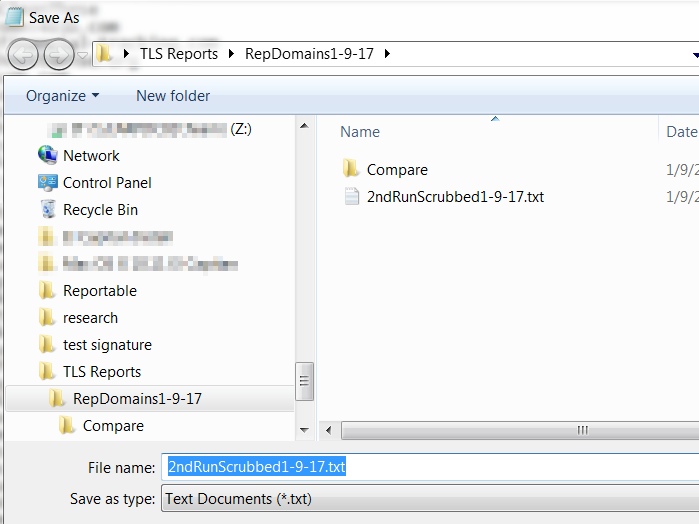
Copy resulting domains to a new .txt file named:
TLSCheckSortTLS-DomainOnly-Final-Date.txt
Now we need to add the tested domains to the Business Partner for the week. Eg. RepDomains-Date in Symantec.
Log into Symantec Cloud,
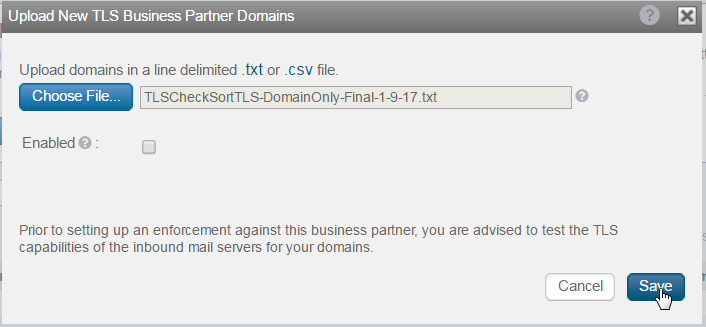
Services > Encryption > TLS Business Partners > Add new BP > RepDomains-Date > Upload New Business Partner Domains > Uncheck “Enabled” > choose file > select TLSCheckSortTLS-DomainOnly-Final-Date.txt > Save
Upload New TLS Business Partner Domains
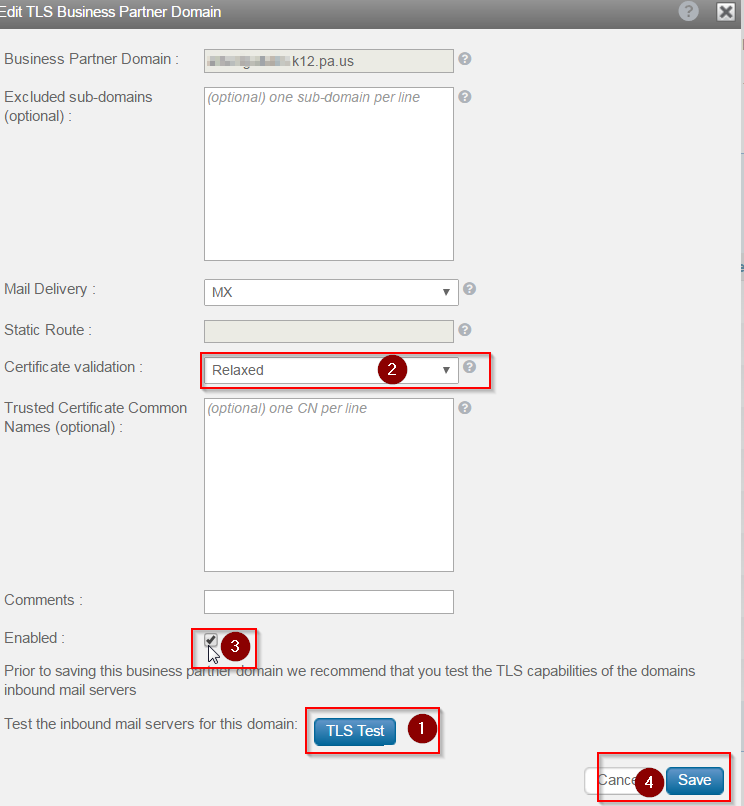
Now that all of the new unique domains have been imported, we need to test them within Symantec and change Certificate Validation from Strong to Relaxed if required.
Click on the domain name, hit the TLS Test button, and if the TLS connectivity fails, hit Close, change the Certificate Validation to “Relaxed” and then Save.
Relaxed certificate validation
Go through each of the newly uploaded domains, and when finished, make sure to ENABLE TLS Encryption enforcement in the TLS Enforcements tab.
Take those in the list that test correctly and are enforced and add to Data Protection Exceptions. Services > Data Protection > PBE Advanced TLS the Portal Trigger Template > (scroll down) Recipient Exclude Domain List > Edit List > Add List Items > Add
It’s a good idea to repeat this procedure every so often so that you catch mail that is being delivered to the secure portal unnecessarily. Hopefully, this procedure will help someone save some time if they have the same task, or at the least help someone sort and scrub email addresses and domains.
Amazon Web Services (AWS) provides the capacity to create a Virtual Private Cloud (VPC), which is a virtual network dedicated to your AWS account. In the first part of this three-part series, I will show you how to create a VPC with the corresponding subnets.
You’re probably already familiar with OpenDNS; the service has long been trusted with consumer-grade firewalls and Wi-Fi Access Points. OpenDNS is now owned by Cisco, and the service is relatively inexpensive at approximately $115 for a three-year, 250-license package on CDW. OpenDNS Umbrella extends that protection to your enterprise by categorizing your DNS traffic in the OpenDNS data centers, rather than relying on your own firewall’s DNS capabilities. This is especially useful if you are running pfSense firewalls, as the packaged domain blocking and reporting is minimal in several areas.
In addition to Umbrella, OpenDNS can protect your roaming devices by installing a remote client. For now, we’ll look at the default reporting and why it’s necessary to set up virtual appliances.
If a computer is powered up on your network, but RDP is not enabled, you can create a group policy to enable RDP, and then restart the computer. Or instead, you can use psexec to remotely enable RDP.
Below are a couple one-line scripts to enable RDP on a remote computer from a different computer on the same domain. Keep in mind you need to be an administrator and you will only enable RDP for yourself, not an entire security group.
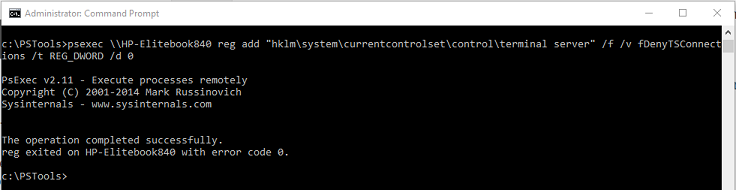
Download the pstools to your computer from the sysinternals download site here and unzip them into a folder named pstools at the root of your c: drive.
Open the command prompt as administrator.
Change directory into c:\pstools (where the pstools files are located) then run the command:
This video shows you how to setup a user account for your kid/child without creating an email address. Windows 10 wants you to use an email address to create a user account. When you try to setup an account, it asks you to use an existing email and if not, it tries to force you to sign up for an outlook.com account. This video shows you how to bypass the Windows User account setup and use Computer Management to create a normal/local user account on Windows 10 Pro version for your kids.
Apparently I am approved for a large loan for my business, although I don’t even own a business… block these numbers too: 281-806-5695 , 725-696-3397 from yesterday, and from the day before, 650-722-1909 . I wonder why I seem to be getting so many of these spam phone calls when there are heavy penalties for violating the “Do not call” list? Time to check the National Do Not Call registry again and re-register.
I took a few hours to review Digital Video Recording and surveillance products and specifications. I’ve learned they’re all pretty much the same re-branded Chinese boxes with Linux embedded and ultimately it comes down to hardware capabilities and if there is a company associated and reviews.
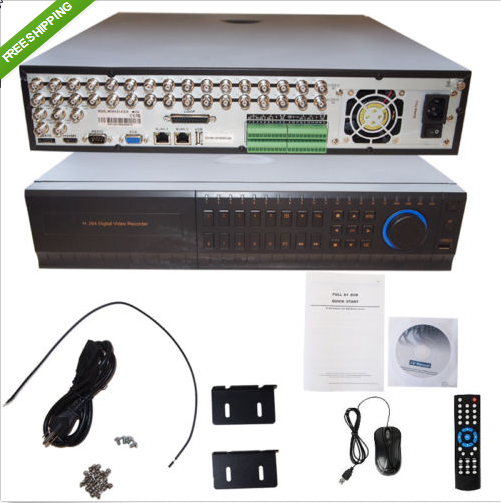
As far as most features, best price, highest quality video and 16 channel video and audio support, I would recommend this unit:
This one is nice because it has more features, two network cards, good quality D1 recording, H-264 and 16 channel, but does NOT include a hard drive. Also it is Generic and a lot of security “companies” buy these, brand them and charge $1200. So this one is around $600 but add on a hard drive for another $100. This unit does not include cameras.
This following DVR pretty much has the same features as the unit above but no dual network card and seems to be supported better and includes a 2TB hard drive. I would consider this unit to be the Ebay Special. A no-name – chinese knock-off that is just the same as all the others but includes better marketing and possibly a company behind it to get some kind of assistance if there are questions.
I recommend this unit because it looks like it has a company behind it, includes the hard drive and DVD-RW drive. If it’s DOA, then you can do an EBAY return. This one is $400.
This following DVR is from a reputable seller (newegg), has a 1 year warranty, but only has 4 audio inputs, and does not include a hard drive:
Essentially it says the newest/best DVR’s are capable of recording in the highest D1 resolution on 4 channels with H.264 compression. If audio recording is a capability you need then the first two units I listed have 16 audio inputs. Other systems only have BNC and no audio inputs, but there are RCA-to-BNC connectors and microphones available to convert a BNC video cable into a working Mic.
IIS 7 and IIS 7.5 – How to renew a self-signed certificate and bind to your website.
Almost one year ago I built an Act server for a client. Act includes a web interface which can be reached by a secured SSL website on port 443. When I setup the site, I used a self-signed certificate as the client is budget conscious and is ok with using a non-third-party trusted certificate.
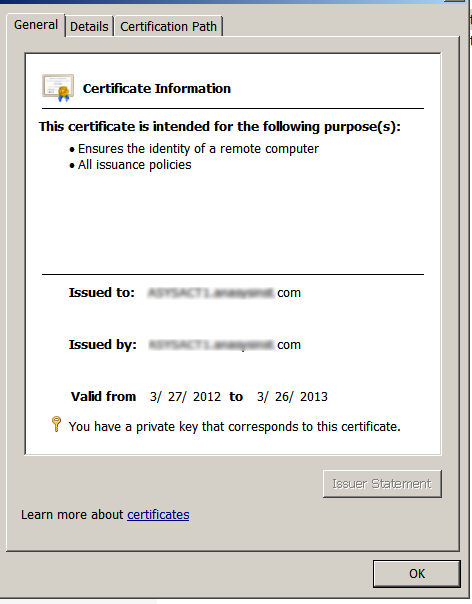
We monitor all of the servers for certificates that will expire and we received an alert that the SSL Certificate on server ***, port 443, is going to expire in 7 days. I browsed to the website, accepted the certificate warning and then opened the certificate itself. Sure enough, the clock is ticking and the cert was to expire on 3/26/13.
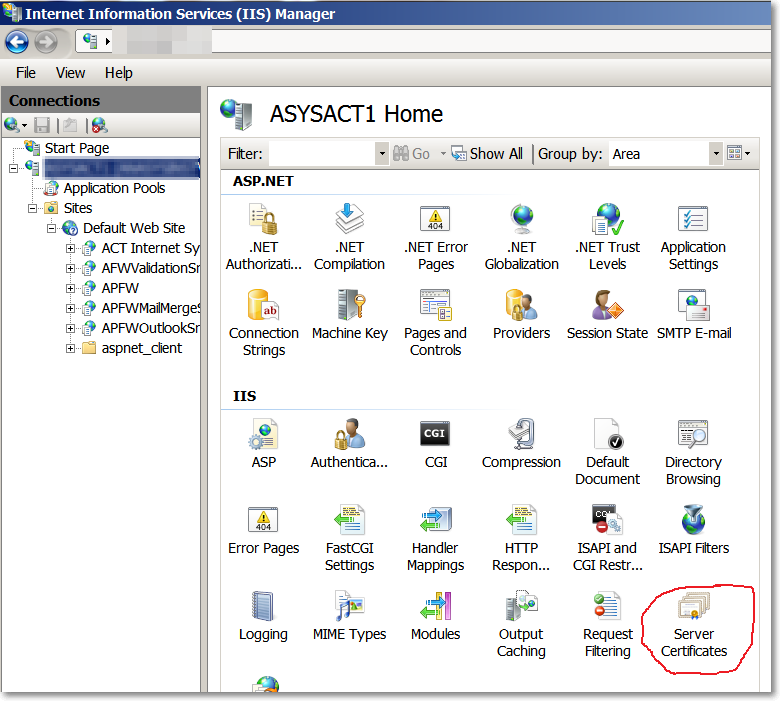
To replace the certificate with a new self-signed certificate, hop on to the server’s console that hosts the IIS site and open Internet Information Services (IIS) Manager.
Select the server (name) under the Connections Pane on the far left of the application.
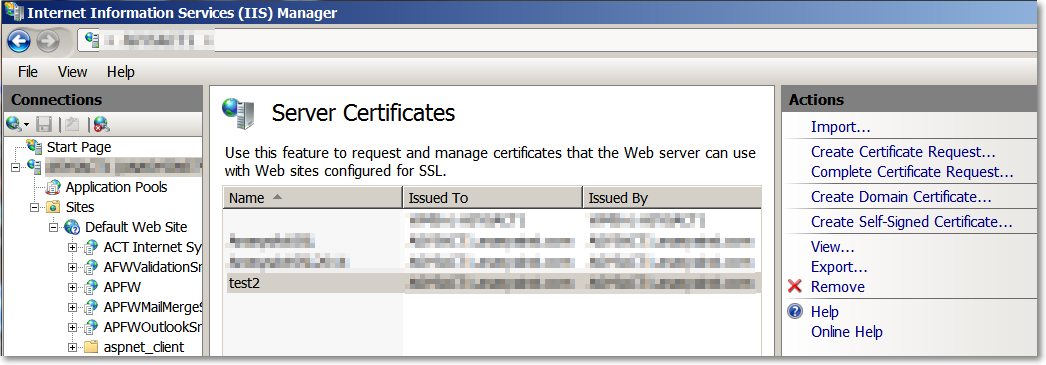
Under the middle pane, double-click on the Server Certificates icon.
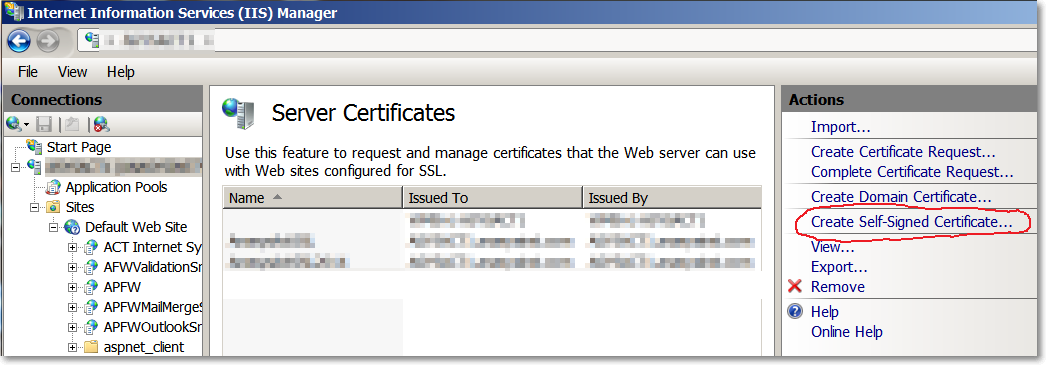
3. Here you will see all of the listed self-signed certificates including the one that will expire. On the right-hand pane under Actions, click on Create Self-Signed Certificate…
4. Specify a friendly name for the cert. I used companynameservername2014. Click OK. You should now see your new self-signed cert available in your list of certificates.
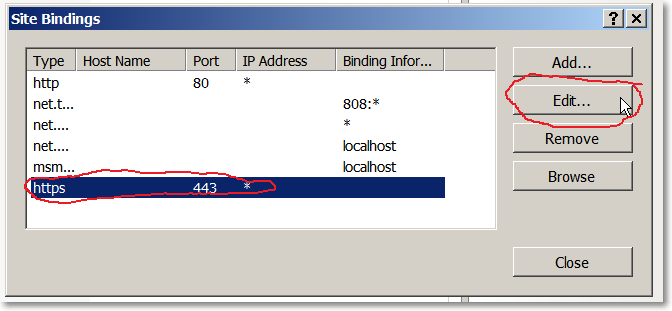
5. Now that the certificate has been created we need to bind it to our website. Under the Connections pane, right-click on the Default Web Site and click on Edit Bindings. Find https, click on it to select it and then click Edit…
5. Inside the Edit Site Bindings, change the Drop-down combo box to the SSL certificate you want to use. Click ok – you’re done!
6. To test, browse to the site you host with https:// and look at the certificate, you should see it is now set to expire 1 year from now.