
When trying to setup and authenticate to an AWS Instance running OpenVPN, a user could not complete a new connection to OpenVPN after entering the initial un/
When troubleshooting OpenVPN login errors it’s a good idea to first try some of the following:
Unlock a Disabled or Locked account on OpenVPN Admin console
To check for the events related to a user lockout,
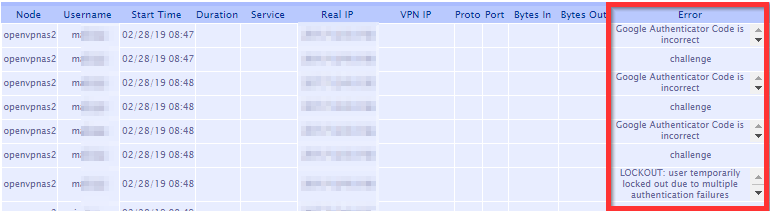
The errors you may find could be the following:
Google Authenticator Code is incorrect.
LOCKOUT: user temporarily locked out due to multiple authentication failures.
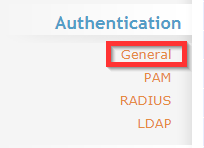
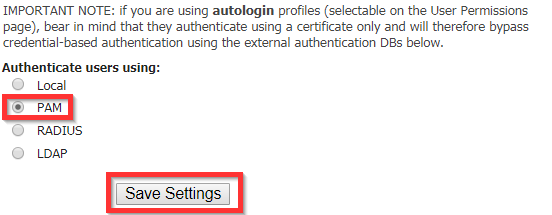
To unlock a user account (if using local authentication), Login to the Admin Web Console, Go to “General” under Authentication and change Authentication to “PAM”, Save Settings > Update Running Server > “Local” > Save Settings> Update Running Server.

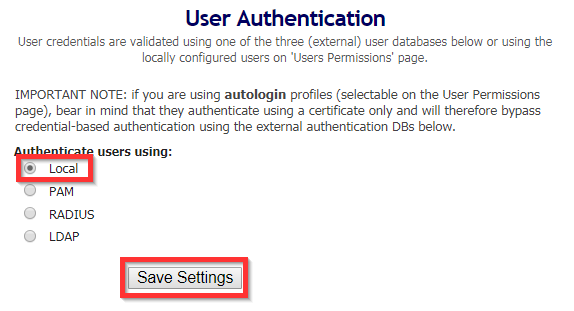
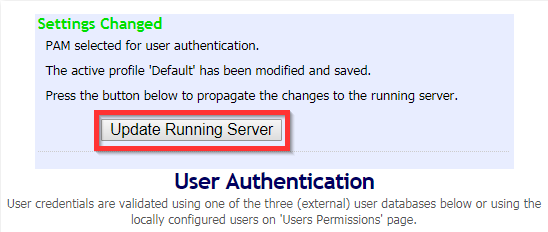
This procedure should unlock disabled or locked user accounts on OpenVPN.
Reset A User Account on OpenVPN
To reset a user’s OpenVPN account:
Log in to the admin web console, click on User Permissions.
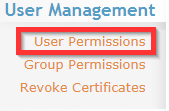
Find the username, place a checkmark in the Delete column, then Apply > Save. Next, re-create the account.
Scroll to the bottom of the list, type the new user name:
Eg. jcoltrin
Save > update server
Go back find the username again in the list and hit Show:
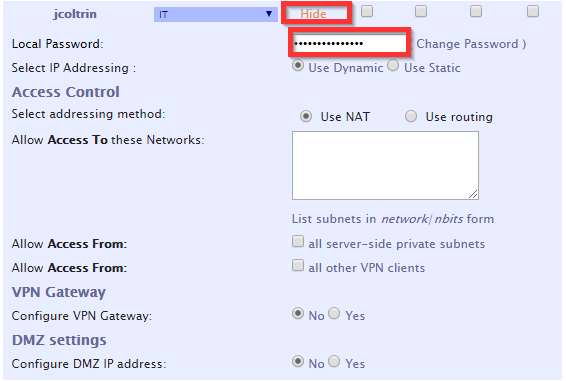
Enter in the Local Password: (S3cr3tP@ssw0rd!)
Save > Update
Check OpenVPN for Valid Concurrent License
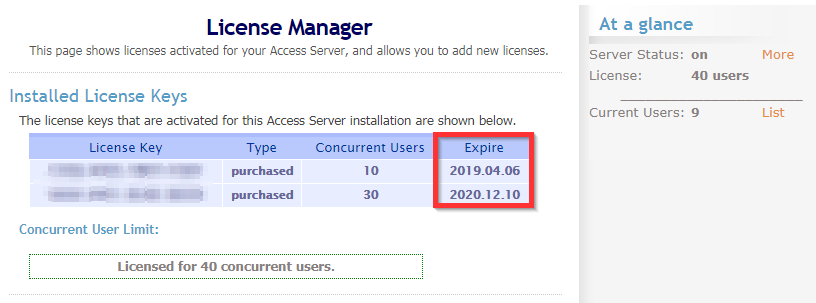
In the admin web console, under the Configuration menu, click License. Check to ensure that your concurrent users have not reached or exceeded the limits of your licenses (under At a glance,) or that your licenses have not expired.
Use SSH to check the logs of the OpenVPN server and get the specific errors for an individual’s login problems.
After logging into the server using Putty/SSH, you can change directory to the scripts directory:
cd
/usr/local/openvpn_as/scripts/
and then issue the command ./authcli –user <username> –pass S3cr3tP@ssw0rd
./authcli --user jcoltrin --pass S3cr3tP@ssw0rd
This will produce something similar to the following information:
Result:
API METHOD: authenticate
AUTH_RETURN
  status : COM_FAULT
  reason : An error occurred while connecting: 13: Permission denied. (twisted.internet.error.ConnectError)
  user : jcoltrin
Addtionally you can find more messages related to authentication failures in /var/log. You’ll find these messages in the latest log files:
openvpnas.log
openvpnas.log.1
Use your favorite editor (vi) to search through the logs
vi openvpnas.log
use the command / and then the username to search for that term and hit “n” to go to the next instance of your term, for example:
/jcoltrin > n > n
and then :q to quit.
Here are some typical error messages for my authentication errors:
2019-02-26 14:03:26-0800 [-] WEB OUT: "2019-02-26 14:03:26-0800 [UDSProxyQueryProtocol,client] Web login authentication failed: {'status': 1, 'reason': 'local auth failed: password verification failed: auth/authlocal:42,web/http:1609,web/http:750,web/server:126,web/server:133,xml/authrpc:110,xml/authrpc:164,internet/defer:102,xml/authsess:50,sagent/saccess:86,xml/authrpc:244,xml/authsess:50,xml/authsess:103,auth/authdelegate:308,util/delegate:26,auth/authdelegate:237,util/defer:224,util/defer:246,internet/defer:190,internet/defer:181,internet/defer:323,util/defer:246,internet/defer:190,internet/defer:181,internet/defer:323,util/defer:245,internet/defer:102,auth/authdelegate:61,auth/authdelegate:240,util/delegate:26,auth/authlocal:42,util/error:61,util/error:44', 'user': 'jcoltrin'}"
2019-02-26 14:19:40-0800 [-] WEB OUT: "2019-02-26 14:19:40-0800 [UDSProxyQueryProtocol,client] Web login authentication failed: {'status': 1, 'no_lockout': True, 'reason': 'challenge', 'user': 'jcoltrin', 'proplist': {'pvt_google_auth_secret_locked': 'true', 'prop_cli.script.win.user.connect': '[redacted]', 'pvt_google_auth_secret': '[redacted]', 'prop_autogenerate': 'true', 'prop_deny': 'false', 'prop_cli.script.win.user.disconnect': '[redacted]', 'prop_superuser': 'false', 'pvt_password_digest': '[redacted]', 'prop_cli.script.linux.user.connect': '[redacted]', 'prop_autologin': 'false', 'conn_group': 'Default', 'type': 'user_connect'}, 'client_reason': 'CRV1:R,E:[redacted]==:Enter Google Authenticator Code'}"
2019-02-26
14:20:08-0800 [-] WEB OUT: '2019-02-26 14:20:08-0800
[UDSProxyQueryProtocol,client] Web login failed
(twisted.cred.error.UnauthorizedLogin)'
2019-02-26 14:21:30-0800 [-] WEB OUT: "2019-02-26 14:21:30-0800 [UDSProxyQueryProtocol,client] Web login authentication failed: {'status': 1, 'client_reason': 'LOCKOUT: user temporarily locked out due to multiple authentication failures', 'reason': 'LOCKOUT: user temporarily locked out due to multiple authentication failures', 'user': 'jcoltrin'}"
Make sure the phone with Google Authenticator has the correct time and set the phone to sync it’s clock with the network/carrier
As mentioned at the beginning of this article, what the original login issue came down to was the Android phone, on which the Google Authenticator was running, had it’s time off by about 3 minutes. To set and change the correct time on an Android Galaxy S8 Active, first, go to Settings > General Management > Date and Time > Set/Turn on Automatic Date and Time.
I’m not sure why the value for this phone had
date
Your result should look like the following:
openvpnas@openvpnas2:/var/log$ date
Thu Feb 28 14:46:57 PST 2019
If you find the time on your server is not accurate, check out my article on how to set the time on Ubuntu and Synchronize NTP here.