
Use PowerShell to get the Windows Experience Index in Windows 10
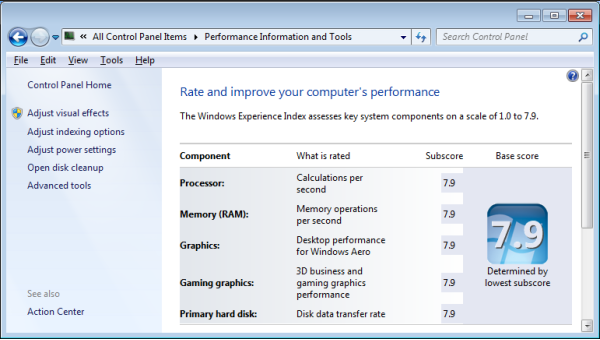
Windows 7 has the Windows Experience Index which is used often by hardware techs to get a good idea about the kind of hardware installed in a PC. It also allows you to quickly find where improvements can be made to get the machine to run faster. The following screenshot is an example of the Windows 7 Windows Experience Index:
You can get an idea about how fast the components of your Windows 10 computer are by running the Windows System Assessment Tool, but the readout is a little hard to understand. Skip this part (winsat formal) to get the Windows Experience Index in Windows 10 or Windows 7 with PowerShell below.
First open an elevated command prompt and run the command:
winsat formal
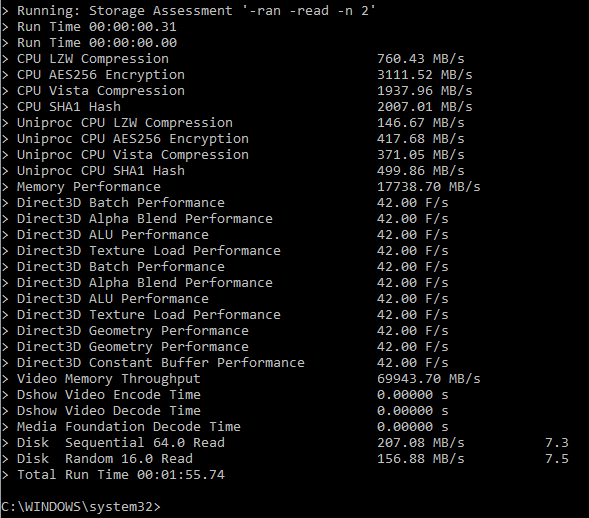
Below is a screenshot of the command running and it’s output. Running this tool will slow down your PC for a few minutes as it runs the tests:

Results:
$SysInfo = Get-CimInstance -Query "SELECT WinSPRLevel,CPUScore,MemoryScore,DiskScore,GraphicsScore,D3DScore From Win32_WinSAT"

    $SysParams = @{
                    Perf_WinExp_All = $SysInfo.WinSPRLevel
                    Perf_WinExp_CPU = $SysInfo.CPUScore
                    Perf_WinExp_RAM = $SysInfo.MemoryScore
                    Perf_WinExp_DSK = $SysInfo.DiskScore
                    Perf_WinExp_VID = $SysInfo.GraphicsScore
                    Perf_WinExp_D3D = $SysInfo.D3DScore
                    Perf_WinExp_AVG = "{0:N2}" -f ((($SysInfo) |
                    ForEach-Object {$_.CimInstanceProperties.Value})[0..4] |
                    Measure-Object -Average).Average
                   }

    New-Object -TypeName PSobject -Property $SysParams
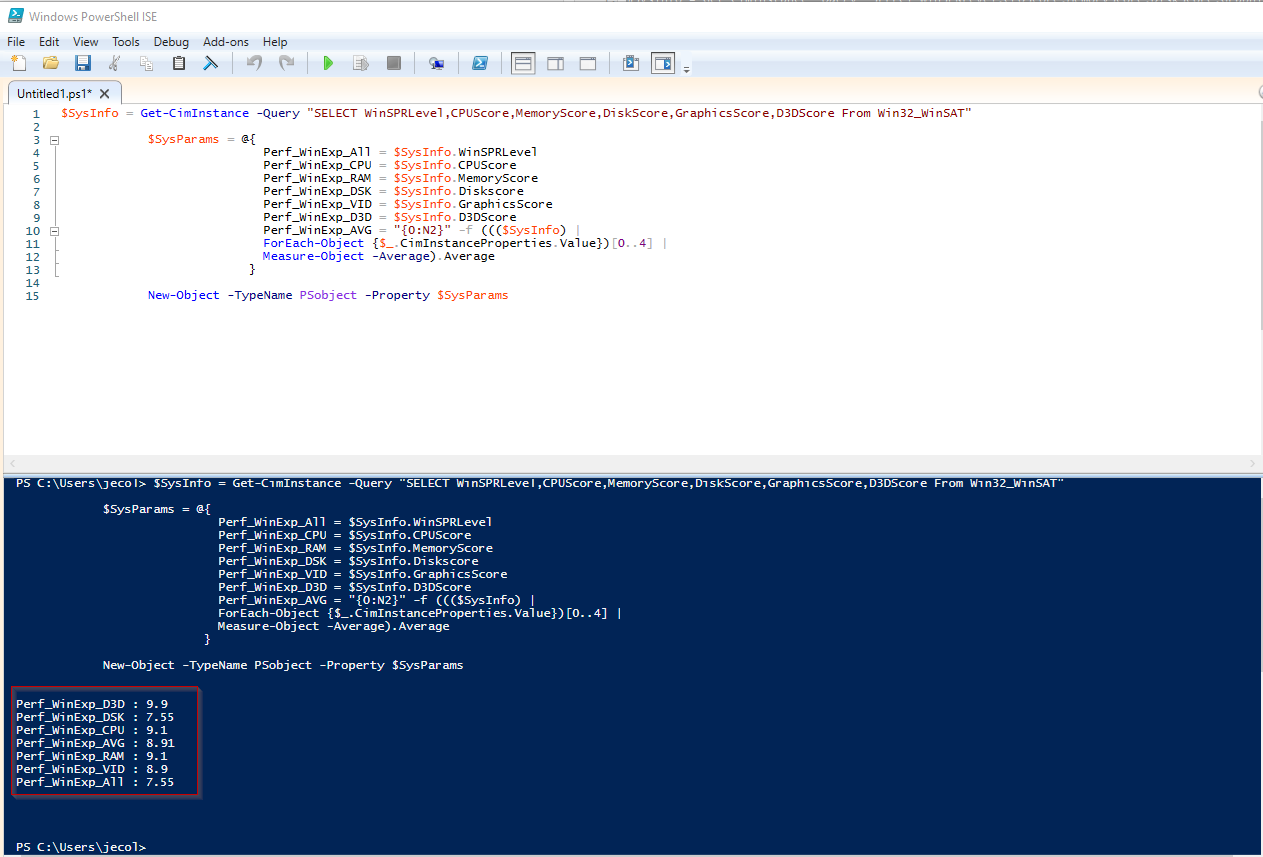
Here’s my results
Perf_WinExp_D3D : 9.9
Perf_WinExp_DSK : 7.55
Perf_WinExp_CPU : 9.1
Perf_WinExp_AVG : 8.91
Perf_WinExp_RAM : 9.1
Perf_WinExp_VID : 8.9
Perf_WinExp_All : 7.55
Perf_WinExp_D3D : 9.9
Perf_WinExp_DSK : 8.15
Perf_WinExp_CPU : 8.2
Perf_WinExp_AVG : 8.09
Perf_WinExp_RAM : 8.2
Perf_WinExp_VID : 6
Perf_WinExp_All : 6
So you can see that in my results, my WEI score would be 7.5 – where the lowest subscore determines my overall result. Looking at the scores, I can improve my score and upgrade my computer by increasing the DSK (disk) performance. To do this I would probably have to upgrade my motherboard to one that supports an NVME hard drive.
My friend’s laptop’s lowest score is VID (video) which means his laptop GPU is keeping the score low. There are a few options for upgrading a laptop GPU, such as an external GPU, but this isn’t surprising as most laptops GPUs can’t compete with a full-sized computer and GPU.