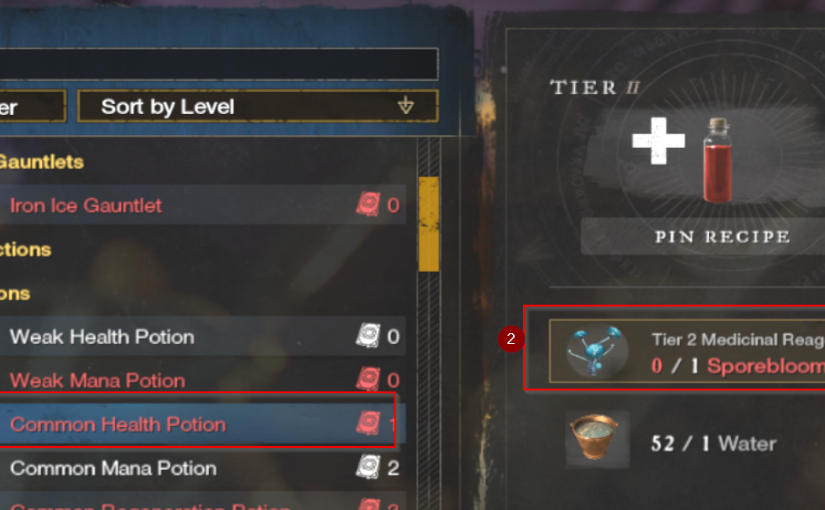
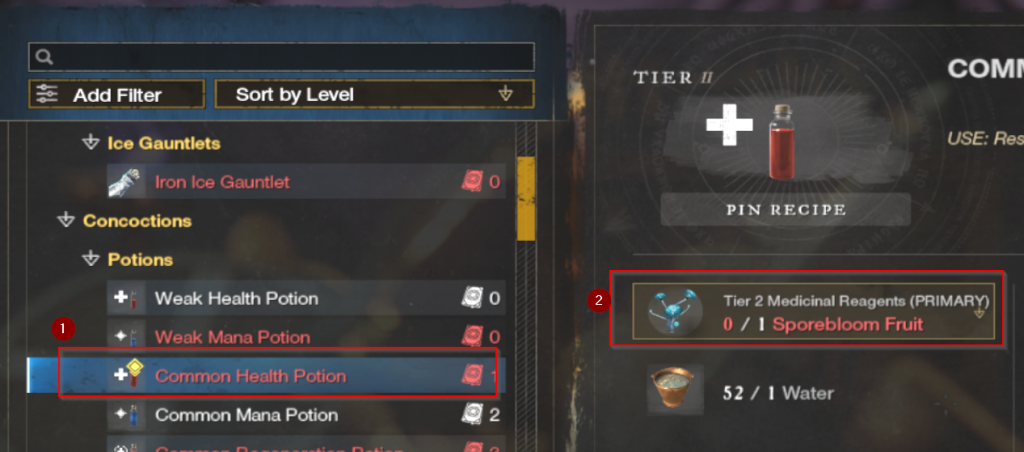
So there is a quest named “Alchemists Needed” in WindsWard Hamlet. The mission is to Acquire Common Health Potion. In order to complete this mission, one of the ingredients for the potion is named Sporebloom Fruit. Searching resource maps online didn’t help so I basically ran around along all the rivers in the area and collected all types of plants. I was then able to craft the Common Health Potion. At this point I found that we can click on the Recipe ingredient titled: Tier 2 Medicinal Reagents (PRIMARY)
Under this recipe item I finally found all of the ingredients that make up Sporebloom Fruit. 1. Click on the Common Health Potion 2. Click on the Tier 2 Medicinal Reagents (PRIMARY) 0/1 Sporebloom Fruit menu:
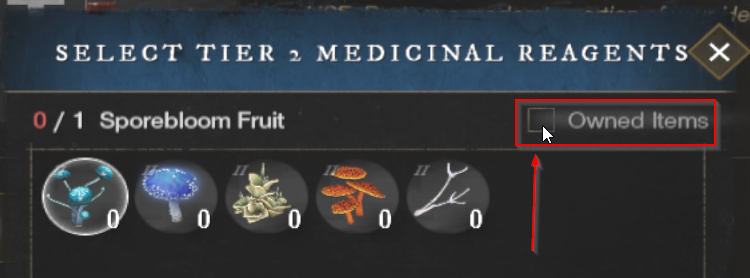
3. Now uncheck / clear the box that says Owned Items:
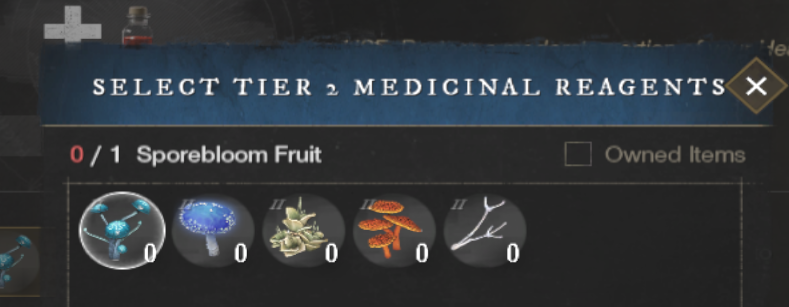
4. Hover your mouse over each ingredient. Now we can see what the (Primary) ingredient constitutes, and they are:
If you have employees who change phone extensions, names, departments, address, or titles a lot, HR or management may want to have this contact information data updated in Office365. Oftentimes these little changes can add up and we want to make a lot of changes in bulk with a single command. Instead of updating manually, we can make the changes to an Excel csv file and upload the changes all at once.
Ok in order to import/update the contact information for employees in the Office 365 tenant using a csv file and PowerShell, do the following:
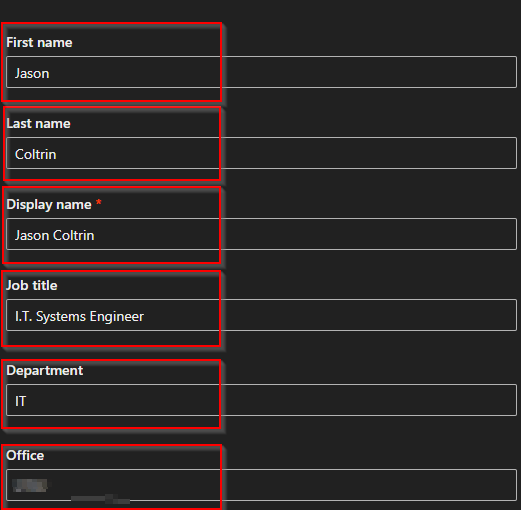
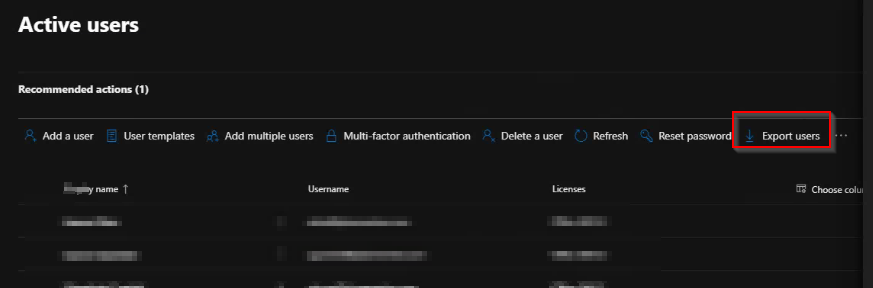
Edit the attached CSV file with information that needs to be imported into O365. **Note: the UserPrincipleName and DisplayName columns are required.** FYI, screenshot below is how I exported the required data from O365 and copied the required columns into the attached file.
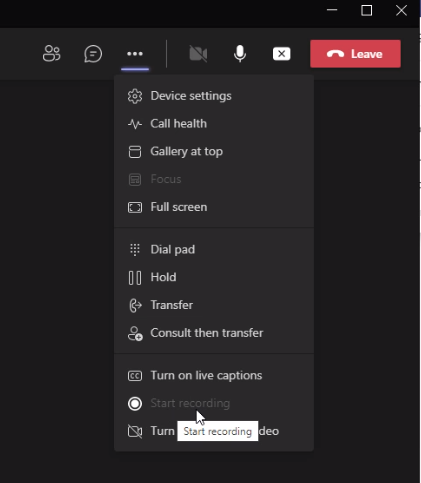
If your users report that the “Start Recording” button in Microsoft Teams is disabled and/or “greyed” out and/or “grayed out,” then perhaps recently the storage path for Teams to One Drive had changed, or there was a policy change or a tenant change occurred which caused the problem. Regardless, the following resolved the issue and fixed the grayed out problem for us. Special thanks to Ryu_Yosei for providing a solution here; below is the step-by-step.
For starters, this resolution’s time-to-fix is about 20 minutes. You’ll first want to start by opening a Microsoft Exchange Online Powershell Module as an Administrator, into the Tenant that is having the issue. If you’re unfamiliar with how to do this, follow the instructions in the first part of the procedure/guide here. One caveat, is that in order to import the required MicrosoftTeams module, we want to ensure that we start the Exchange Powershell session as an Administrator.
How to Run the Microsoft Exchange Online Powershell Module as Administrator
After installing the Hybrid Exchange Shell, we will probably have a desktop shortcut. Right-clicking on the shortcut doesn’t give us the usual “Run as an Administrator” option. Instead, we’ll want to first start a command ‘cmd’ prompt, run that as an administrator first, and then launch the Exchange Shell from within the command prompt.
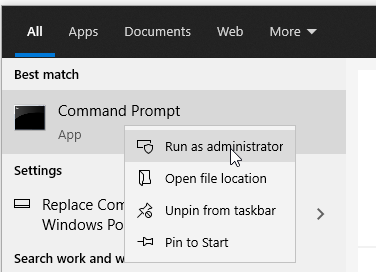
Click the Start Button and type cmd
Right click on the Command Prompt app and choose Run as an Administrator
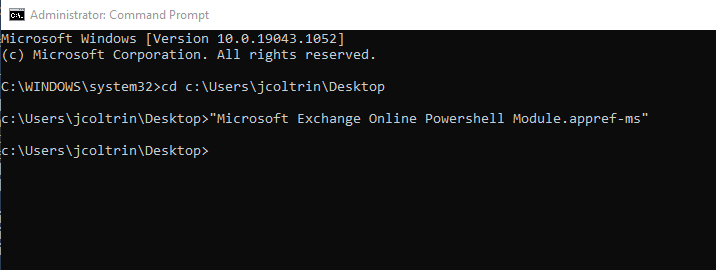
4. Next, inside the Administrator command prompt, issue the commands
cd c:\Users\Username\Desktop
5. Next start the Exchange module by running the command:
You may be prompted to log into O365, and perform multi-factor authentication if necessary. Next, if we do not already have the Teams module installed, issue the commands:
We’ll see some information asking to allow to trust the repo, so type y for yes.
PS C:\Users\jcoltrin> Install-Module MicrosoftTeams

Untrusted repository
You are installing the modules from an untrusted repository. If you trust this repository, change its
InstallationPolicy value by running the Set-PSRepository cmdlet. Are you sure you want to install the modules from
'PSGallery'?
[Y] Yes  [A] Yes to All  [N] No  [L] No to All  [S] Suspend  [?] Help (default is "N"): y
Next we’ll want to connect to Microsoft Teams in our tenant with the command:
Connect-MicrosoftTeams
We’ll have the system return some information including our Account, Environment, Tenant, and TenantId. We can now check the status of our CsTeamsCallingPolicy with the command:
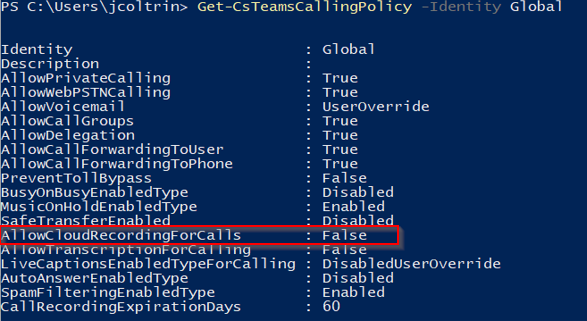
Get-CsTeamsCallingPolicy -Identity Global
In our case if we look at the entry for AllowCloudRecordingForCalls, we can see it is set to False:
Teams AllowCloudRecordingForCalls set to False
To change this to True, use the following command:
Set-CsTeamsCallingPolicy -Identity Global -AllowCloudRecordingForCalls $true
We can check to see if the command worked by issuing the previous command again:
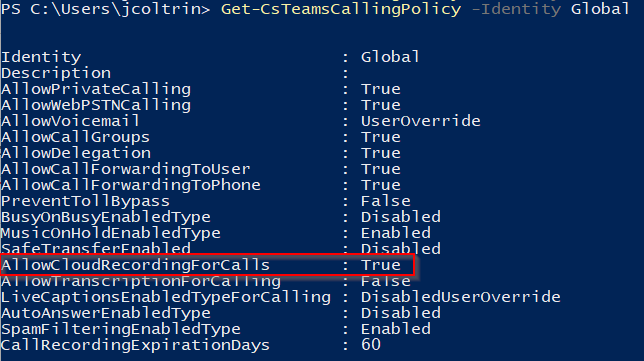
Get-CsTeamsCallingPolicy -Identity Global
We can now see that AllowCloudRecordingForCalls is now set to True:
AllowCloudRecordingForCalls set to True
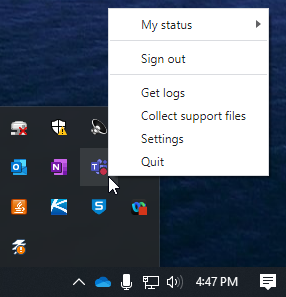
The setting should take place pretty much immediately across the tenant, however, users will still see the Start Recording button is disabled or grayed out until they completely Quit Teams and then restart the App again. To quit teams, in the bottom-right corner of the Windows primary desktop, down by the clock, expand the SysTray, right-click on the Teams icon and choose Quit.
How to Quit Microsoft Teams
Restart and/or Sign into Microsoft Teams again, start a test Call/Meeting with an associate, and check to see that Start Recording is now available and enabled.
Hopefully this guide helps restore your ability to record Teams calls. If something else worked for you, please leave a note in the comments below.
If your organization has been utilizing SharePoint’s “View in File Explorer” or “Open With Explorer” to map a drive to a SharePoint directory, you may have had problems opening SharePoint files in File Explorer, the connection between SharePoint and the File Explorer breaks, the Mapped Drive disconnects, or the connection is unreliable. Also, SharePoint can be a bit cumbersome when trying to work with files in the web-browser. The outdated SharePoint “View in File Explorer” feature was built with WebDav in the 90’s, and may use ActiveX controls, which is why it relies on Internet Explorer version 10 and/or 11 to run. You may recall we wrote about troubleshooting SharePoint’s “Open in File Explorer” here.
Microsoft’s preferred alternative to “View in File Explorer” is OneDriveSync, and Files On Demand (FOD.) When we think of “Sync”, we probably think of the classic Windows “Offline Files” configured in the Control Panel’s Sync Center. However, OneDriveSync is not the same as Offline Files.
OneDrive Sync utilizes the more modern technology, Files-on-Demand (FOD), which is configured in OneDrive Settings. Once configured, Files on Demand will only pull the index of all the files and folders in a SharePoint Library.
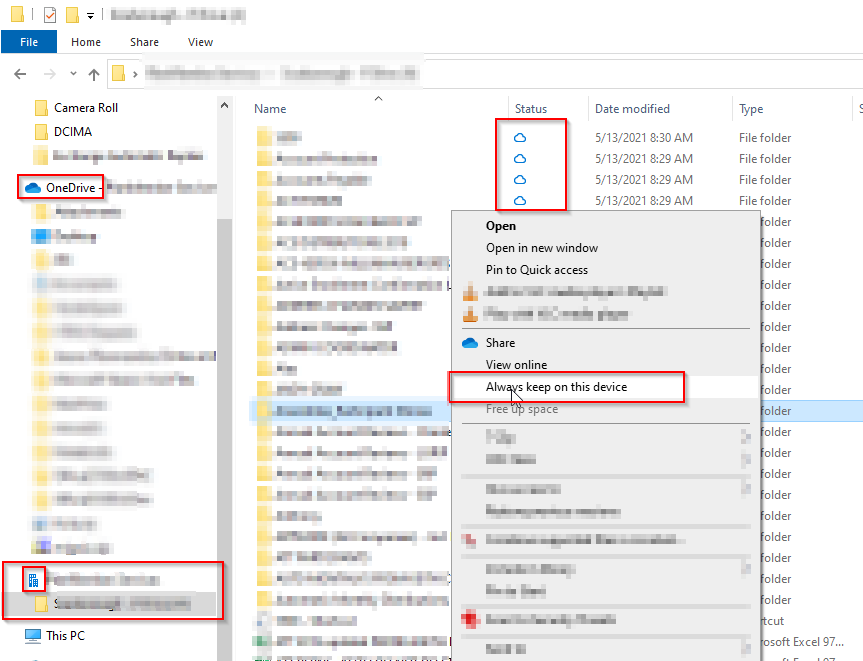
If desired, we can get the entire file/folder/data by right-clicking on the file or folder and choosing “Always keep on this device.” By default, if FOD is enabled, and we choose to Sync, we’ll only get an index of the SharePoint Library in the File Explorer (and we won’t sync the entire library and data contained there in.)
How to Enable Files On Demand and Sync a SharePoint Library
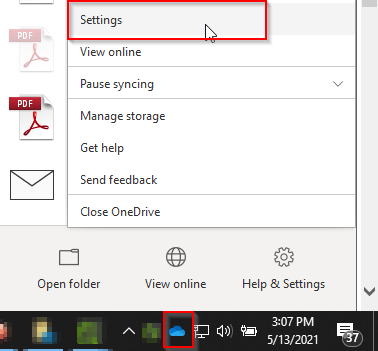
Before we Sync our SharePoint Library, make sure the OneDrive app is up to date and is running and logged in with the same credentials used to log into SharePoint online at www.office.com. Look for the blue or white cloud icon in the Systray (bottom right corner of your primary screen; near the clock,) then right-click, and click Settings.
OneDrive Settings
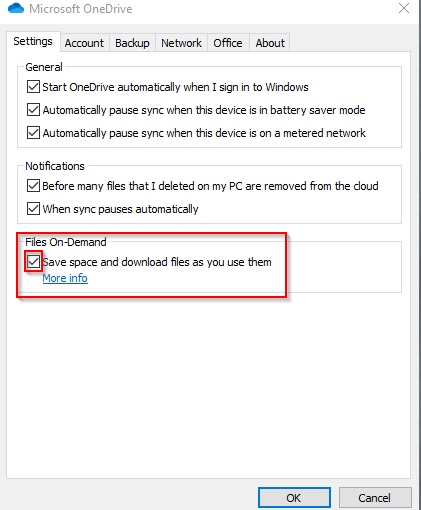
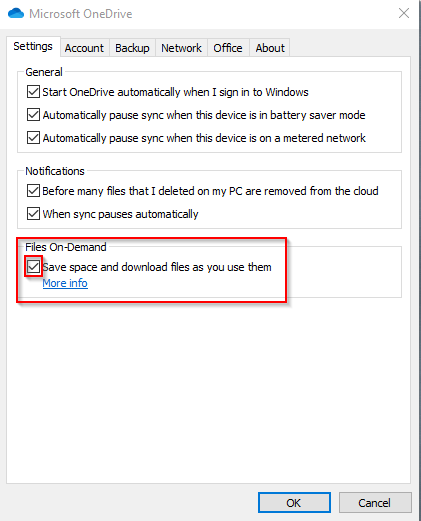
Next, in the Settings dialog box, near the bottom, place a check mark in the Files On-Demand / “Save space and download files as you use them” checkbox.
OneDrive Settings Files On-Demand
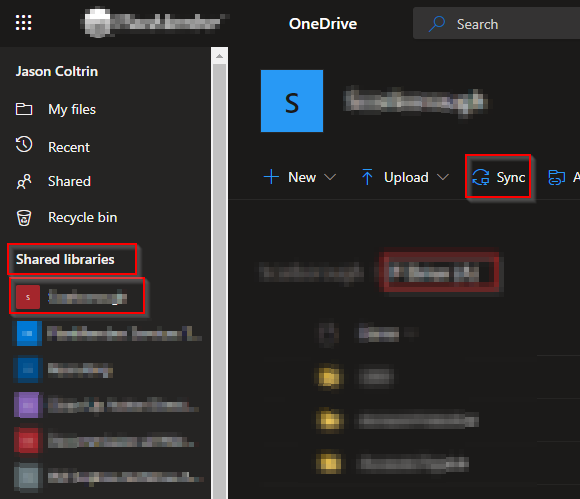
Next, open the Edge web browser and sign into www.office.com. Click on the SharePoint icon and then navigate to a Document Library that you would like to sync. Next, click the Sync button at the top of the Library:
OneDrive Sync
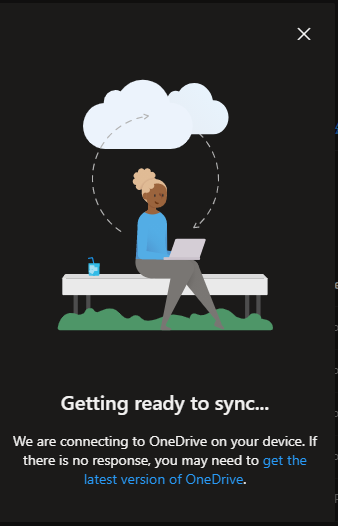
Normally we’ll see a couple pop-ups: Getting Ready to Sync, and You are Now Syncing:
Getting Ready to Sync dialog
OneDrive You are now syncing dialog
We’ll now have the SharePoint Library’s index built in our File Explorer with the files now having a status of either “Cloud Icon” or “Green Check Mark” next to each folder/file. As the Sync runs, we can check the Sync status by right-clicking on the OneDrive icon in the Systray.
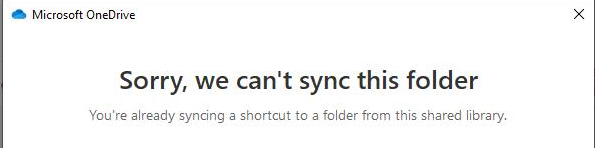
If you attempt to sync a library that already has a shortcut pointing to that library from within the user’s OneDrive folder, you may get an error:
Sorry, we can’t sync this folder – You’ve already syncing a shortcut to a folder from this shared library.
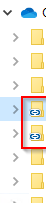
The icon will appear to have a link, so right-click on the folder that’s pointing to the Library you’re trying to Sync, and choose remove shortcut. Now we should be able to Sync the library.
If we want to have the file in SharePoint downloaded completely to our computer, right-click and choose “Always keep on this device.”
We probably do not want “Always keep on Device” for the entire Folder/Library, as it will eat up our entire hard drive.
Always keep on this device OneDrive Sync
If a file or folder is inadvertently kept on our device, we can right-click and instead choose “Free up space” on the file (greyed-out in the screenshot above.)
Take note in the screenshot above, the newly-synced Shared Library is not directly under OneDrive in the left navigation pane of the File Explorer, instead, it is listed separately below it and has a different “building” type icon.
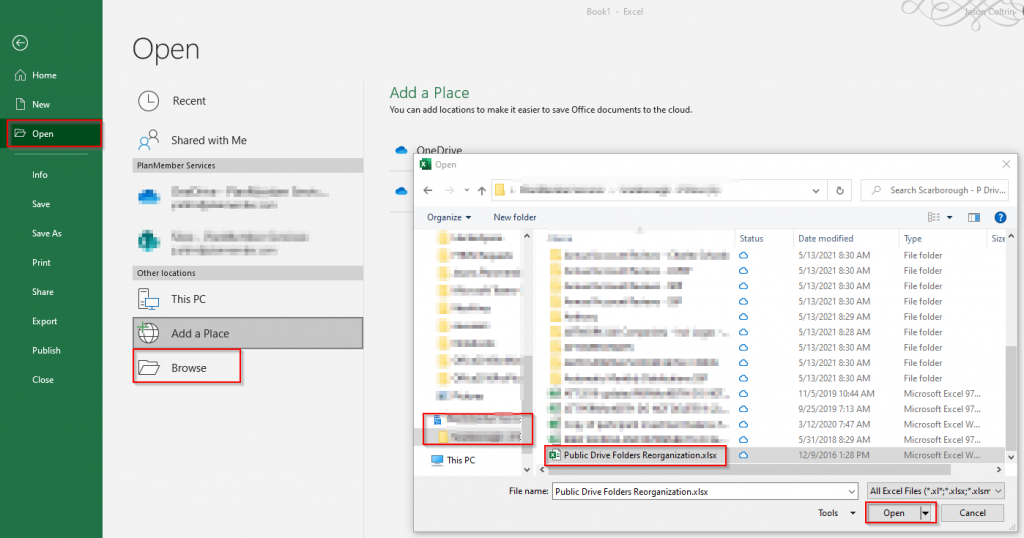
So now we can use Word and Excel apps to browse our local computer for files that are synced with SharePoint without having to use the old “Open/View in File Explorer” method.
For example, if we want to open a SharePoint file inside Excel, we click the File menu > Open > Browse > Organization / Library > File.xlsx > Open
Open SharePoint Library Files in Excel
Once we have made our changes and click Save, we’ll see a green checkmark under the Status column inside the File Explorer.
Excel File SharePoint Sync Status
We hope that if you’ve experienced difficulty opening SharePoint files in the Windows 10 File explorer, this procedure and OneDrive Sync will provide a more stable and fluid means of browsing SharePoint files in the File Explorer.
When you manage a large amount of Exchange mailboxes, inevitably someone will leave the organization, and you have to setup autoreplies with a message stating the user is no longer available by email. Common sense dictates we will setup a noreply@ mailbox and add the terminated users as alias’ to that mailbox, but not so fast. After a few days of testing and working with support, we’ve found that setting up a shared mailbox with autoreplies enabled with the terminated user’s unique email address/alias, provides the most consistent results.
We’re not going to go through the myriad of possible scenarios about what your org does with a mailbox after a user leaves. Instead, we’ll assume the mailbox is now deleted, and forwarding of mail bound for that mailbox is no longer necessary. To be on the safe side, ensure you back up the mailbox in some way before deleting the mail.
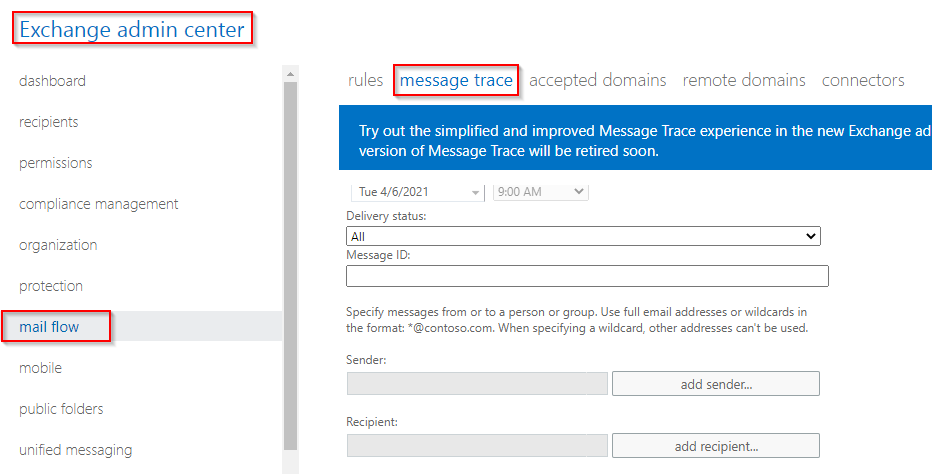
When testing auto replies, you may want to use the Exchange Message Tracker to see the messages come in and go out. To get there, go to O365 Admin > Exchange > Mail Flow > Message Trace.
A good thing to note here is that while performing a message trace, when sending test messages to the newly created shared mailbox with Automatic Replies enabled from within the same tenant or domain, auto reply messages may Drop with the following error:
This Drop message is actually an intended action, and is not an error, as it is probably used to prevent a loop of autoreplies within the same tenant.
Getting back to our original issue, to generate autoreplies, we first tried to setup a “noreply@” shared mailbox and add terminated user’s email addresses as aliases to the noreply box, but we got inconsistent results. Instead, we did the following.
How to Setup Automatic Replies for a Terminated User Mailbox
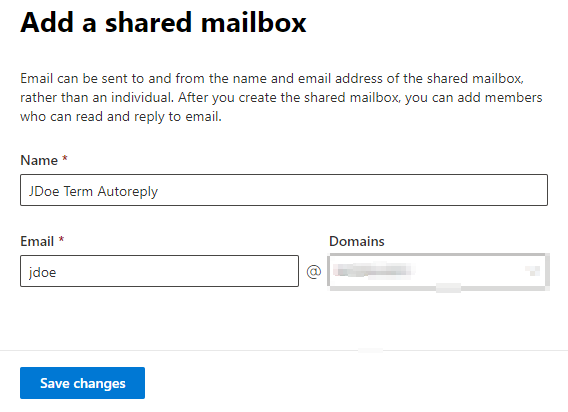
Create a shared mailbox with the terminated user’s email address. To do this go to 365 Admin Center > Groups > Shared mailboxes > Add a shared mailbox > Give the shared mailbox a name like “JDoe Term AutoReply” > Give the shared mailbox the (previously/actually used) email address of the terminated user. This does not use a mailbox license thereby freeing up a license. Alternatively, you can try simply converting the terminated user’s mailbox to a shared mailbox, but we had an inconsistent result doing this.
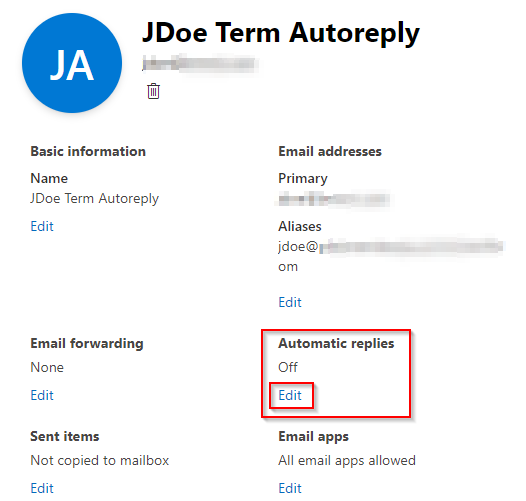
Next, simply click on the details of the shared mailbox, and under Automatic replies, click the Edit link:
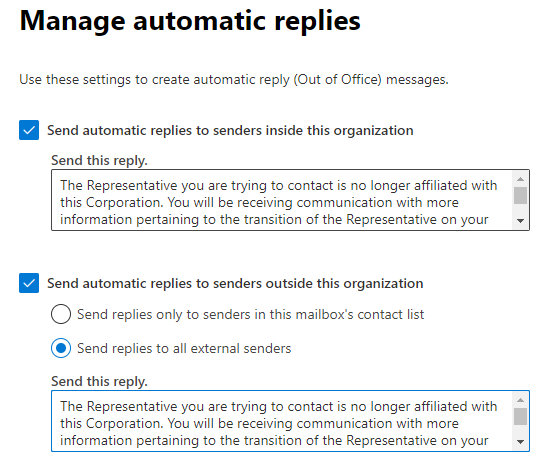
Next place Checkmarks in both “Send automatic replies to senders inside this organization” and “Send automatic replies to senders outside this organization”
Add a reply blurb which can be something similar to the following:
The Representative you are trying to contact is no longer affiliated with this Corporation. You will be receiving communication with more information pertaining to the transition of the Representative on your account. If you have an urgent matter and would like to speak with someone, please call our Service Center at 800-555-5555 between the hours of 6am-5pm (PST).
Click “Save” at the bottom and you should be all set.
If you want to test, you can try sending an email from an account outside your organization. *Note – when we sent a test message from gmail, the autoreply ended up going into the gmail account’s spam folder.
If further errors are encountered, you may need to look at your spam/external forwarding policies in your mail filtering site at https://protection.office.com/antispam or reach out to MS Support.
So recently Windows 10 has enabled a security feature that redirects certain websites like www.office.com to the Edge browser. If you need to get into a website using Internet Explorer, for now the workaround is to disable the Edge redirect setting inside the Edge browser settings.
If you use SharePoint online a lot you have probably found that Open in File Explorer is a convenient way to manage your SharePoint files and libraries in Windows 10. You’ve also probably found that in order to view the SharePoint files in the Windows 10 File Explorer, you first need to open Internet Explorer, then open the SharePoint library, find the link Return to Classic SharePoint in the bottom left corner of the SharePoint library page, and then click on the Open in File Explorer link inside Classic Mode. Details on how to troubleshoot opening SharePoint files in File Explorer can be found here. If you want an alternative way to browse SharePoint files in Windows 10 File Explorer using Edge, please go here.
If you want to know how to disable or remove the IE to Edge redirect, use the following instructions:
Start by opening the Edge browser.
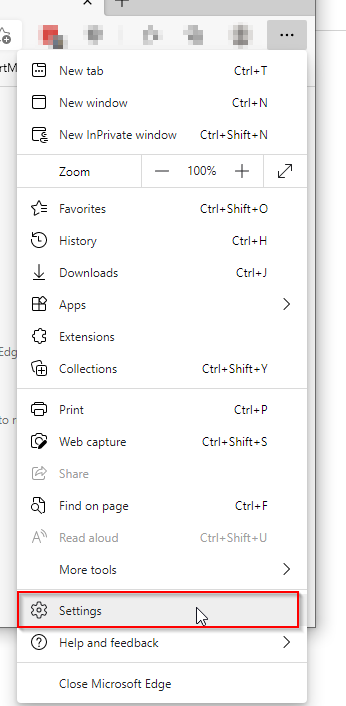
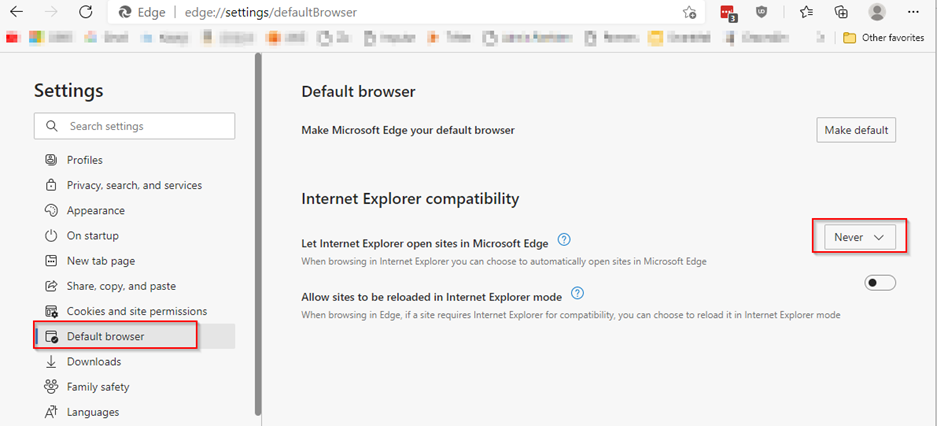
In Edge, click on the … ellipsis menu in the upper-right corner, and then click Settings. Or in the address bar at the top of Edge, type edge://settings/defaultbrowser and press Enter.
Edge Browser Settings
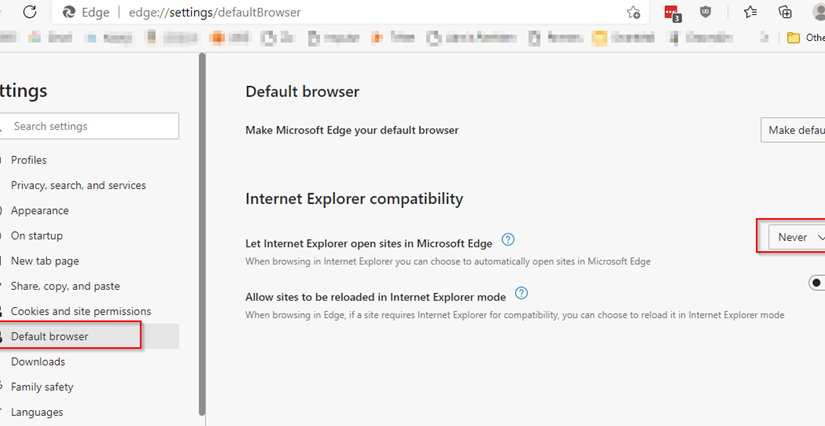
Next, inside the Edge Settings page, on the left side menu, click Default browser.
Change the setting “Let Internet Explorer open sites in Microsoft Edge” to Never.
Edge Default Browser Let Internet Explorer open sites in Microsoft Edge
That should do it!
Close the Settings Tab/Edge browser. Close and then open Internet Explorer browser. Go to www.office.com in IE and it should let you in.
So if you suspect you may have a bad Cat5/6 Ethernet patch cable, you can use a cisco switch cli interface and a few commands to diagnose if the copper pairs of cables connected to the switch are bad. The commands and explanation of TDR (Time-Domain Reflectometer) I found here.
First, ssh or telnet or use the web interface to connect to the switch with the suspect cable.
Use the following command to show the list of interfaces on your switch:
show interfaces
You’ll want to make note of how the interface is described in the previous command because Cisco is pretty particular. In my case I’ll test GigabitEthernet1/0/1.
Next issue the following command to first test the interface in question:
test cable tdr interface GigabitEthernet1/0/1
You will probably get something like the following result:
TDR test started on interface Gi1/0/1
A TDR test can take a few seconds to run on an interface
Use 'show cable-diagnostics tdr' to read the TDR results.
Wait 10 seconds and then issue the command to show the cable diagnostics result:
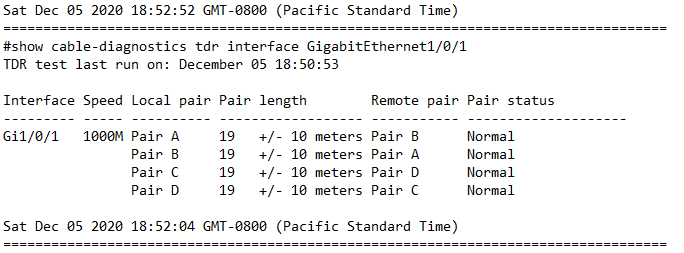
show cable-diagnostics tdr interface GigabitEthernet1/0/1
And the output will look something like the following:
TDR test last run on: December 05 18:50:53
Interface Speed Local pair Pair length Remote pair Pair status

Gi1/0/1 1000M Pair A 19 +/- 10 meters Pair B Normal
              Pair B 19 +/- 10 meters Pair A Normal
              Pair C 19 +/- 10 meters Pair D Normal
              Pair D 19 +/- 10 meters Pair C Normal
In our results we see Normal under Status. The following could be your status if there is a problem.
Result
Explanation
Normal
Ideal result you want. If testing FastEthernet, you want Pair A and B as “Normal”. If testing GigabitEthernet, you want ALL as “Normal”.
Open
Open circuit. This means that one (or more) pair has “no pin contact”.
If you have a disk drive that is running out of space because a database is starting to grow too large for the drive in an EBS volume on AWS, you may be asked to modify or expand the volume. In this case, we are tasked with expanding the “E drive” on a Windows Server 2012 AWS virtual machine. Because this is not a boot volume, and because it is an NVMe-based gp2 volume, it will be fairly easy to expand the volume without having to do things like shut down the instance, take a snapshot, expand the snapshot etc.
When you have a lot of disks attached to a Windows Server corresponding to a lot of different volumes attached to the instance in AWS, it can be a little tricky identifying the correct volume to expand. Read below to learn how to match an EBS volume in AWS to a Disk drive in Windows, expand the volume in AWS, and then finally resize the disk in Windows.
Identify Volumes Associated with Instance
First, log into AWS
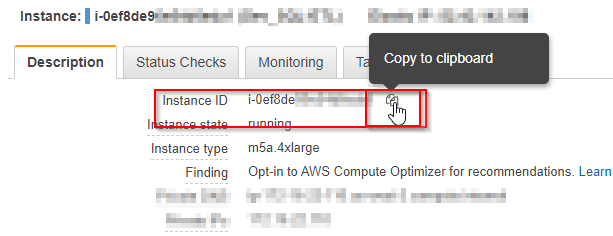
Next, Go to EC2 > Find your instance in EC2 by name, select it, then copy the instance ID.
get instance id
Next, navigate in AWS to EBS > Volumes.
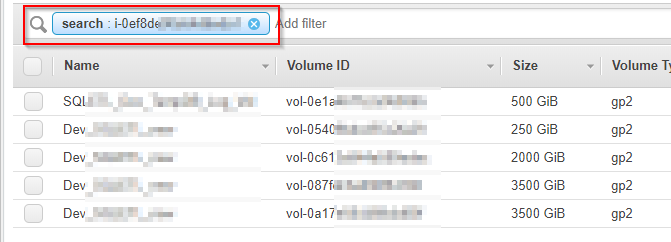
Find all the volume names associated with the instance by pasting the Instance ID into the search box at the top of the screen.
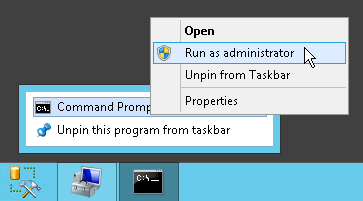
Next find the command prompt and open CMD as administrator (right-click on CMD icon > run as administrator.)
Run CMD as Administrator
Change directory in CMD to your desktop with the command:
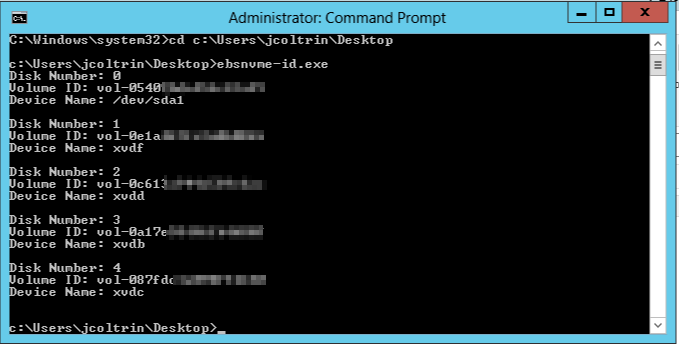
cd c:\users\jcoltrin\desktop
Run the ebsnvme-id.exe in the Administrator Command Prompt
run ebsnvme-id.exe in cmd
Identify Disk in Windows and Match to Volume ID
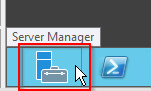
Next, on the Windows server, open Server Manager
Windows 2012 Server Manager
In the upper-right corner of Server Manager, go to Tools > Computer Management
Server 2012 Computer Management
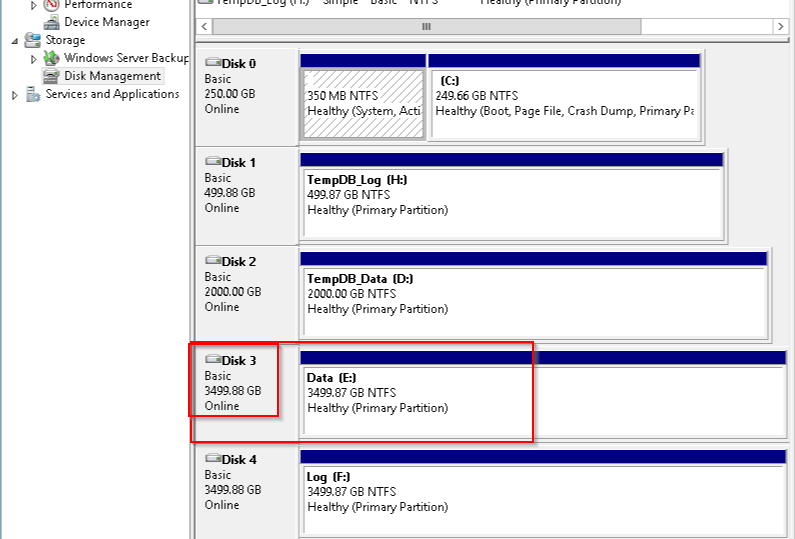
Make note of which disk (Disk 0, Disk 1, Disk 2, etc) corresponds to the Device Name and Volume ID that you want to change. In my case I want to expand Disk E, which is also known as Disk 3. Looking at the output of the CMD screenshot above, I can see Disk 3 shows my Volume ID is vol-0a17e…, and Device Name is XVDB.
Server 2012 Disk Management
Modify and Expand EBS Volume in AWS
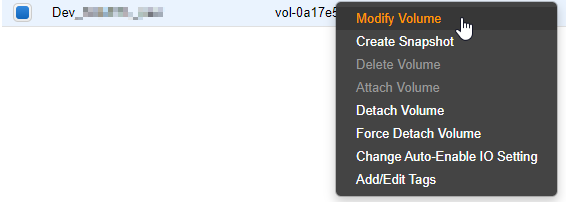
Now that we are sure which volume it is we want to expand, and that this is not our Boot drive we can right-click on the vol-0a17e… volume in EBS and choose Modify Volume. **If the Disk is your boot drive, a snapshot should be taken first, and then shut down to expand the snapshot volume, then detach the snapshot, and attach the expanded volume.
EBS Modify Volume
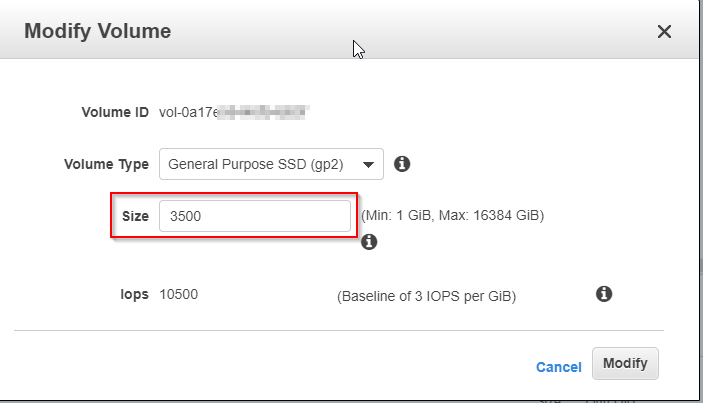
A new dialog box pops up asking for the new size of the volume:
EBS Modify Volume Size Dialog
Enter the new size and click Modify.
Switch gears and now go back to your RDP session, go to Disk Managment, Right click on the volume and choose Extend Volume… > use all of the available space and click ok.
Our Volume size has now been increased and we can continue to grow!
To enable Bitlocker on your Windows computer, you first need to be running the Windows 10 Pro operating system. Windows 7, Windows 8, and ‘Windows 10 Home’ versions do not support Bitlocker.
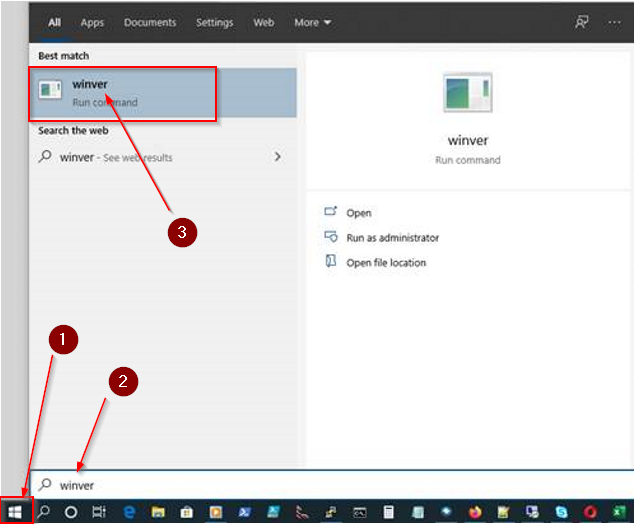
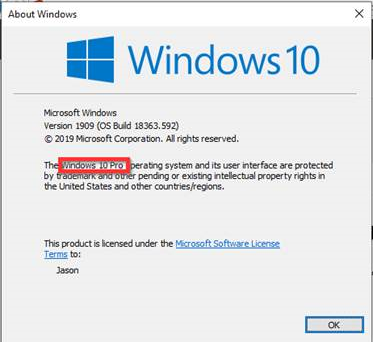
It’s a good idea to first know your current operating system version. To do so, click on the Start Button and type “WinVer” and then press Enter:
Check the version of operating system. You need to have Windows 10 Pro. As of the time of writing this article, the most version of Windows 10 is Version 1909 (OS Build 18363.592).
If you have Windows 7, follow the upgrade instructions below. If you have Windows 10 Home, then you need to purchase the upgrade to Windows 10 Pro, and follow instructions here.
You need to upgrade from Windows 7 Home to Windows 10 Home before you can upgrade to Windows 10 Pro.
When running the Media Creation Tool, run the Upgrade option. It will take a while and several reboots to upgrade from Windows 7 or 8 to Windows 10. If you started with Windows 7 Home or Windows 8 Home, the tool will most likely upgrade your PC to Windows 10 Home.
After you’ve finished the ‘Windows 7 Home’ to ‘Windows 10 Home’ upgrade, you now need to upgrade from Windows 10 Home to Windows 10 Pro in order to get the Bitlocker feature.
Upgrade from Windows 10 Home to Windows 10 Pro
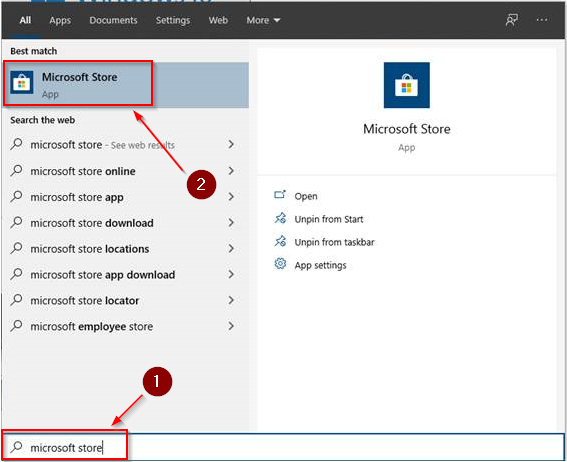
To upgrade from Windows 10 Home to Windows 10 Pro, click on the start button and type ‘Microsoft Store‘ and press Enter.
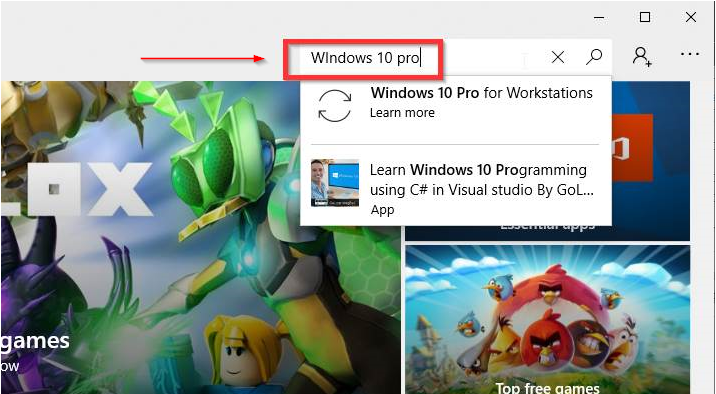
In the store, search for Windows 10 Pro in the upper-right corner of the store:
Purchase the upgrade ($99) and then run the upgrade. The process will take a while and several reboots.
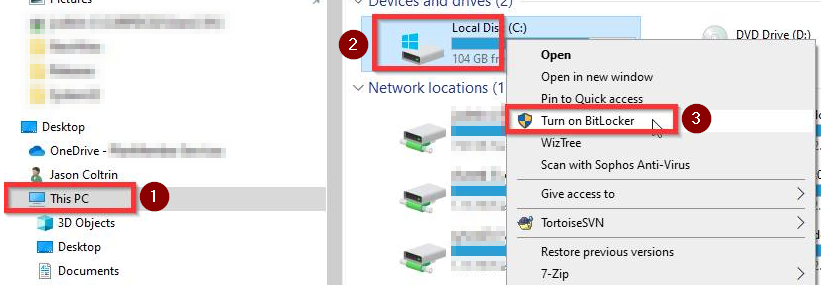
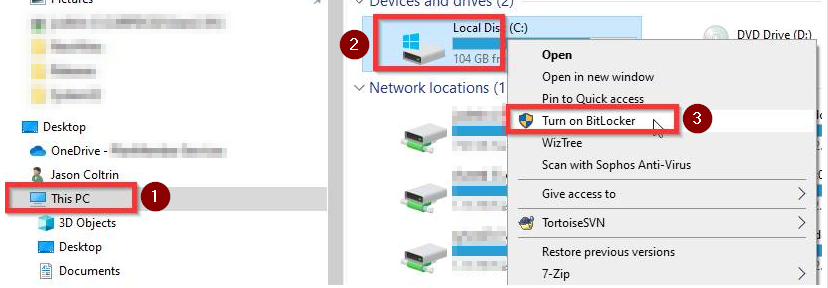
Once you are on Windows 10 Pro, open the File Explorer, click This PC, then Righ- click on the C: drive and choose Turn on Bitlocker or Manage Bitlocker.
Enable Bitlocker for the C: drive – Save the Bitlocker encryption/decryption key to a removable USB drive, save to the cloud, and print for a hard copy. This password to unlock the drive and the Recovery/Decryption key are very important, do not lose them.
Follow the default prompts (ok to skip system check) and the drive will begin encryption. You should see a status bar and progress indicator showing the percentage of encryption. When it reaches 100%, the encryption process has finished.
Reboot the system to complete the encryption of the drive.
After the reboot, log in to the desktop again, and use the Windows Control Panel to check the status. Please follow instructions here:
If you have recently enabled MFA multi factor authentication or 2FA on your Office 365 tenant, your Microsoft Outlook for Office 365 MSO 16.0.11929 (desktop version) users may be prompted over and over for their password, even though you are sure you have the correct password and even the apppassword / app password hash. I’m sure you’ve tried to re-configure Outlook, look at Azure settings, reinstall Outlook, check your autodiscover records, make sure you have the correct Office Suite version and perhaps have even attempted to change the windows 10 registry with the following settings:
So I thought it would be helpful to have a step-by-step how to enable modern authentication in Exchange Online for Office 365 based on the instructions provided in the link above.
With MFA enabled, connecting to Exchange Online with powershell is not as simple as it used to be, but still not all that bad. I’ve found the easiest way to connect to Exchange Online with Powershell is to do the following.
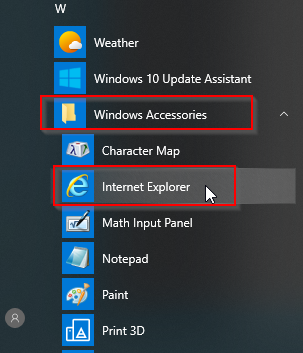
Note: A forewarning here, with certain browsers, when clicking on the Exchange Hybrid “Configure” button, and then installing the Hybrid configuration, the Office 365 login screen may may flash on the screen as a white box, and then disappears before you can authenticate and use your 2FA txt code. I’ve seen this when using Microsoft Edge, Chrome, and even the new version of Microsoft Edge based on Chromium. The only browser I’ve gotten this to consistently work with is the Internet Explorer browser built into Windows 10. The Internet Explorer browser is installed on Windows 10 by default, it’s hidden in the start menu under Accessories:
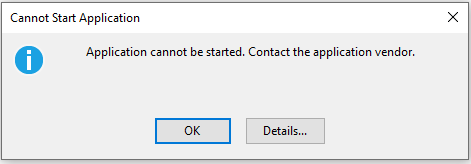
If you do attempt to run the Exchange Powershell Module using chrome you may encounter the error:
“Application cannot be started. Contact the application vendor.”
When clicking the Details… button, you may find information similar to the following:
PLATFORM VERSION INFO
	Windows 			: 10.0.18363.0 (Win32NT)
	Common Language Runtime 	: 4.0.30319.42000
	System.Deployment.dll 		: 4.8.3752.0 built by: NET48REL1
	clr.dll 			: 4.8.4121.0 built by: NET48REL1LAST_C
	dfdll.dll 			: 4.8.3752.0 built by: NET48REL1
	dfshim.dll 			: 10.0.18362.1 (WinBuild.160101.0800)

SOURCES
	Deployment url			: file:///C:/Users/Jason/Downloads/Microsoft.Online.CSE.PSModule.Client%20(3).application

IDENTITIES
	Deployment Identity		: Microsoft.Online.CSE.PSModule.Client.application, Version=16.0.3527.0, Culture=neutral, PublicKeyToken=45baf49ae30bdb15, processorArchitecture=msil

APPLICATION SUMMARY
	* Installable application.
	* Trust url parameter is set.
ERROR SUMMARY
	Below is a summary of the errors, details of these errors are listed later in the log.
	* Activation of C:\Users\Jason\Downloads\Microsoft.Online.CSE.PSModule.Client (3).application resulted in exception. Following failure messages were detected:
		+ Deployment and application do not have matching security zones.

COMPONENT STORE TRANSACTION FAILURE SUMMARY
	No transaction error was detected.

WARNINGS
	There were no warnings during this operation.

OPERATION PROGRESS STATUS
	* [4/3/2020 3:32:57 PM] : Activation of C:\Users\Jason\Downloads\Microsoft.Online.CSE.PSModule.Client (3).application has started.
	* [4/3/2020 3:32:57 PM] : Processing of deployment manifest has successfully completed.
	* [4/3/2020 3:32:57 PM] : Installation of the application has started.

ERROR DETAILS
	Following errors were detected during this operation.
	* [4/3/2020 3:32:57 PM] System.Deployment.Application.InvalidDeploymentException (Zone)
		- Deployment and application do not have matching security zones.
		- Source: System.Deployment
		- Stack trace:
			at System.Deployment.Application.DownloadManager.DownloadApplicationManifest(AssemblyManifest deploymentManifest, String targetDir, Uri deploymentUri, IDownloadNotification notification, DownloadOptions options, Uri& appSourceUri, String& appManifestPath)
			at System.Deployment.Application.ApplicationActivator.DownloadApplication(SubscriptionState subState, ActivationDescription actDesc, Int64 transactionId, TempDirectory& downloadTemp)
			at System.Deployment.Application.ApplicationActivator.InstallApplication(SubscriptionState& subState, ActivationDescription actDesc)
			at System.Deployment.Application.ApplicationActivator.PerformDeploymentActivation(Uri activationUri, Boolean isShortcut, String textualSubId, String deploymentProviderUrlFromExtension, BrowserSettings browserSettings, String& errorPageUrl, Uri& deploymentUri)
			at System.Deployment.Application.ApplicationActivator.PerformDeploymentActivationWithRetry(Uri activationUri, Boolean isShortcut, String textualSubId, String deploymentProviderUrlFromExtension, BrowserSettings browserSettings, String& errorPageUrl)
--- End of stack trace from previous location where exception was thrown ---
			at System.Runtime.ExceptionServices.ExceptionDispatchInfo.Throw()
			at System.Deployment.Application.ApplicationActivator.PerformDeploymentActivationWithRetry(Uri activationUri, Boolean isShortcut, String textualSubId, String deploymentProviderUrlFromExtension, BrowserSettings browserSettings, String& errorPageUrl)
			at System.Deployment.Application.ApplicationActivator.ActivateDeploymentWorker(Object state)

COMPONENT STORE TRANSACTION DETAILS
	No transaction information is available.
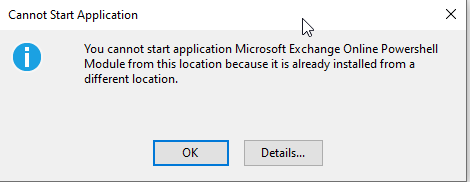
At this point, it may be necessary to uninstall the existing module and then re-install and run using Internet Explorer. You may even receive the following error:
"You cannot start application Microsoft Exchange Online Powershell Module from this location because it is already installed from a different location."
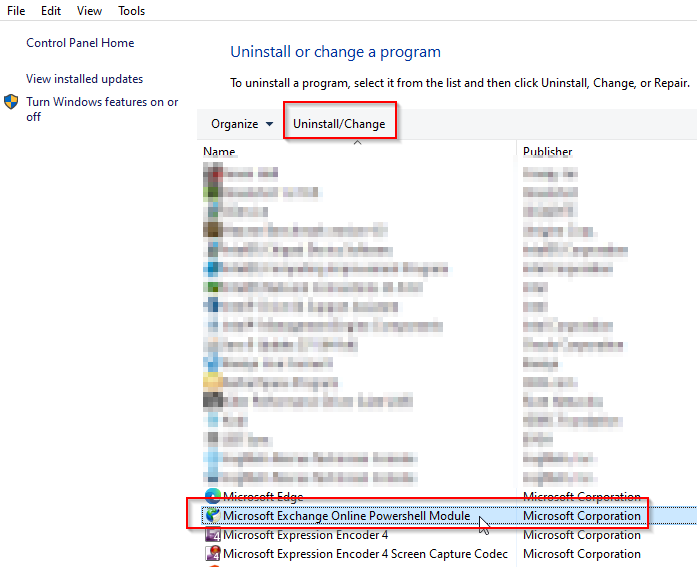
To uninstall the module, click the Start Button > type “appwiz.cpl” and press Enter.
Inside of the Programs and Features screen find the application and click Uninstall.
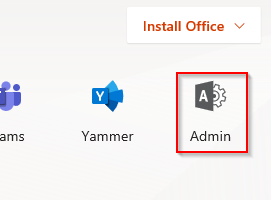
After uninstall, log into your tenant (with an administrator account) at https://www.office.com using Internet Explorer 11, and click the Admin link:
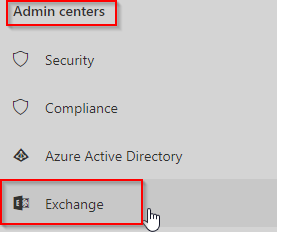
Next, Expand the Menu on the left menu by clicking Show All… and then click on Exchange:
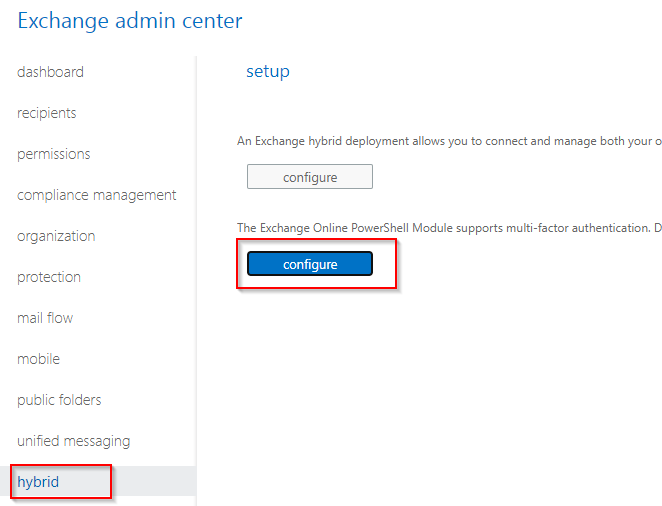
Next we want to click on the Hybrid link to get to our Powershell Configure button:
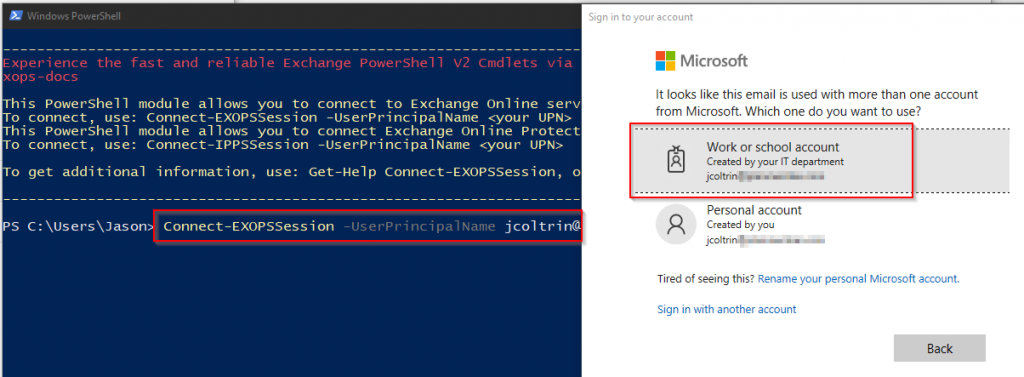
Go ahead and install the component if it asks, and when it completes, you’ll be greeted with a Windows Powershell screen with the following message:
Experience the fast and reliable Exchange PowerShell V2 Cmdlets via new PowerShellGallery module. Go to https://aka.ms/exops-docs

This PowerShell module allows you to connect to Exchange Online service.
To connect, use: Connect-EXOPSSession -UserPrincipalName <your UPN>
This PowerShell module allows you to connect Exchange Online Protection and Security & Compliance Center services also.
To connect, use: Connect-IPPSSession -UserPrincipalName <your UPN>

To get additional information, use: Get-Help Connect-EXOPSSession, or Get-Help Connect-IPPSSession
We now want to initiate our session using the instructions provided. At the prompt, type in the command:
You’ll now be prompted to sign into your tenant (Work or School). You’ll see some status bars go by and then be prompted with a warning about unapproved verbs (for example banish?)
So now we want to (only look before making changes) get our organization structure, and more precisely, find the status of our OAuth2ClientProfileEnabled setting by issuing the command:
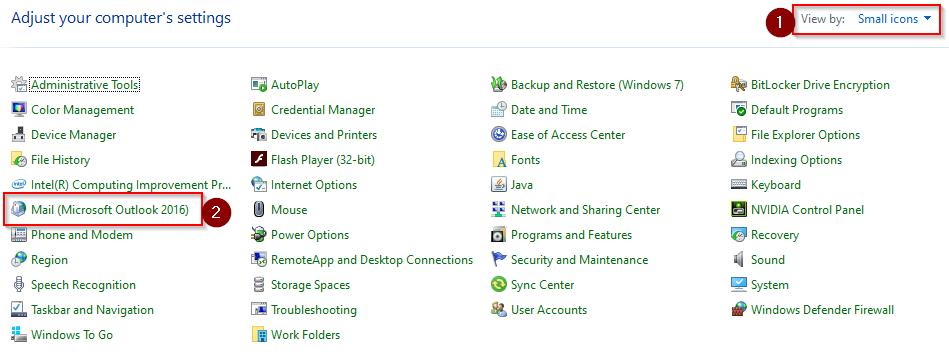
That’s about it! Give the setting about an hour to propagate and then try testing Outlook on the desktop again. You may get a few clients where their profile needs to be recreated. You can do this by going into the control panel > (1) choose Small Icons > (2) Mail Microsoft Outlook 2016.
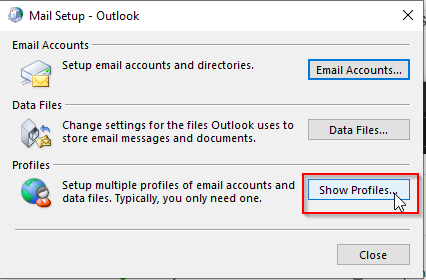
Then click Show Profiles
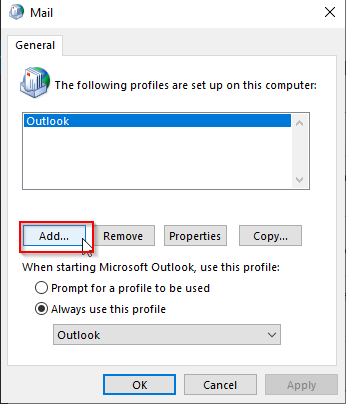
Click Add…
Now when setting up the new mail account, you should be prompted with the modern authentication and you’ll be prompted for your txt code or Microsoft Authentication Application.