How to find the Windows Experience Index in Windows 10 with Powershell

Use PowerShell to get the Windows Experience Index in Windows 10

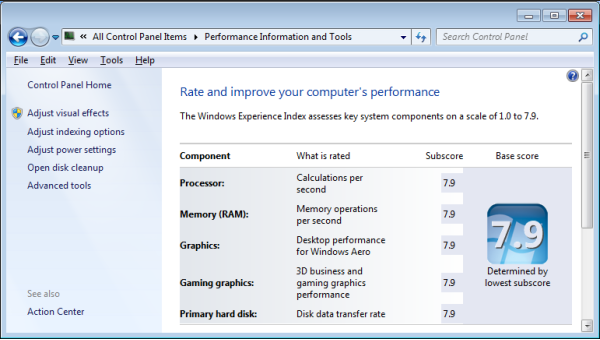
Windows 7 has the Windows Experience Index which is used often by hardware techs to get a good idea about the kind of hardware installed in a PC. It also allows you to quickly find  where improvements can be made to get the machine to run faster. The following screenshot is an example of the Windows 7 Windows Experience Index:

You can get an idea about how fast the components of your Windows 10 computer are by running the Windows System Assessment Tool, but the readout is a little hard to understand. Skip this part (winsat formal) to get the Windows Experience Index in Windows 10 or Windows 7 with PowerShell below.

First open an elevated command prompt and run the command:

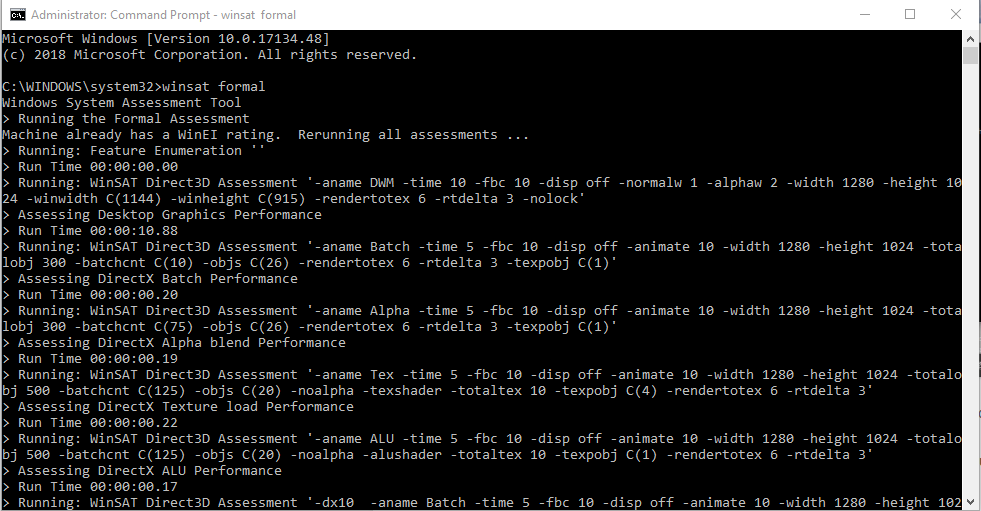
winsat formal

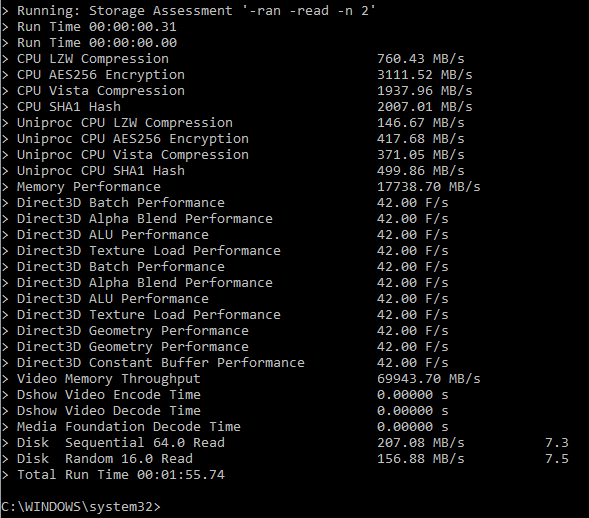
Below is a screenshot of the command running and it’s output. Running this tool will slow down your PC for a few minutes as it runs the tests:

Results:

The Windows Experience Index WMI modules are still available in Windows 10, however, the scores are not readily apparent in the Windows 10 system settings.
To get your Windows 10 Windows Experience Index subscores with PowerShell, first open up the Windows PowerShell ISE. Next, go to the following link: https://pastebin.com/i5M81xsV, -credit goes to reddit user:
*(as of 12/20/18 this code was no longer available on pastebin, so I’ve copied below)
$SysInfo = Get-CimInstance -Query "SELECT WinSPRLevel,CPUScore,MemoryScore,DiskScore,GraphicsScore,D3DScore From Win32_WinSAT"

    $SysParams = @{
                    Perf_WinExp_All = $SysInfo.WinSPRLevel
                    Perf_WinExp_CPU = $SysInfo.CPUScore
                    Perf_WinExp_RAM = $SysInfo.MemoryScore
                    Perf_WinExp_DSK = $SysInfo.DiskScore
                    Perf_WinExp_VID = $SysInfo.GraphicsScore
                    Perf_WinExp_D3D = $SysInfo.D3DScore
                    Perf_WinExp_AVG = "{0:N2}" -f ((($SysInfo) |
                    ForEach-Object {$_.CimInstanceProperties.Value})[0..4] |
                    Measure-Object -Average).Average
                   }
                   
    New-Object -TypeName PSobject -Property $SysParams
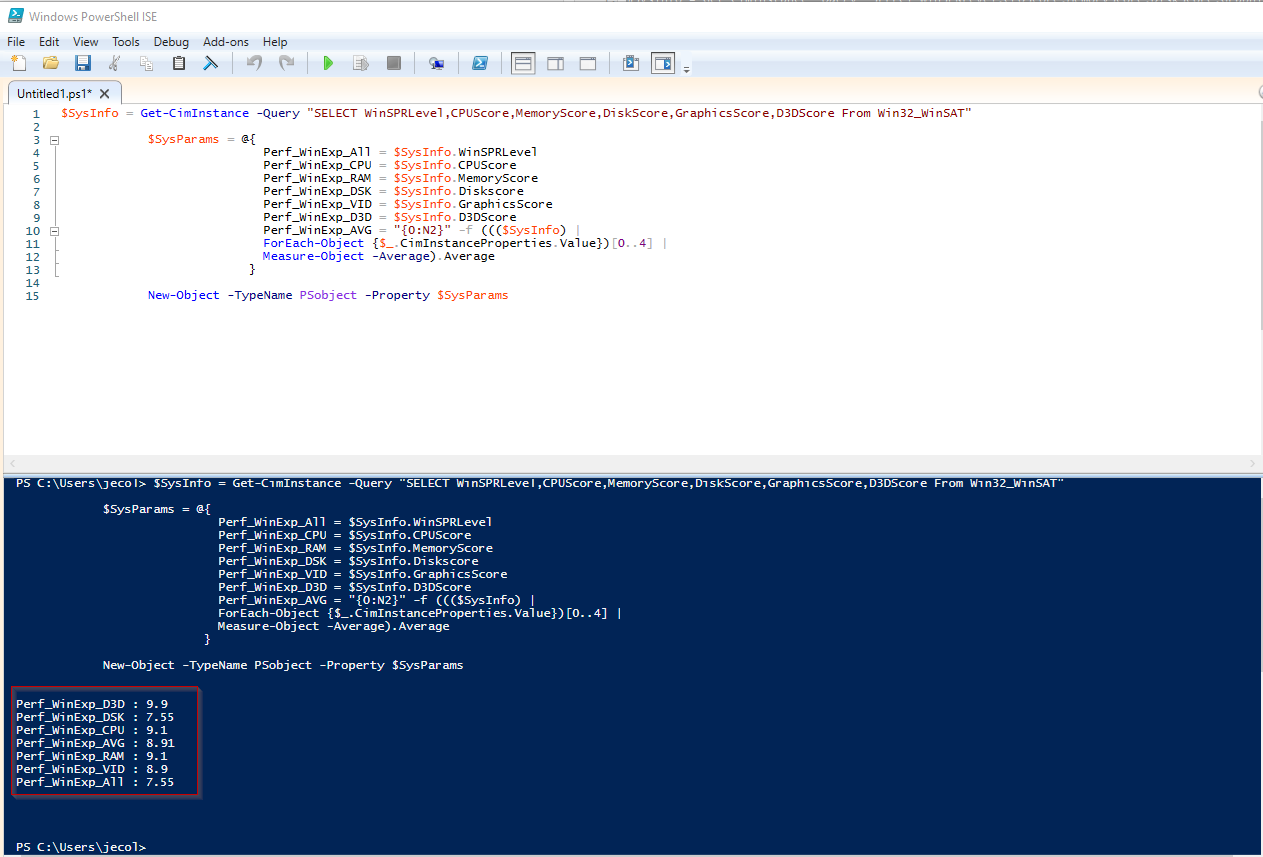
Copy the code into the Windows 10 PowerShell ISE and then run the script, or create a .ps1 file, and you can get the Windows Experience Index with PowerShell in either Windows 10 or Windows 7:

Here’s my results

Perf_WinExp_D3D : 9.9
Perf_WinExp_DSK : 7.55
Perf_WinExp_CPU : 9.1
Perf_WinExp_AVG : 8.91
Perf_WinExp_RAM : 9.1
Perf_WinExp_VID : 8.9
Perf_WinExp_All : 7.55
Here are the scores from my friend’s laptop (thanks Stan):
Perf_WinExp_D3D : 9.9
Perf_WinExp_DSK : 8.15
Perf_WinExp_CPU : 8.2
Perf_WinExp_AVG : 8.09
Perf_WinExp_RAM : 8.2
Perf_WinExp_VID : 6
Perf_WinExp_All : 6

So you can see that in my results, my WEI score would be 7.5 – where the lowest subscore determines my overall result. Looking at the scores, I can improve my score and upgrade my computer by increasing the DSK (disk) performance. To do this I would probably have to upgrade my motherboard to one that supports an NVME hard drive.

My friend’s laptop’s lowest score is VID (video) which means his laptop GPU is keeping the score low. There are a few options for upgrading a laptop GPU, such as an external GPU, but this isn’t surprising as most laptops GPUs can’t compete with a full-sized computer and GPU.

How to clone a Dell Optiplex 7050 M.2 NVME Hard Drive with Clonezilla and an External USB HDD

I ran into trouble when trying to clone a new Optiplex 7050. My normal procedure for cloning with clonezilla required a little tweaking to accommodate Windows 10, UEFI, NVME M.2, Secure Boot, and RAID On. Follow the procedure below to clone your systems on these newer hard drives and BIOS versions.

As a side thought, I enjoy using Clonezilla and have used it for many years. I love the convenience of it and not having to manage Windows images with something like SCCM. While SCCM has a place in some organizations, I believe it’s perfectly fine to use Clonezilla to create OS images of different models of computers. I have approx 15 different OS images; everything from Lenovo laptops to Dell Optiplex 380’s to Optiplex 7050’s.

Requirements:

  • 1 x USB 2.0 or 3.0 USB thumb drive min 2GB capacity for the clonezilla bootable USB drive made bootable to 20170905-zesty version of clonezilla
  • 1 x USB 3.0 USB External HDD with a minimum HDD size that is larger than the TOTAL size of your M.2 NVME HDD. (I use a 4 TB Western Digital My Passport) – In my previous experience with Clonezilla, it has created images only writing images of the Used Space on the Source HDD, in this case with UEFI / NVME HDD’s, the image created on disk is the total size of the NVME drive.
  • 2 x Dell Optiplex 7050 (Source and Target) computers
  • 1 x Separate PC or laptop you can use to create a bootable USB Clonezilla Thumb Drive

1. Configure your Source Windows 10 Dell Optiplex 7050 machine as necessary. Install all applications, create user accounts, and uninstall bloatware. Make sure you create an administrator user account and password. In final preparation for cloning, either run Sysprep (found in C:\Windows\System32\Sysprep), or alternatively ensure you shut down Windows 10 completely by creating a Shutdown /s /t 0 shortcut and executing it.

2. On a separate PC, download Rufus which we’ll use to create a bootable USB thumb drive.

3. On a separate PC, download the AMD64 version of alternative (Ubuntu-based) as outlined on the Clonezilla website (this version is required for newer BIOS’):

4. Change the file type to ISO and hit Download.

5. Attach your USB thumb drive into your separate computer, run Rufus, tell Rufus to use the drive you just attached under Device, point Rufus ” to the .iso file you just downloaded.

6. Hit Start and the bootable USB thumb drive with Clonezilla will be created.

7. On the Source computer, insert the USB thumb drive into one of the front panel’s top (black) USB ports, and insert the USB External HDD separately into the Blue USB 3.0 port. Attach the keyboard, mouse, power, and monitor.

8. Power on the Source computer and start mashing the F12 key on the keyboard to get to the one-time boot menu.
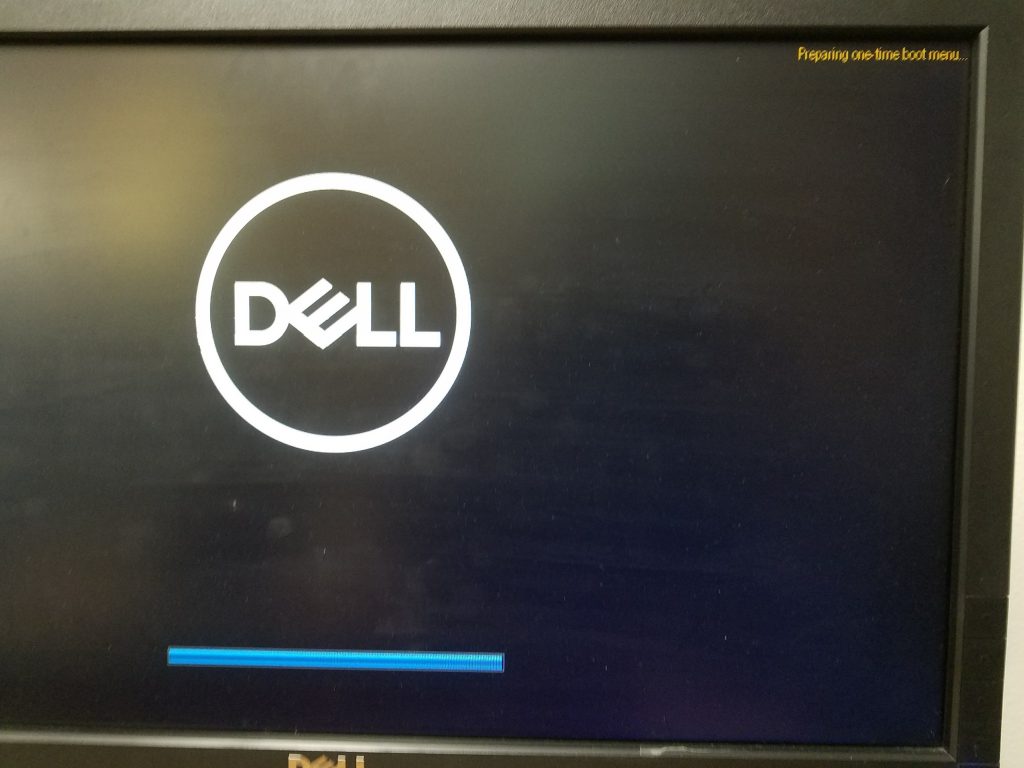
9. Before we begin, we need to make sure clonezilla can find our NVME HDD. By default UEFI and Secure Boot will be enabled. We need to disable these as well as Boot Path Security so that we can continue.

10. Select Setup from the Boot Menu:
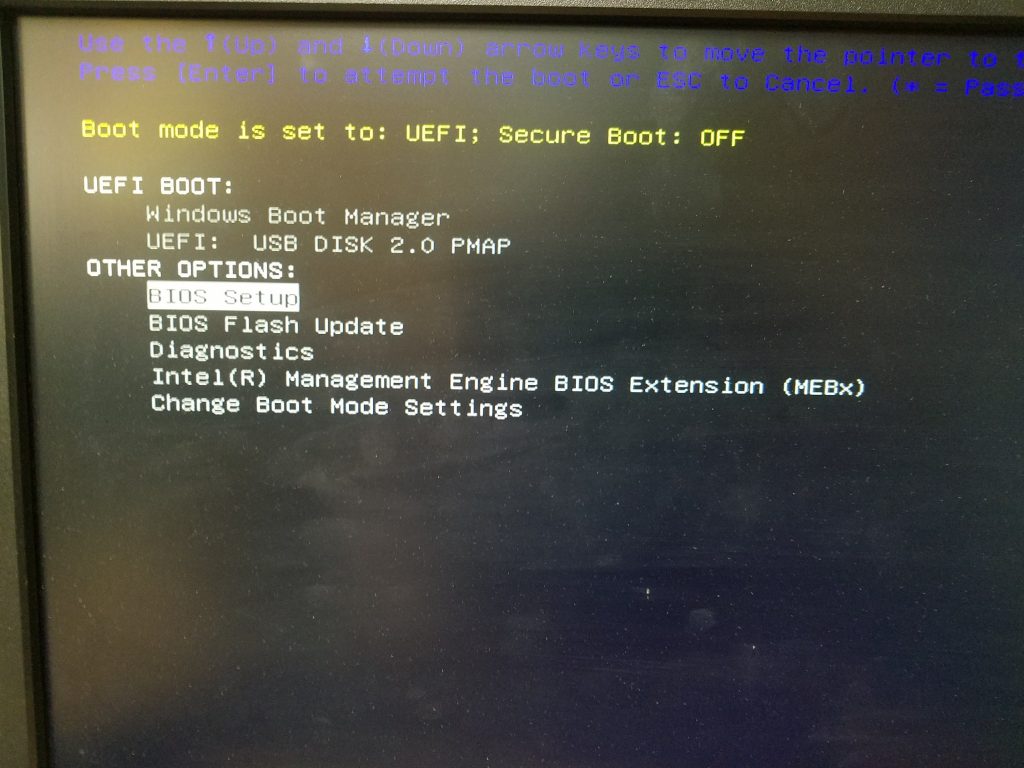
11. In the BIOS, under the General Heading, select UEFI Boot Path Security and change it from Always to Never.
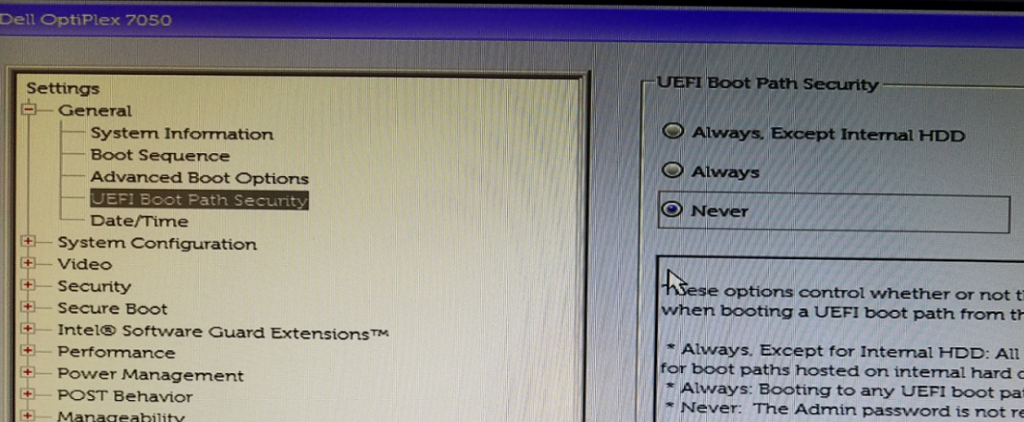
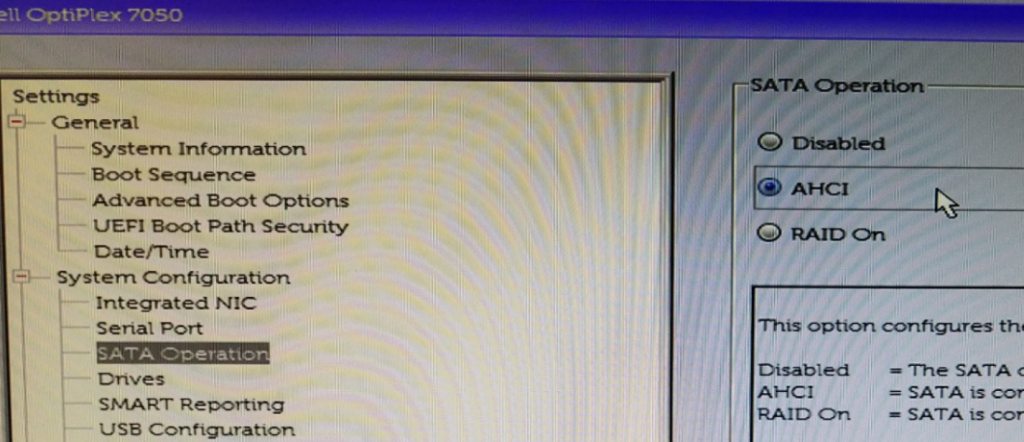
12. Next change System Configuration > SATA Operation from RAID On to AHCI
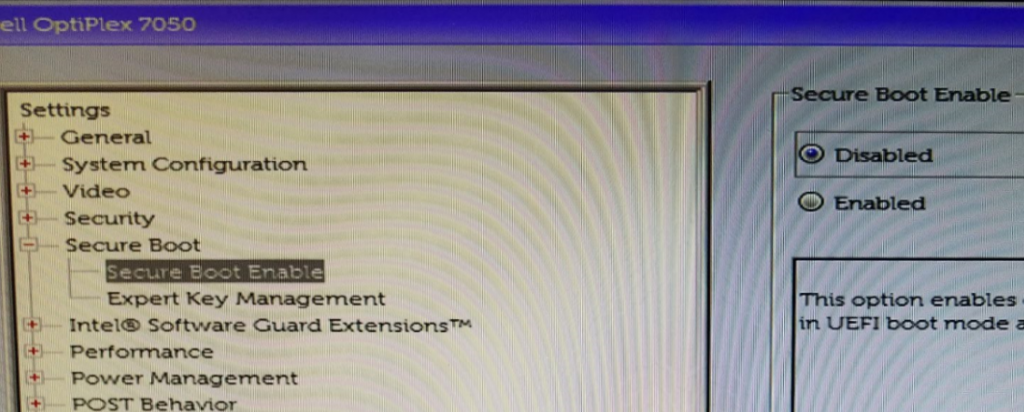
13. Lastly, change Secure Boot > Secure Boot Enable “Enabled” to “Disabled”
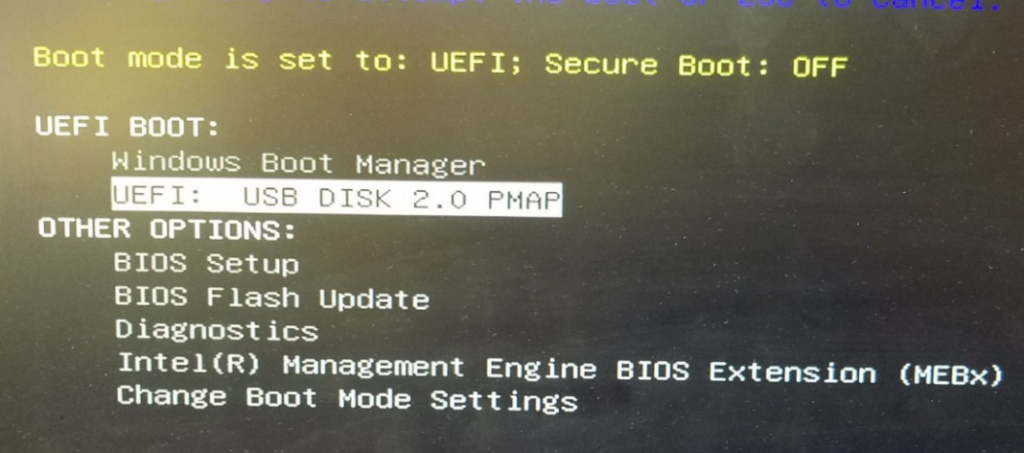
Apply, Save and Exit the BIOS. On the next boot, start mashing the F12 key again and this time select UEFI: USB DISK 2.0 PMAP
Clonezilla will boot from the USB drive so choose the default (hit Enter):

Select English > Don’t touch keymap > Start Clonezilla > device-image (Ok)

Under Mount Clonezilla image directory, choose Local_dev (Ok)
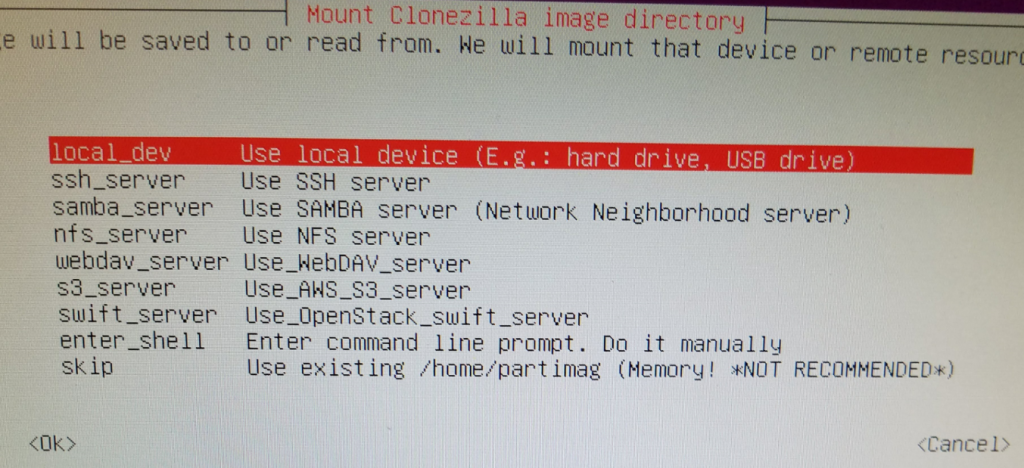
Press Enter to continue.

Review the clonezilla Scan disk preview to ensure it’s found both your Source and Target hard drives:

Press Ctrl-C to continue.

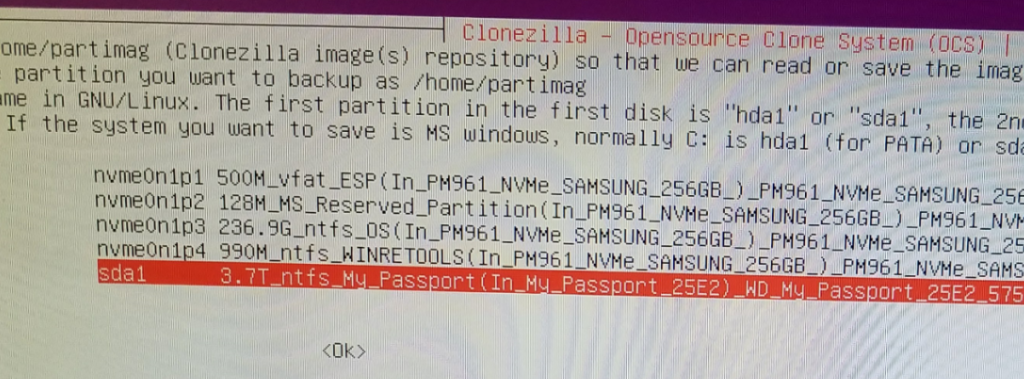
Arrow down and select your large external USB hard drive (sda1) to set the location of /home/partimg . This is where the clone image will be stored.
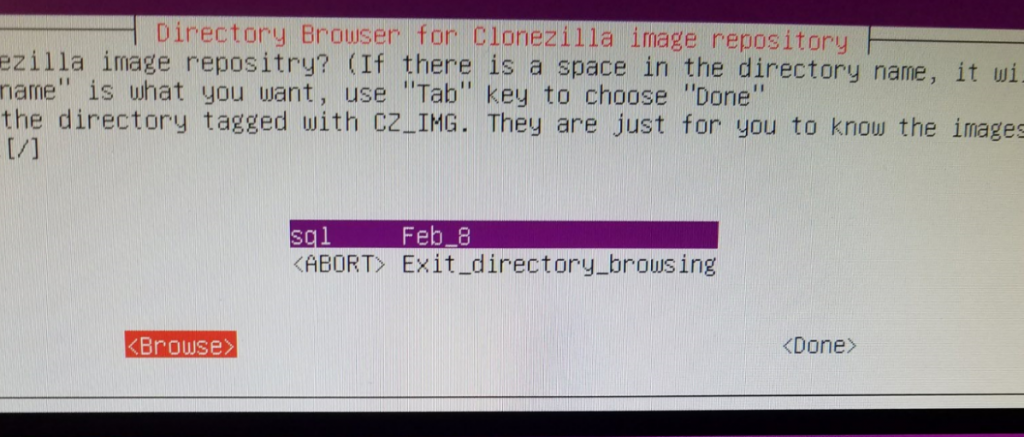
In the Directory Browser, hit “Browse” and go to your Parent Directory (top-most level) and select Done. This is where your image will be saved. You can see in my screenshot I’ve already saved an image here.
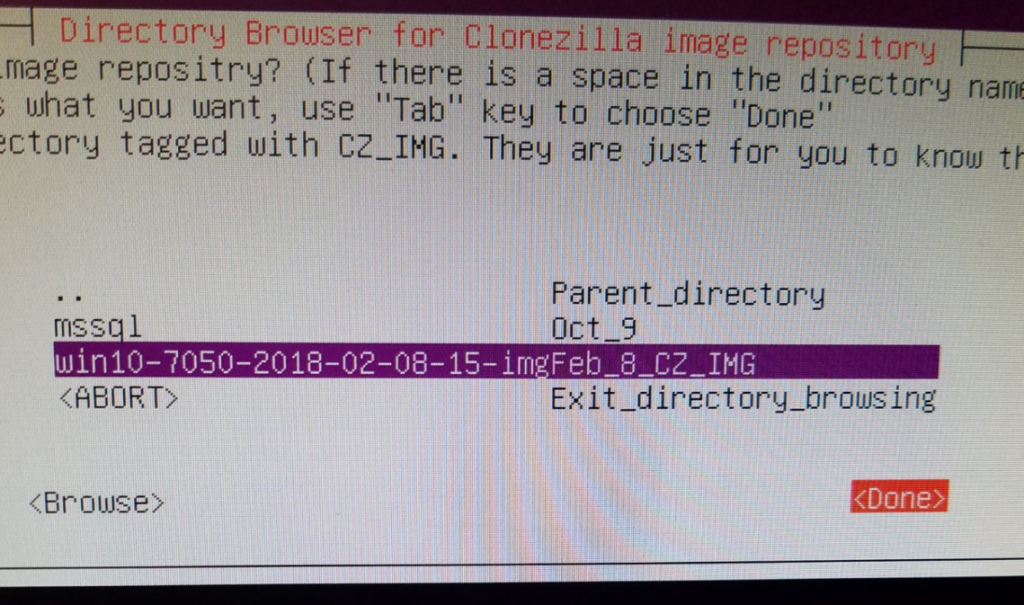
You will get a Summary location of Source (dev/sda1) and Target (/home/partimag). Press Enter to continue.

Choose Beginner mode

Choose Save Disk (Save_local_disk_as_an_image) – in my previous experience with Clonezilla, using normal spinning HDD’s and even SSD’s, I’ve used Samba to save my images to a separate server over the network using gigabit ethernet perfectly fine. However, in the case of these new computers and hard drives, I would get a permissions error when selecting SAMBA/SMB 2.1. The imaging would begin to take place and a couple smaller partitions would copy, but as soon as the primary large partition started it’s copy, I would get the permission error and the clone would halt. This is why we are using a local external USB hard drive.

Give a descriptive name for the image (Dell7050_NVME_256GB_DATE-IMG) hit OK.

Select the local disk as source (should only be one here)

Select -sfsck (Skip Checking)

Select Yes, check the saved image

Select -senc Not to encrypt the image (or encrypt if desired)

Select Action to perform when everything is finished: -p power off.

Press Enter to continue, (Yes/Yes) – the image process will run and the image of the Source PC will be written to the External USB HDD. The machine should shut down when complete.

Image Target Computer

Now that we have our image saved on our external HDD, we can image our Target PC. On the powered-off PC, Connect the USB thumbdrive, External HDD, keyboard, mouse, and monitor, and again Boot into the BIOS.

On the new target computer, we want to again change the BIOS settings to mirror those we made in steps 11., 12., and 13.

After saving the BIOS, restart and hit F12 again, select the USB thumb drive, and boot Clonezilla.

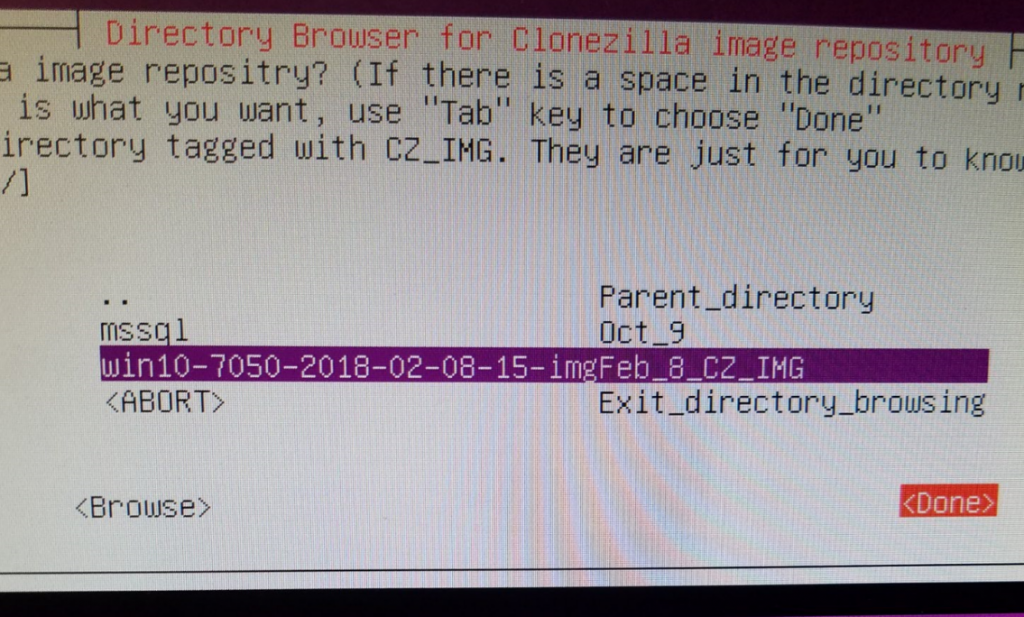
Start Clonezilla > Device Image > Local_dev > select image repository (sda1) > in Directory Browser, browse to the image we created, highlight it and select Done:
Choose Beginner Mode > Restore Disk:

Choose the image to restore:

Select the target disk to restore onto (Should only be one listed here):

Select “Skip checking the image before restoring” > poweroff > Enter >

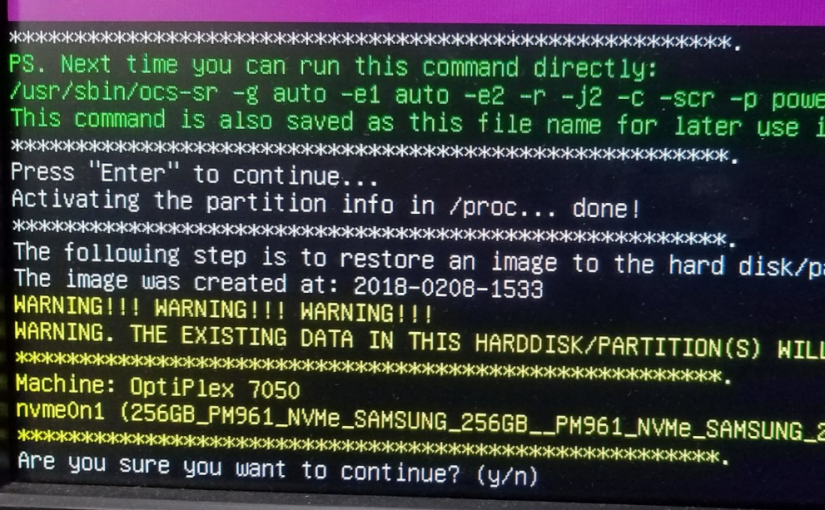
Heed the warning here. If important data is on the target disk, do not proceed. All data will be overwritten:
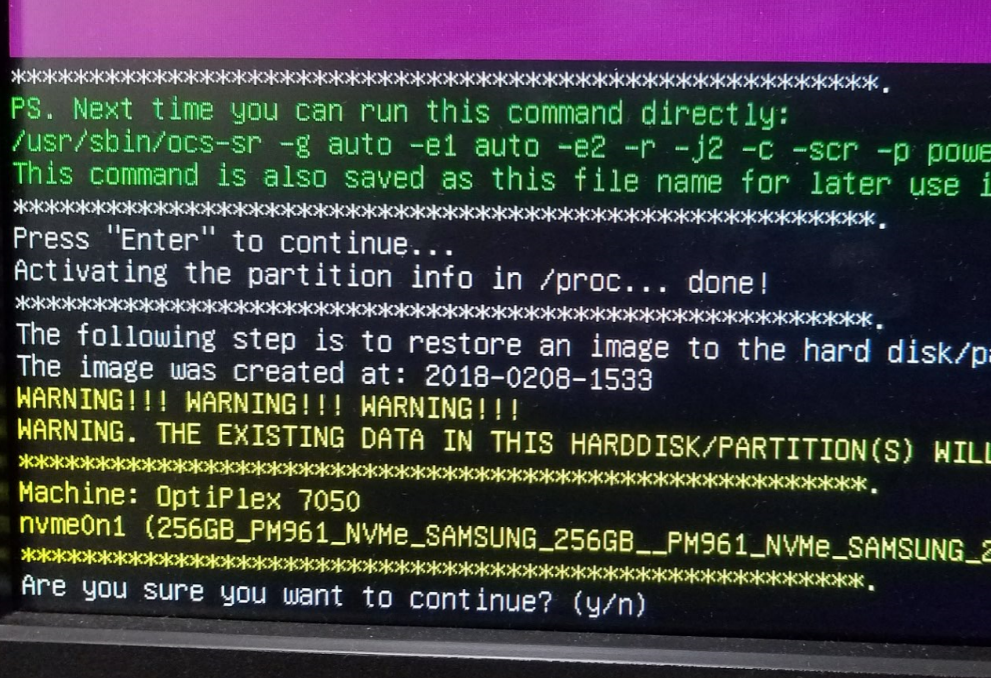
Hit y (enter) > y (enter) >

Partclone will run, clone the image to your disk, then shut down:
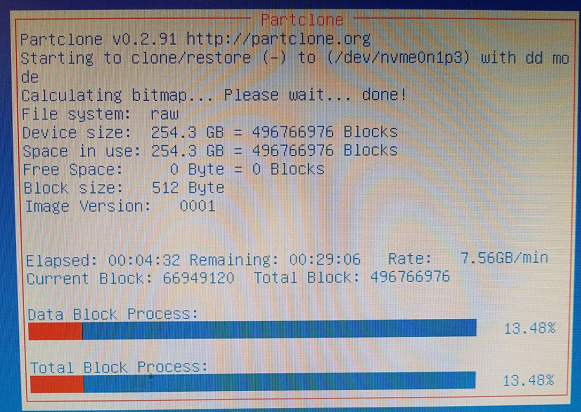
With the system powered down, remove your external HDD and boot thumb drive.

Power on the newly-imaged PC, hit the F12 button to go into the BIOS again. Reverse the changes made in steps 11, 12, and 13. Save the BIOS settings, and boot normally into windows. Congrats, you’re done! Hope this helps someone clone their newer systems with Clonezilla.
Windows 10 Creators Edition New Keyboard Shortcuts

Some new Windows Keyboard Shortcuts in Windows 10

With the release of Windows 10 Creators Edition version 1709, comes more bells, whistles, tricks, and shortcuts for us to dig into and explore. In this article, we’ll look mostly at the Windows Key shortcuts available and how the shortcuts and key combos can help us in our daily workflow.

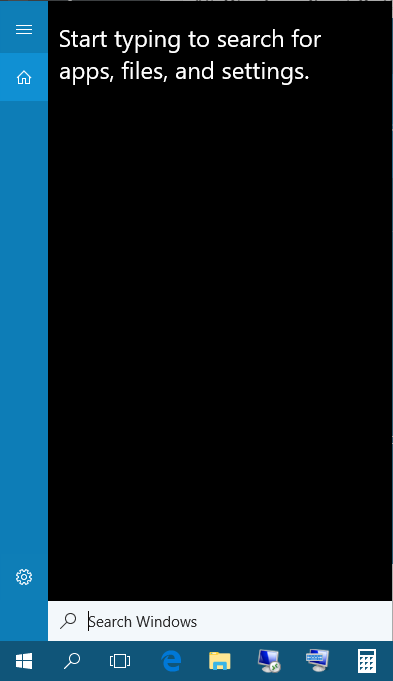
  1. In the event you’re not already aware, the Windows Key on your keyboard (usually between the Ctrl and the Alt keys in the lower left area of most keyboards) has a lots of capabilities when held down while pressing other keys on the keyboard. Pressing this key on it’s own launches the Start Menu:
  2. Windows Key + A – Brings up the Windows Notifications SideBar. Here we can find existing notifications, switch to tablet mode, get into the windows settings panel, join a WiFi network, and change our location settings.           
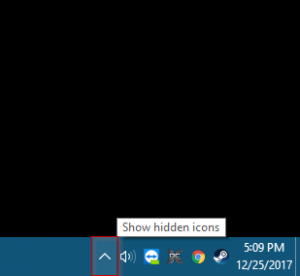
  3. Windows Key + B – Select / Activate the Systray / Show Hidden Icons Expansion menu. This can come in handy as a few applications run as services and can only be accessed by right-clicking on the icon in the Systray; if your mouse stops working, this is a good shortcut to know.         
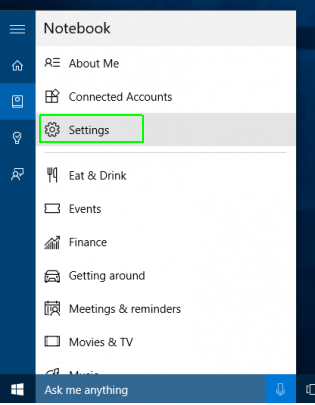
  4. Windows Key + C – Opens Cortana in Listening Mode. “Hey Cortana!” This is disabled by default and can be activated in the Cortana Settings. (Enable in Cortana > Menu > Notebook                                    
  5. Windows Key + D – Show the desktop
  6. Windows Key + E – Open File Explorer
  7. Windows Key + F – Open the Feedback Hub and Take a screenshot (this didn’t work for me)
  8. Windows Key + G – Open the X-Box Game Bar
  9. Windows Key + H – Open the Dictation control bar 
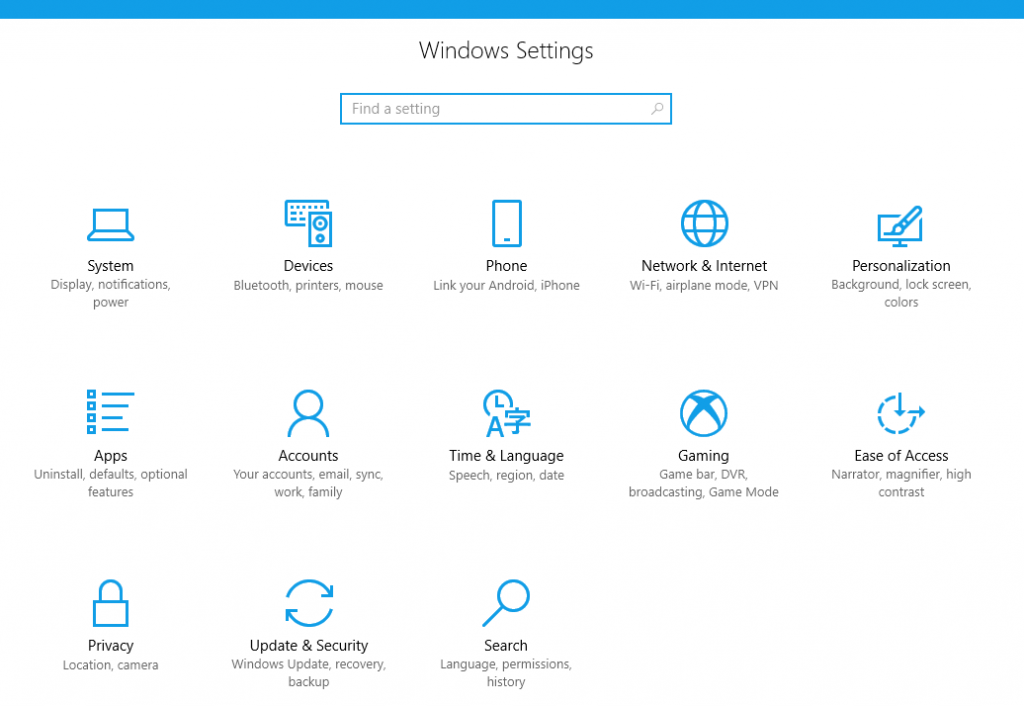
  10. Windows Key + I – Opens the Windows 10 Settings
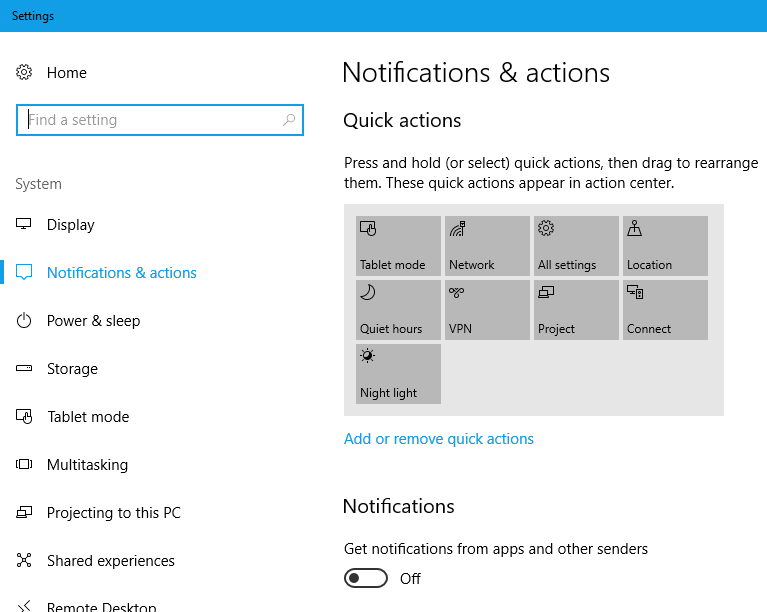
  11. Windows Key + J – Sets focus to Windows Tips when one is available (Turn off tips in Settings > Notifications & Actions) 
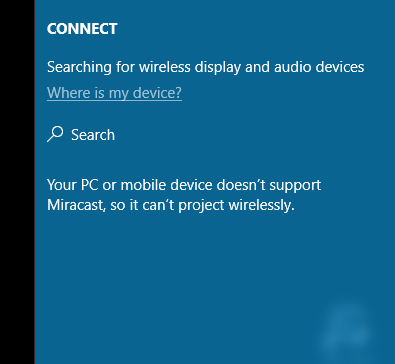
  12. Windows Key + K – Open the Connect Quick action (connect to a wireless projector)                                            
  13. Windows Key + L – Lock your PC or Switch Accounts
  14. Windows Key + M – Minimize all windows
  15. Windows Key + O – Lock the device orientation (helpful for tablets)
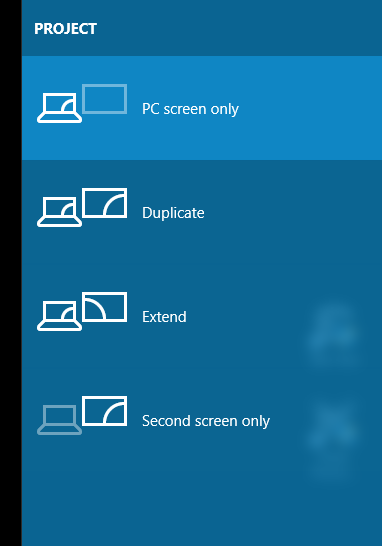
  16. Windows Key + P – Choose a presentation display mode (Sidebar Projectors tool) 
  17. Windows Key + Q – Quick file search
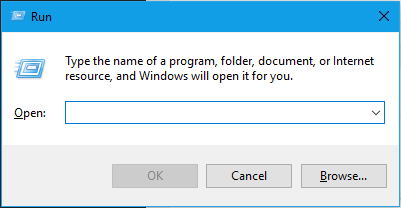
  18. Windows Key + R – Open Run dialog box
  19. Windows Key + S – Open Windows Search (same as Windows Key + Q)
  20. Windows Key + T – Cycle through apps pinned to the taskbar (cycle in reverse is Windows Key + Shift + T)
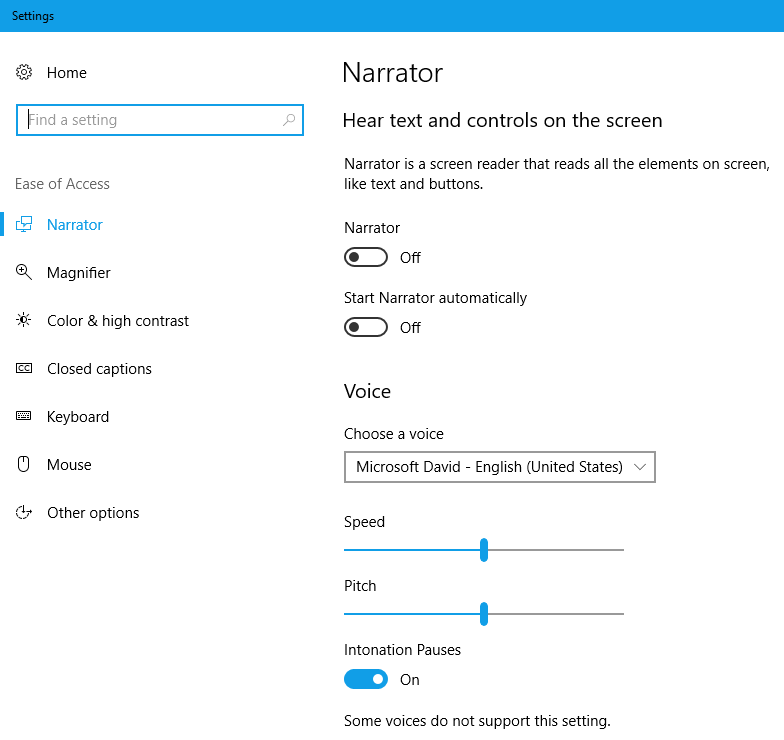
  21. Windows Key + U – Open Ease of Access Center
  22. Windows Key + V – Cycle through windows notifications
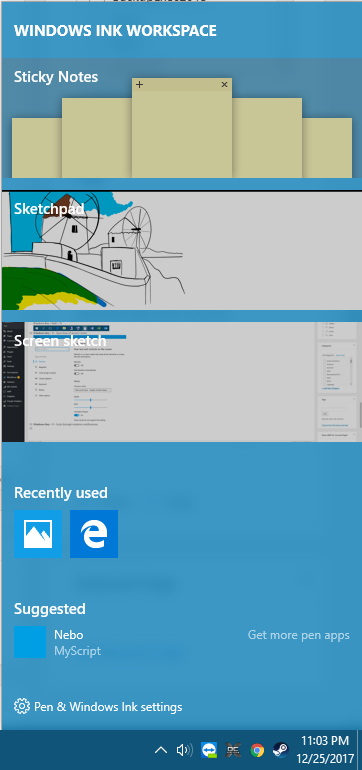
  23. Windows Key + W – Opens the Windows Ink Workspace
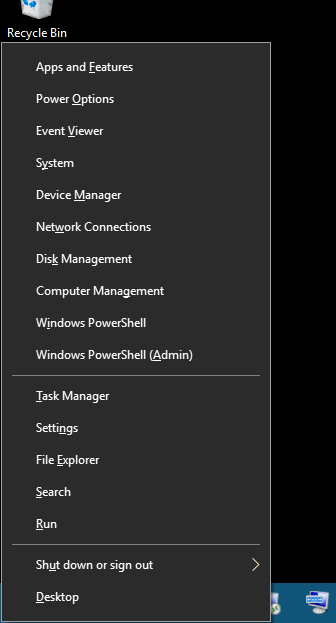
  24. Windows Key + X – Opens the Quick Links Menu (right-click on the start menu) 
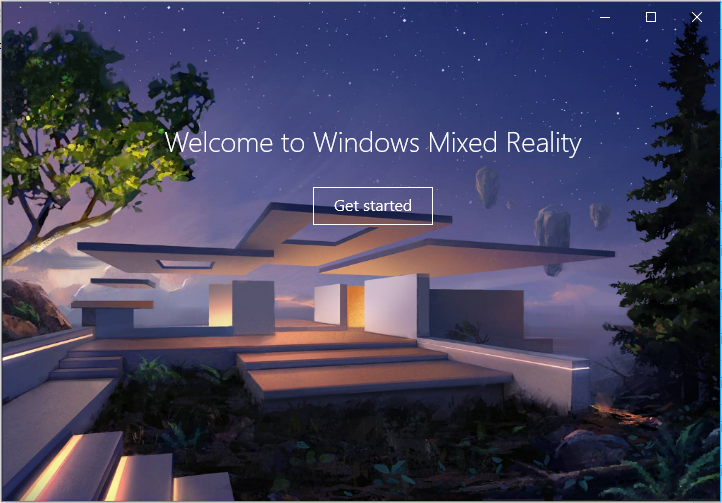
  25. Windows Key + Y – Switch input between Windows Mixed Reality and desktop (Your PC may not meet the minimum specs for Windows Mixed Reality)
  26. Windows Key + Z – Shows menus or commands available when an app is in full-screen mode.
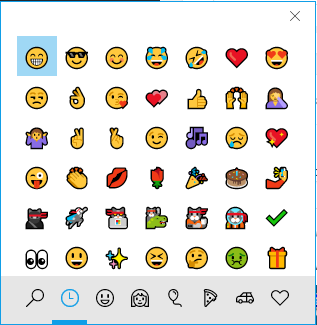
  27. Windows Logo Key + period (.) or semicolon (;) – Opens the Windows 10 Emoji control panel 👍                                                 
  28. Windows Key + Comma (,) – temporarily peek at the desktop
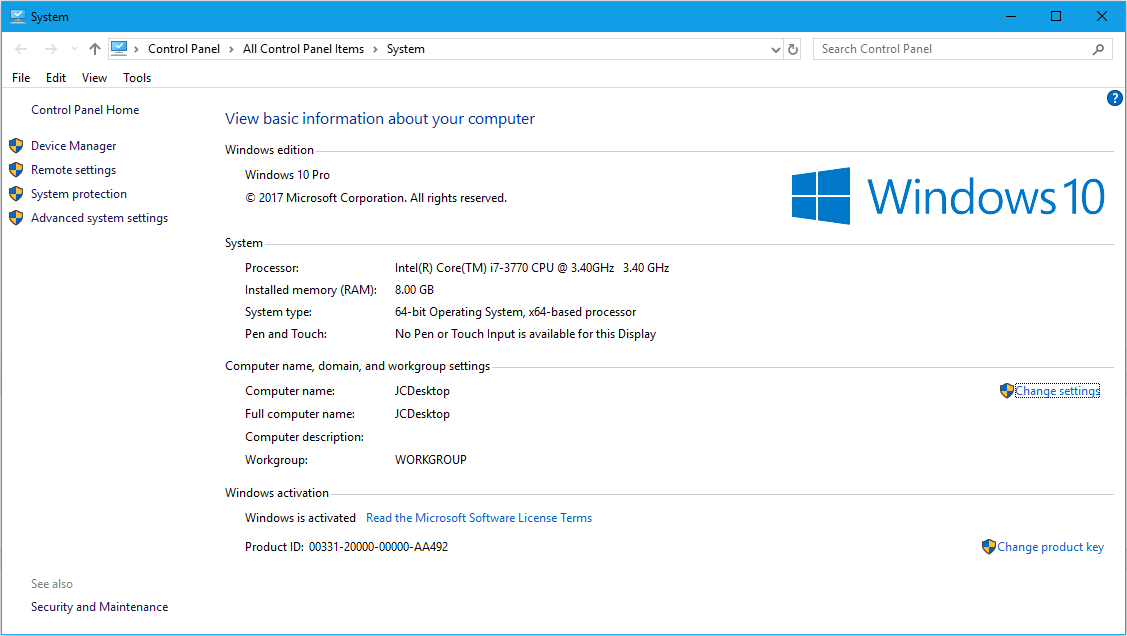
  29. Windows Key + Pause/Break – Opens the System Properties
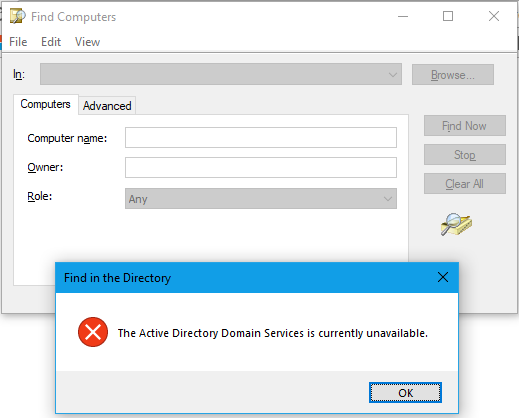
  30. Windows Key + Ctrl + F – Search for Active Directory computers on a network
  31. Windows Key + Number/Shift/Ctrl/Alt – Manage TaskView Virtual Desktops

I’m sure there are more so let me know in the comments if I missed any and let us know which are your favorites (mine is Windows Key + Pause/Break)

Security – Blue Team – Building a security project on a budget

How to Create and Build a Security Profile for Your Network on a Budget – Part 1

Start with Building a Foundation (or use an existing good one).

Credit to Kyle Bubp & irongeek.com: http://www.irongeek.com/i.php?page=videos/bsidescleveland2017/bsides-cleveland-102-blue-teamin-on-a-budget-of-zero-kyle-bubp

Use a Base Framework for your security project. There are a lot of standards available and the NIST government standards are a good solid foundation:

  • NIST 800-53
  • NIST Cybersecurity Framework
  • NIST CSF Tool
  • CIS Critical Security Controls
  • NIST-CSF tool – this is a nice visual tool – graphical interface for the stages of building a security program

Document everything

A core documentation repository is critical when setting up a security project – others will follow you and will need to look up the information you have recorded. It’s best to have a security incident response ticketing system and documentation before you need it. Have these tools up and ready.

For policy, procedure, how-tos, etc:

  • MediaWiki(free)
  • Atlassian Confluence ($10 for 10 users) – glyfee plugin for confluence
  • OneNote/SharePoint – not every company is entirely open source

Incident Response Ticketing/Documentation systems:

Map out your entire network

  • NetDB – Uses ARP tables and MAC databases on your network gear. (use a service account and NetDB will use ssh/telnet to find every device connected, will give a nice http interface. You can setup a cron job that will scan NetDB database every hour. You can pipe new device connections to an email address. Knowing if something comes onto your network is critical.

.ova is available at https://www.kylebubp.com/files/netdb.ova

Supports the following: Cisco, Palo Alto, JunoOS, Aruba, Dell Powerconnect

  • nmap scans + ndiff/yandiff – not just for red teams; export results, diff for changes. Alert if something changed.
  • NetDisco

https://sourceforge.net/projects/netdisco – uses SNMP to inventory your network devices.

  • Map your network – create a Visio document and have a good network map.

Visibility

Facebook-developed osquery and this tool can give you all you need.

Agents for MacOS, Windows, Linux

Deploy across your enterprise w/ Chef, Puppet, or SCCM

Do fun things like search for IoC’s (FBI file hashes, processes) – pipe the data into ElasticStack for visibility & search-ability

User Data Discovery

OpenDLP – (github) or (download an .ova) – will scan file shares and using a normal user account you can scan for available shares and data. Run over the weekend and see what you can find. Find the data owners and determine where the data should reside.
Hardening Your Network

CIS Benchmarks – Center for Internet Security Benchmarks: 100+ configuration guidelines for various technology groups to safeguard systems against today’s evolving cyber threats.

Out of the box, windows 10 is 22% for the CIS benchmark.

It’s difficult to secure your network if everything is a snowflake. While not exciting, configuration management is important. Deploy configs across your org using tools like GPO, Chef, or Puppet.

Change management is also important – use git repo for trackign changes to your config scripts.

Safety vs. Risk

Scanning for Vulnerabilities:

OpenVAS (greenbone) is a fork of Nessus which is still maintained, is the default vulnerability scanner in AlienVault. It does a great job in comparison with commercial products. Be careful, do some safe scans first and it’s not recommended to scan critical life-support equipment for example in a hospital.

Scan web apps:

Arachni Framework – for finding bugs in your developer’s code

OWASP ZAP (Zed Attack Proxy)

Nikto2 (Server config scanner)

Portswigger Burp Suite (not free – $350)

Harden your web servers:

Fail2ban – python-based IPS that runs off of Apache Logs

ModSecurity – Open source WAF for Apache & IIS

Test USB 3.0 and USB 2.0 thumb flash drive on Windows 10 read write speeds

How to test USB thumb drives for USB 3.0, USB 2.0, and test Read and Write Speeds on Windows 10

Determine if USB Port is 2.0 or 3.0 in Windows 10:

Below are some directions and screenshots of how you can tell if a USB drive is connected to Windows 10 with USB 3.0 or USB 2.0., first insert the drive into a USB port on your Windows 10 computer.

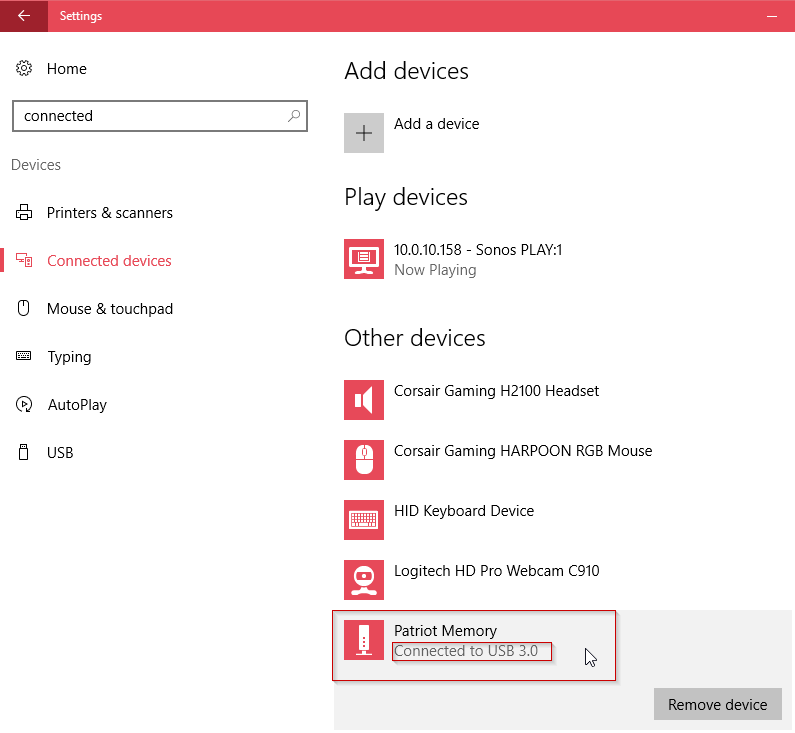
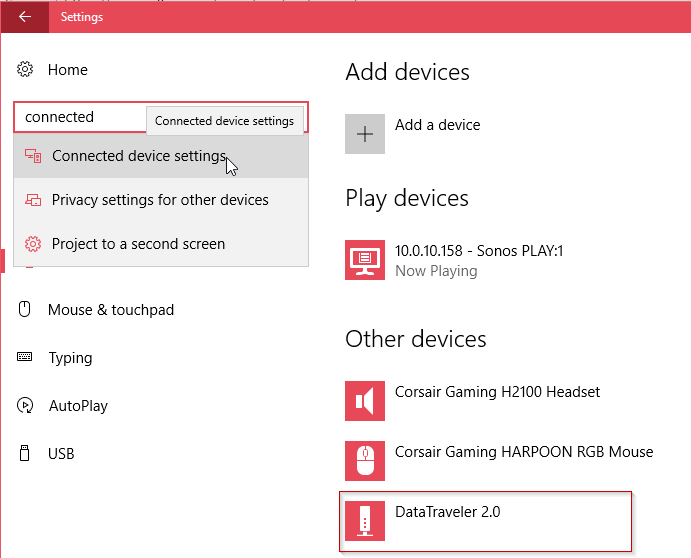
Click on the Start Button > then click on the Settings gear icon > in the “Find a Setting” box > type “Connected Devices” > then click on the “Connected Device Settings” icon. The USB 3.0 will show “Connected to USB 3.0”, the USB 2.0 drives will not display these words:

Testing Read and Write speeds of USB 2.0 and USB 3.0 with SpeedOut utility and  Windows 10.

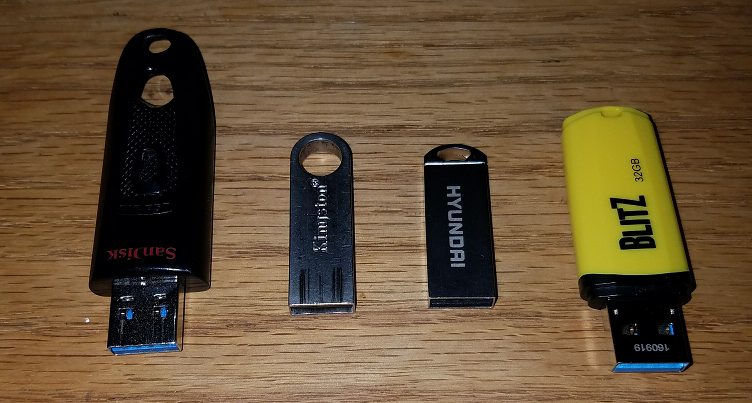
I picked up a couple thumb drives this weekend that were on sale at Frys. I like to have both USB 2.0 and USB 3.0 drives on hand in case a computer doesn’t recognize USB 3.0 as a boot drive. I wanted to determine the Read and Write speeds of my USB drives to test if they actually display a difference according to their listed specs (spoiler alert: numbers can be deceiving.) My PC workstation has an Intel SSD drive and USB 3.0 ports.  I downloaded and ran the SpeedOut v0.5 utility against 4 different USB thumb drives:

  1. Patriot Memory Flash PSF32GBLZ3USB 32GB USB3.0 BLITZ with a yellow plastic case.
  2. Hyundai USB 2.0 Bravo 16GB with a metal case.
  3. Kingston USB 2.0 DTS E9 Data Traveller 16GB with a metal case.
  4. SanDisk Ultra USB 3.0 32GB SDCZ48-032G with a plastic case.

All four drives were formatted FAT32 (and I tested the Patriot drive as NTFS.) The way you know if a device is connected to 3.0 USB in windows 10: Start > Settings > Search “Find a setting” : type in “devices” > Show all results > Connected Device Settings > Other devices > Find your USB drive and it should say “Connected to USB 3.0”. More details on where to find this setting at the bottom of the article.

Anyway, I ran SpeedOut utility against the Patriot USB 3.0 drive first, and the results were: 23.7 MB/s READ and 27.8 MB/s.

I ran the same SpeedOut test against on the same USB port using a HYUNDAI USB 2.0 BRAVO 16GB drive (wasn’t recognized as USB3.0 by Windows 10) and it’s results were: 21.9 READ and 10.5 WRITE.

Then I ran the same SpeedOut test again using a Kingston DTS E9 Data Traveler and it’s results were 17.158 READ and 9.8 MB/s WRITE.

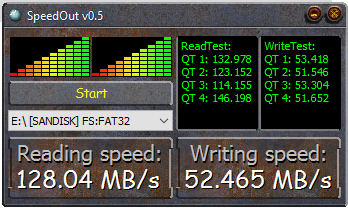
Lastly I ran the same SpeedOut test again using a SanDisk Ultra USB 3.0 32GB drive and the results were: 128.04 MB/s READ and 52.47 MB/s WRITE.

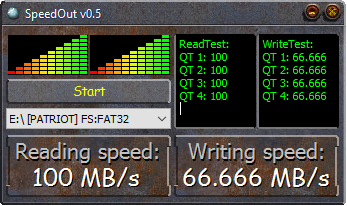
I gave the Patriot USB 3.0 drive another chance the results of a 2nd read write test against the drive were pretty good:

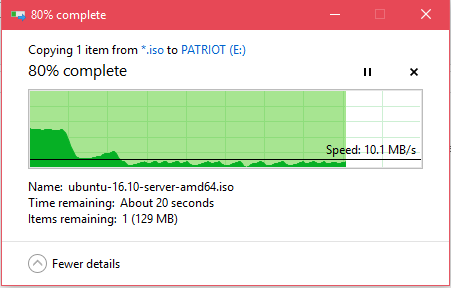
This test gave me hope that the drive would have decent write speeds but upon testing the copy of an ubuntu-16.10-server-amd64.iso (684.032 MB) file from my SSD drive to the Patriot USB 3.0 Drive, the results show surprisingly slow speeds after an initial burst of speed:

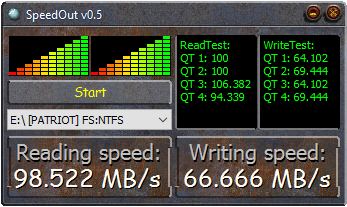
I thought perhaps this may have to do with the drive formatted as Fat32, so I formatted the drive as NTFS and tried again. Here is the SpeedOut result first:

Now the same Ubuntu.iso copy and it’s results:

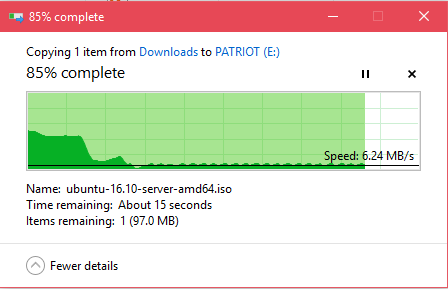
Same results. The write speed would alternate between 6.24 MB/s and 12 MB/s which is in all reality pretty abysmal for a USB 3.0 drive! The total copy time for the 684MB file was 55.12 seconds…

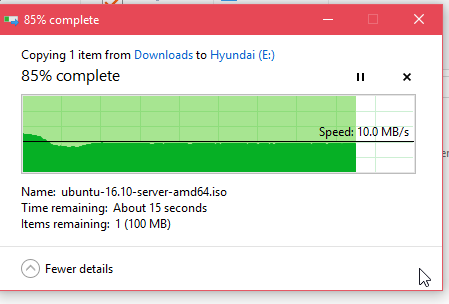
The total copy time for the HYUNDAI USB drive for the same ubuntu .iso was 1:10.02 seconds.

The USB Patriot USB 3.0 drive did not fare much better than the Hyundai USB 2.0 drive, but I did notice that there is an initial speed burst when copying data to the Patriot drive. To test this I copied a 100MB file to the Patriot drive and while the first copy of the 94MB file did quickly finish at around 60 MB/s, however subsequent tests were very low again in the 6-12MB/sec range. The Patriot drive is no other way to describe than flaky; fast sometimes for a little while, but ultimately pretty slow – just a little better than the USB 2.0 drives.

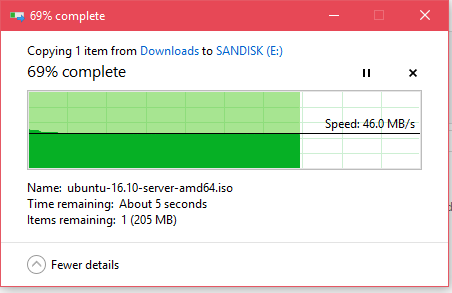
Lastly I tested the copy speed of the same Ubuntu .iso file to the SanDisk Ultra 3.0 32 GB drive formatted Fat32 and the amount of time to copy was  14.59 seconds!

Just because something says USB 3.0 and is on sale, doesn’t mean you’re going to get true USB 3.0 speeds reliably…

Dell Latitude 3570 SSD HDD upgrade procedure reinstall reset recover Windows 10 on blank disk from DVD

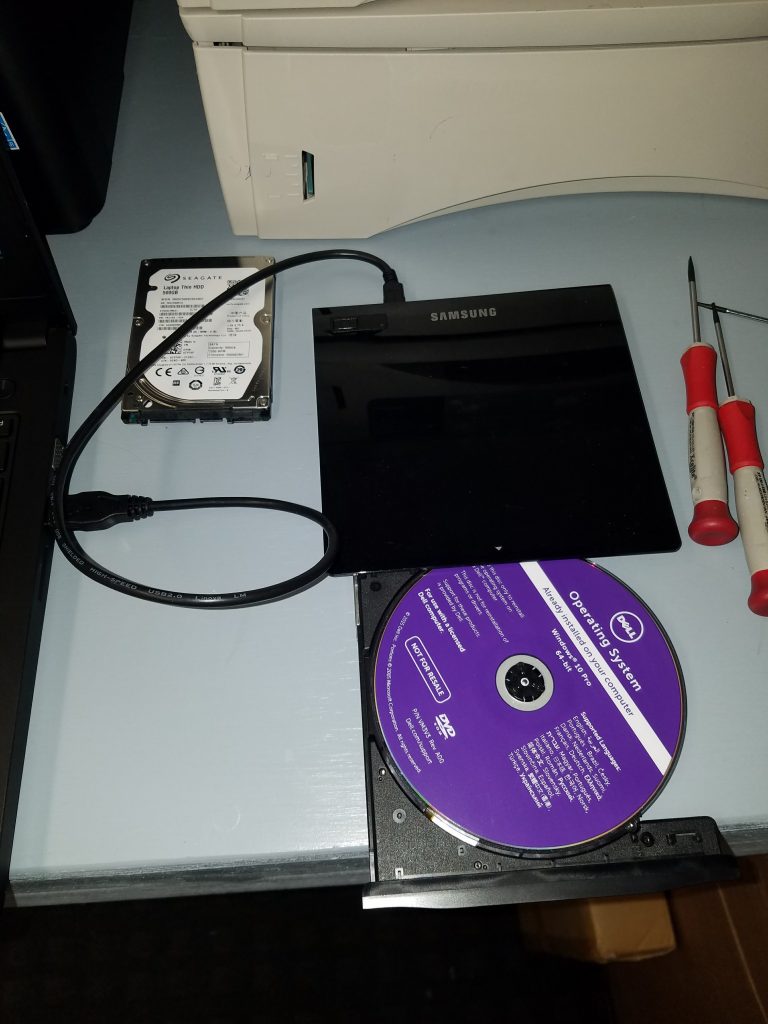
So you received a Dell Latitude e3570 for business and the laptop already has a downgrade Windows 7 Pro Operating System installed on the existing 500GB 7200RPM hard drive. You want to make the machine faster and upgrade to Windows 10, so you decide to install a 120GB SSD HDD (or a Samsung M.2) and then install Windows 10 Pro from scratch. You already have the Dell Windows 10 Pro DVD. The problem is that you don’t have a hard disk image, clone image, cloning software, or machine to clone from the old HDD to the new SSD, nor do you even want to use an existing Operating System image. You don’t want to go through the steps of an upgrade from Windows 7 Pro to Windows 10 Pro and then perform a clone as well. Well, that’s what happened to me and I usually prefer to perform a clean installation from a certified Dell Windows 10 Pro 64-Bit DVD for use with a licensed Dell computer like the one in the picture below. After banging my head over what amounts to a relatively simple solution, and doing some research, I thought I’d spare someone else the pain of what I went through by documenting the solution here.

So, you gleefully pop open the back of the laptop by loosening the cover screws, replace the SATA HDD with your new SSD HDD, and close up the cover again. With an external USB DVD drive, power on the laptop, hit F12, select the Dell DVD as your boot device, and hit a brick wall with the following sequence:

Language > Country > Choose option: Troubleshoot > Reset this PC > Reset this PC: Remove everything :

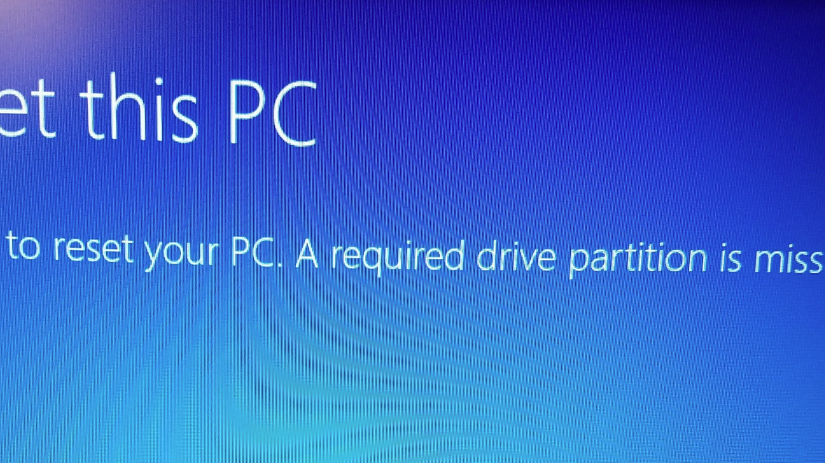
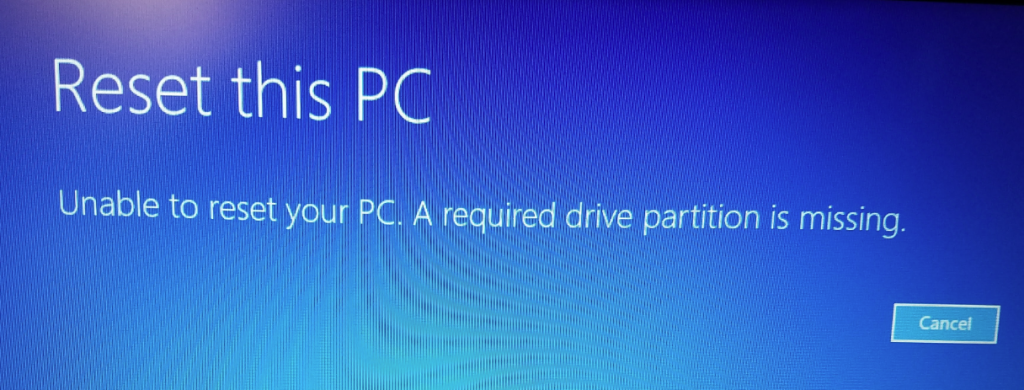
Error: Reset this PC – Unable to reset your PC. A required drive partition is missing. (cancel)

In this event, what the setup is doing is that it’s assuming you already have Windows 10 installed on the hard drive, and that perhaps it’s corrupted, and you are choosing to have the installer find the default recovery partition that’s already on the hard drive (which it isn’t because it’s a brand new-wiped-clean-by-the-factory SSD). Also, you’d already probably know that if you DID already have the recovery partition on the hard drive that you’d choose the “Repair my computer” option in the boot menu by hitting F12 when starting…

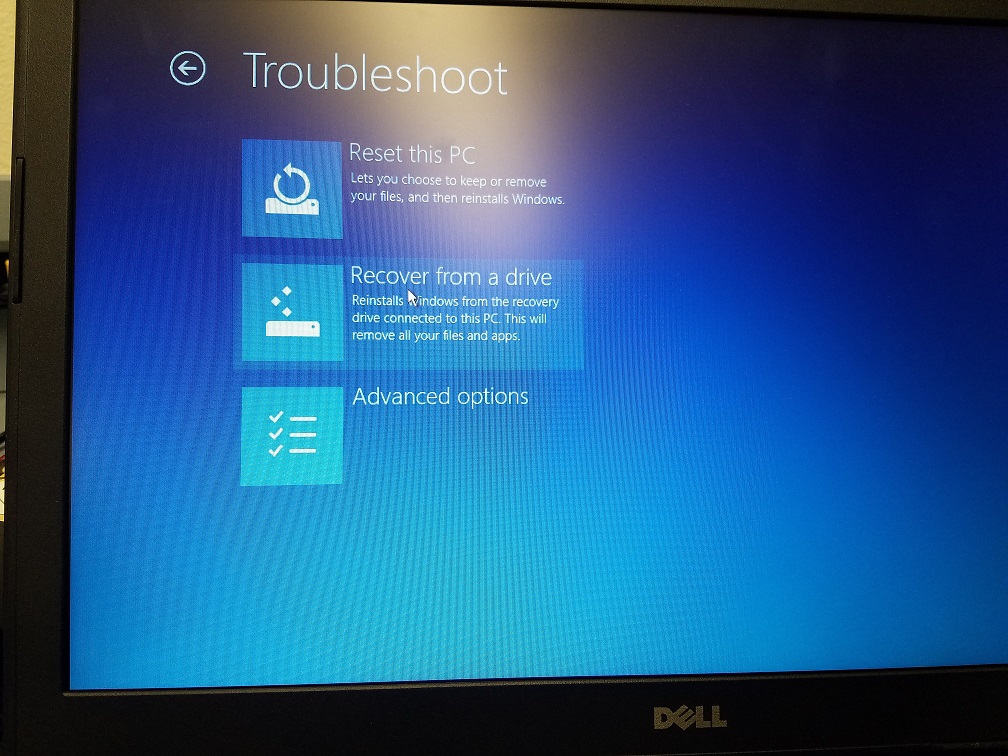
So the problem is actually not difficult to resolve because, in summary, the solution is you merely need to choose the following sequence instead and perform a “Recover from a drive“, not “Reset this PC”. *Note: if you do this, your BIOS may still hold non-recommended Boot and Drive configurations for Windows 10, so be sure to follow the instructions after the screenshots that your BIOS and new SSD HDD is set up for correct secure-boot operations.

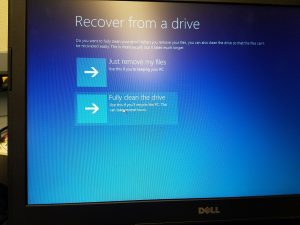
Language > Country > Choose option: Troubleshoot > Recover from a drive > Fully clean the drive

At this point, if you have replaced an M2 hard drive, you may have received the following error:  “Unable to reset your pc. The system drive cannot be found.” If this is the case, skip to the bottom of this post to find new information.

Like I said, it’s a good idea to check some BIOS settings and secure your new SSD HDD boot device prior to running the system Recover > Fully clean the drive operation.

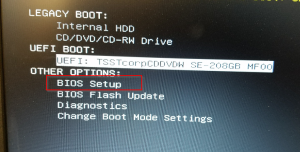
  1. First hit F12 and select OTHER OPTIONS: BIOS Setup
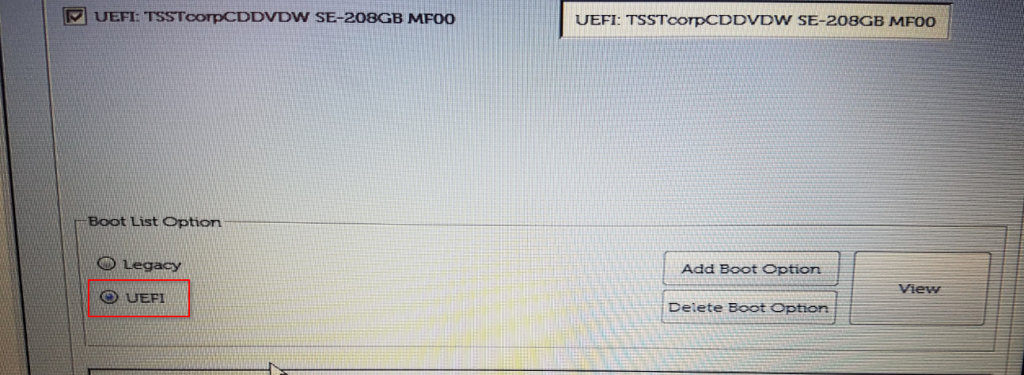
  2. Next under General > Boot Sequence, set the Boot List Option to UEFI
  3. Next, under General heading, select Advanced Boot Options and uncheck “Enable Legacy Option ROMs”
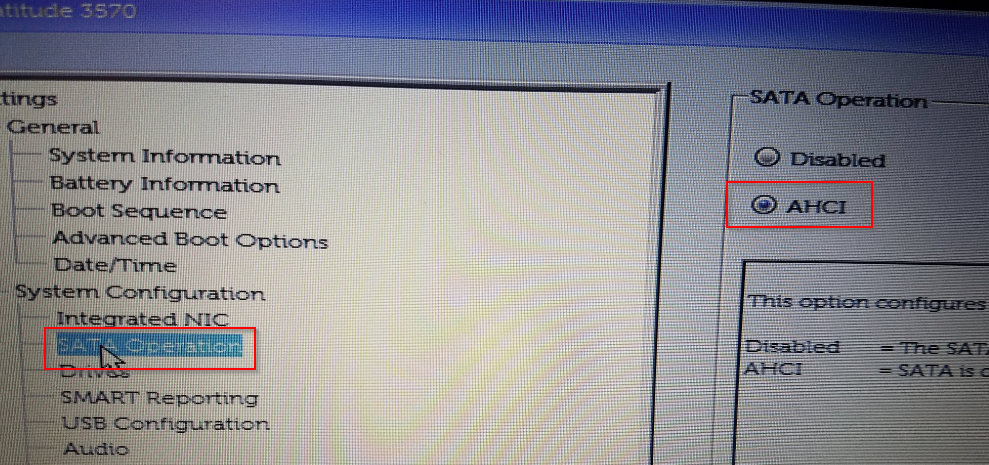
  4. Next, under System Configuration, make sure SATA Operation is set to AHCI:
  5. Next, go to the heading Secure Boot and set Secure Boot Enable to Enabled:
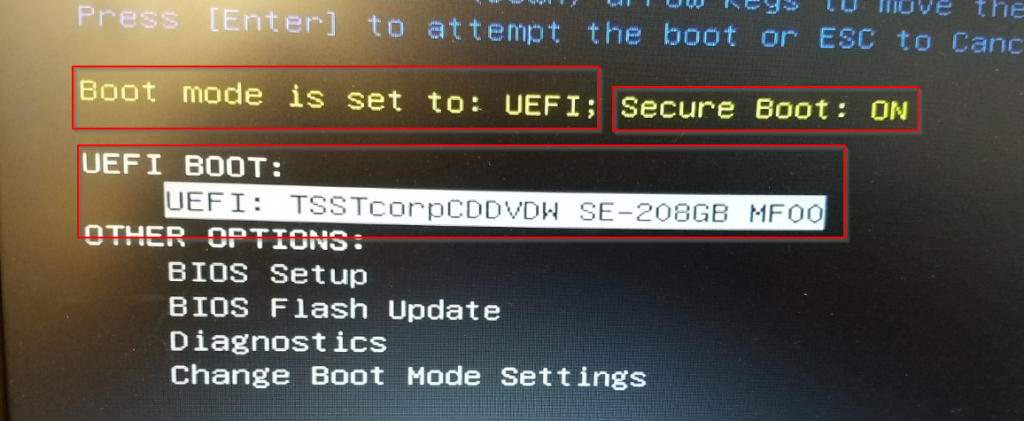
  6. Now save all the changes to the BIOS and restart/Save, and hit F12 again, where at the next menu you will use the UEFI BOOT: to your external USB/DVD drive:
  7. Now go ahead and go back to the Troubleshoot > Recover from a drive > Fully clean the drive. *Note: this action will completely destroy anything that is already on the hard drive so before you do this action, be sure you have a backup of what was previously on the drive; if anything.
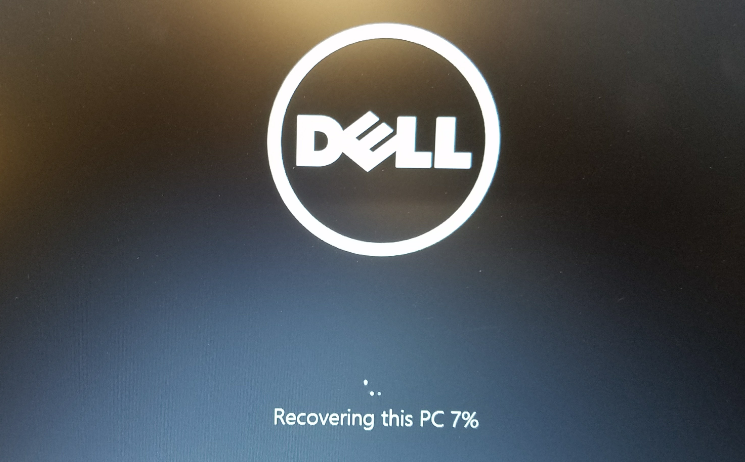
  8. Once the procedure runs and the machine reboots, you should see the “Recovering this PC” and a percentage status.
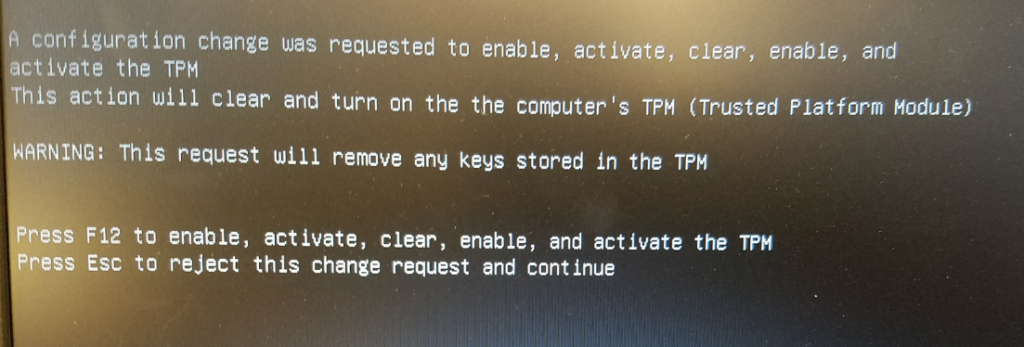
  9. The machine will complete the procedure and you may receive the following warning: A configuration change was requested to enable, activate, clear, enable, and activate the TPM – This action will clear and turn on the computer’s TPM (Trusted Platform Module) – WARNING: This request will remove any keys stored in the TPM: Press F12 to enable, activate, clear, enable, and activate the TPM or Press Esc to reject this change request and continue. Unless you have stored keys and want to retain them, go ahead and hit F12. 
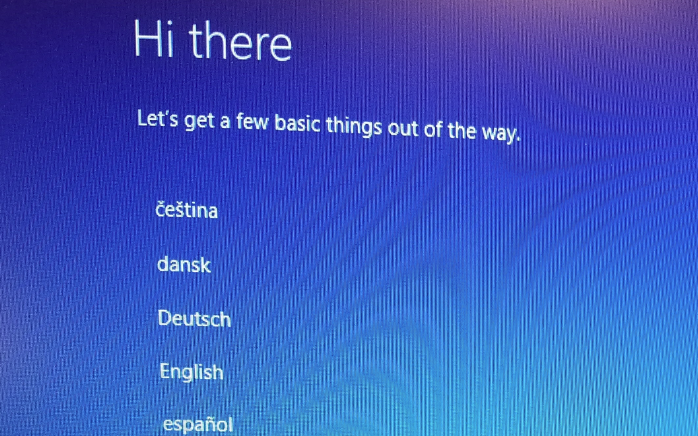
  10. The machine will restart a couple more times and finally, you should be prompted with the traditional setup:
  11. Complete the setup, remove the DVD from the computer, restart and enjoy your newly installed Windows 10 Pro on your Latitude 3570 with an SSD hard drive. In my opinion, this is a very worthwhile upgrade and the speed difference between Windows 7 Pro on a spinning HDD as compared to Windows 10 on an SSD is like night and day.

__________________

So if your error encountered during a “Recover from Drive” was:  “Unable to reset your pc. The system drive cannot be found.” then you’ll want to take note. The Purple DVD you are trying to recover from may not include the required M2 Hard drive drivers in order for the installer to find your new hard drive. “Extra Fudge” found some success by downloading the drivers manually (which did not solve the problem for me – more below…) from Intel (if you’re installing an Intel M2 HDD, that is) and that information can be found here:

Dell Recovery disc not working. “Unable to reset your pc. The system drive cannot be found”

The link to the updated drivers in this post can be found here:

https://downloadcenter.intel.com/download/27147/Intel-Rapid-Storage-Technology-Intel-RST-?v=t

Like I said earlier, this fix and was not successful (perhaps because I was installing a Samsung NVMe SSD 960 EVO M.2 drive.)

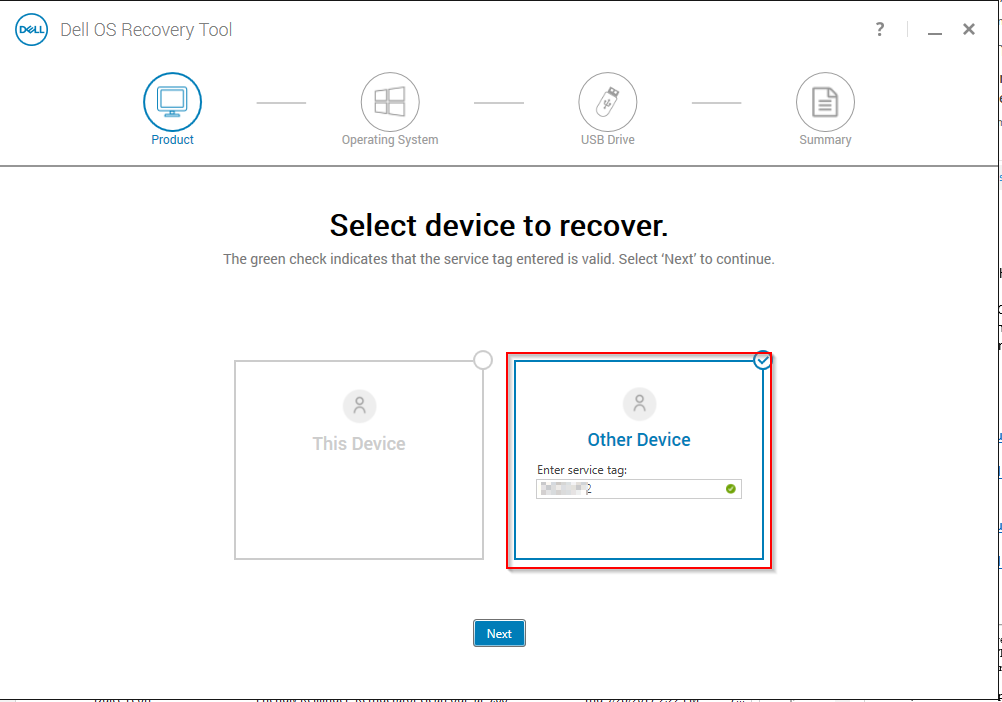
Finally what solved my problem was to use the new Dell Operating System Imaging Tool, which assumably has the correct M.2 drivers baked into the image.

You’ll need an 8GB or larger drive USB thumb drive to complete this task. Go to Dell support https://support.dell.com, enter in the Service Tag, Select find Drivers Myself, > Select OS Windows 10, and then download the Operating System Image tool.

Next, run the tool and the rest is pretty self-explanatory.

How to run Mac OS X El Capitan on Windows 7 or Windows 10 – How to build a Hackintosh VM Virtual Machine

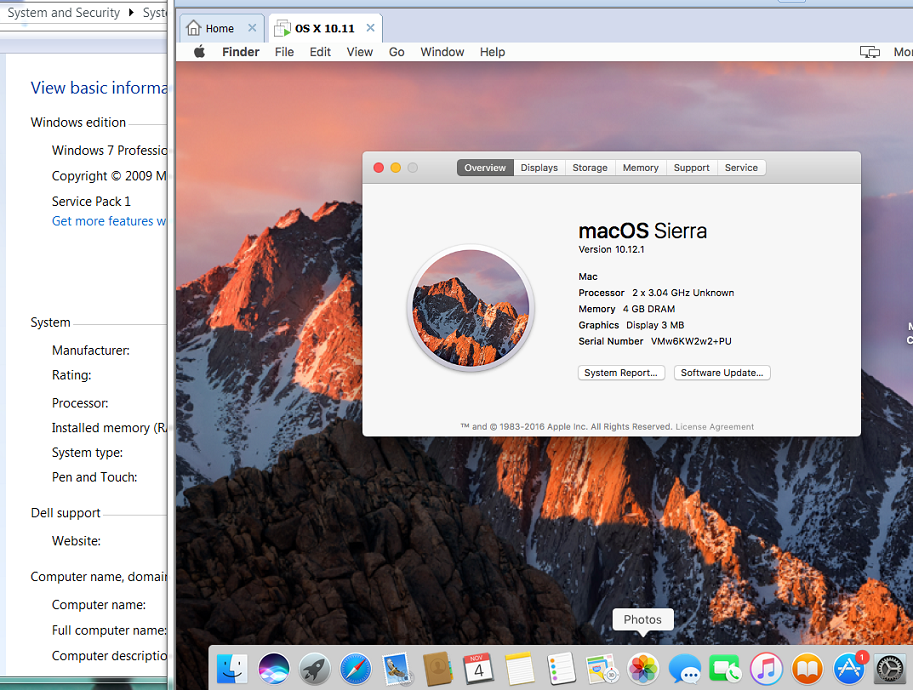
Here is a guide to show how to build an OS X El Capitan virtual machine that runs on top of Windows 7 or Windows 10. Thanks to this video, (where only the first 3:30 minutes are relevant to this guide,) I wrote a step by step solution to building a hackintosh virtual machine that runs on top of Windows. Once you have OS X El Capitan running on Windows you can easily build a bootable OS X USB drive to further install the latest OS X operating system on a normal Mac. Building a hackintosh may be against the OS X terms of use so I don’t advise selling such a machine/solution and this guide is only for your testing and troubleshooting.

  1. Download VMware Player from official VMware website (30 day free trial):
    https://www.vmware.com/products/player
  2. Download OS X El Capitan: https://goo.gl/vXKKL6
  3. Download latest Unlocker app at http://www.insanelymac.com/forum/files/file/339-unlocker/
  4. Unpack Unlocker and copy to the same directory as your unpacked OS X El Cap.vmdk files.
  5. Run the unlocker file named “Win-Install”
  6. Create a new folder on the desktop and name El Cap Install Folder.
  7. Open VMWare Player -> New VM -> Typical -> Install OS Later -> Mac OS 10.11 -> Install to new El Cap Install folder you created. Store as single file -> Edit VM -> Set more ram and CPU -> Select HDD and remove -> Add new HDD -> SATA -> Use existing HDD -> Browse to El Cap.vmdk you downloaded and unpacked-> Keep existing format > Remove CD/DVD -> Show all USB devices -> finish ->
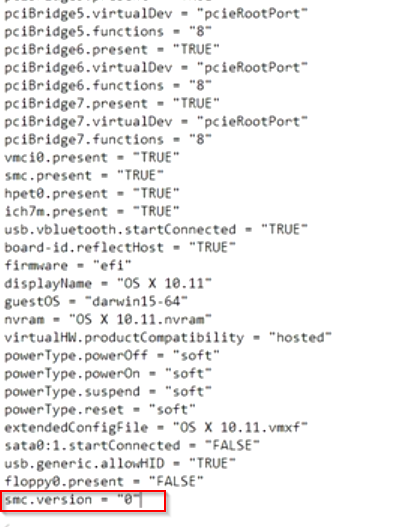
  8. Open the new Virtual Machine configuration file (OS X 10.11.vmx) inside your your “El Cap Install” folder, and open with notepad.

    vmx edit
    vmx edit
  9. At the end of the file add the line:
    smc.version = "0"
  10. Save
  11. Power on the OS X VM!

*Note, if you go on to build a USB bootable os x installation drive, after you insert your USB key drive into the computer, it may not show up on your OS X desktop. To fix this, click on the USB drive icon at the bottom right-hand corner of the vmware player frame.

attach-usb-drive-to-hackintosh-osx-in-vmware-player

powershell – Find all computers in a domain or OU running a service

Sometimes you need to find all the computers on a domain that are running a certain particular service. By using Active Directory, supplying your canonical domain name, and define an output file, you can easily create a list of computers running a service.

First, start PowerShell as administrator, and import active-directory powershell components with the following command:

Import-Module ActiveDirectory

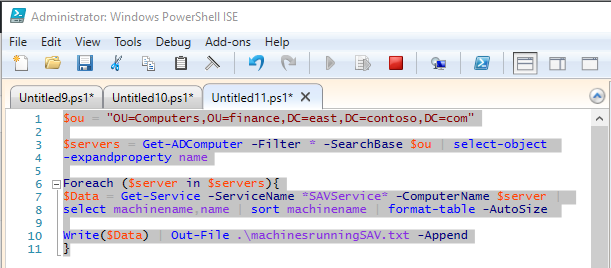
Then, open PowerShell ISE and copy in the following into a new .ps1 script:

$ou = "OU=Computers,OU=finance,DC=east,DC=contoso,DC=com"

$servers = Get-ADComputer -Filter * -SearchBase $ou | select-object 
-expandproperty name

Foreach ($server in $servers){
$Data = Get-Service -ServiceName *SAVService* -ComputerName $server | 
select machinename,name | sort machinename | format-table -AutoSize 

Write($Data) | Out-File .\machinesrunningSAVService.txt -Append
}

Run the script, and your output file will look similar to the following:

MachineName Name      
----------- ----      
hostname1   SAVService


MachineName Name      
----------- ----      
hostname2   SAVService


MachineName Name      
----------- ----      
hostname3   SAVService

How to enable RDP remotely with psexec pstools

How to enable RDP remotely with psexec pstools

If a computer is powered up on your network, but RDP is not enabled, you can create a group policy to enable RDP, and then restart the computer. Or instead, you can use psexec to remotely enable RDP.

Below are a couple one-line scripts to enable RDP on a remote computer from a different computer on the same domain. Keep in mind you need to be an administrator and you will only enable RDP for yourself, not an entire security group.

  1. Download the pstools to your computer from the sysinternals download site here and unzip them into a folder named pstools at the root of your c: drive.
  2. Open the command prompt as administrator.
  3. Change directory into c:\pstools (where the pstools files are located) then run the command:
psexec64 -u domain\administrator -p "P@ssw0rd" \\remotecomputername.domain.com reg add "hklm\system\currentcontrolset\control\terminal server" /f /v fDenyTSConnections /t REG_DWORD /d 0

4. Run another command to open the required ports in the firewall on the remote machine

psexec64 -u domain\administrator -p "P@ssw0rd" \\remotecomputername.domain.com netsh firewall set service remoteadmin enable

5. RDP into the remote machine with mstsc.exe successfully, and that’s it!

How to format a large external usb hard drive for use between both an OS X Mac and a Windows 10 PC

All versions of Windows since Windows Vista should be able to access a GUID drive. Because OS X is able to partition a GUID partition, we want to partition our large external hard drives with this compatible partition table. So, any modern computer since 2006 should be compatible. GUID doesn’t suffer from the restriction of a maximum partition size of 2TB, so if we have a hard drive larger than 2TB, we won’t be required to build multiple partitions with MBR.

Here’s a good quote for other important features regarding GUID (GPT stands for GUID Partition Table).

“On an MBR disk, the partitioning and boot data is stored in one place. If this data is overwritten or corrupted, you’re in trouble. In contrast, GPT stores multiple copies of this data across the disk, so it’s much more robust and can recover if the data is corrupted. GPT also stores cyclic redundancy check (CRC) values to check that its data is intact — if the data is corrupted, GPT can notice the problem and attempt to recover the damaged data from another location on the disk. MBR had no way of knowing if its data was corrupted — you’d only see there was a problem when the boot process failed or your drive’s partitions vanished.”

exFAT was released in 2006 as well, but Microsoft added backwards-compatibility to previous Windows versions from before Vista. The main benefit to it is that it doesn’t have the file size restrictions of FAT32, so individual files with exFAT can be larger than 4GB each. It probably isn’t super important for smaller files, but it could be a necessity for people working on larger files like videos or disk images.

Below is a step-by-step procedure for formatting a large External USB drive which can be used by both a Mac and a PC. This setup will utilize the newest, most fault-tolerant partition tables, and allows for the largest volume and file size capabilities. In my case I am formatting an 8TB Seagate Backup Plus+ USB 3.0 external HDD hard drive.

First, plug a new USB drive into a Mac:

  1. The Mac will automatically prompt if you want to use the drive as a Time Machine backup Disk – click “Don’t Use”
  2. Open Disk Utility
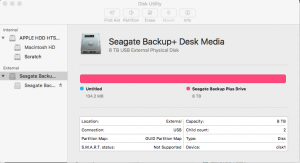
  3. On the left side of Disk Utility, under External, you should see your drive listed.
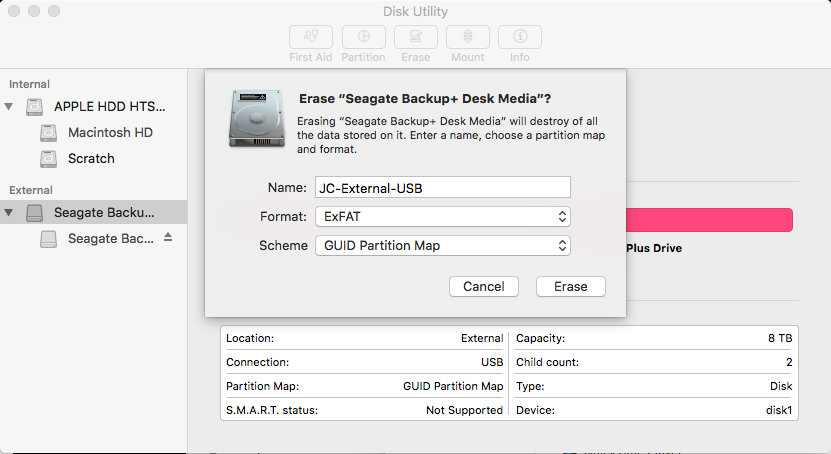
  4. Select the “highest-level” of the drive, not the partitions located underneath. In my case, Seagate Backup+ Desk Media.PC Mac External drive format (1)
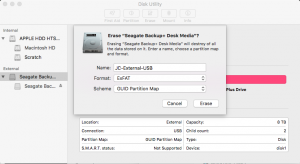
  5. At the top of Disk Utility, click the “Erase” button.PC Mac External drive format (2)
  6. Name your disk, such as “JC-External”.
  7. Under “Format” drop-down menu, select “ExFAT”
  8. Under “Scheme” drop-down menu, select “GUID Partition Map”PC Mac External drive format (3)
  9. Click “Erase”
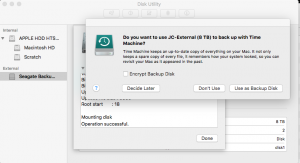
  10. Once the drive has been erased, again, Time Machine will prompt to use as a backup disk – select “Don’t Use”PC Mac External drive format (4)
  11. Click “Done”
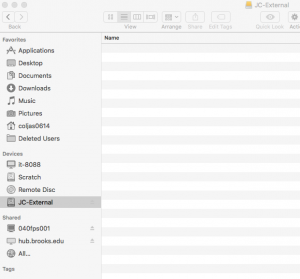
  12. Your drive should now be listed under Devices in the Finder.PC Mac External drive format (5)
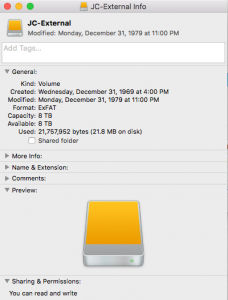
  13. Control-click or right-click on the device in the Finder, and click “Get Info”.  You can see that indeed it created an 8TB ExFAT Volume, but the Sharing and Permissions cannot be modified. Permissions can only be set if the drive is formatted with  “OS X Extended”. Also, notice that the Created/Modified dates may not be accurate, however, files and folders contained in the drive will display accurate modified dates/times.PC Mac External drive format (6)
  14. One thing to note, is after initially formatting the drive on a Mac, and then attaching the external drive to a Windows 10 PC, the drive may not immediately display with a drive letter by default in the Windows File Explorer. Go into Windows 10 Disk Management and find the drive listed in the discovered drives, but you may find that a drive letter is not associated with the volume.
  15. To fix this, in Disk Management, right-click on the large/unidentified new data volume and click “Change Drive Letter and Paths…”. Next, click the Add.. button, assign a drive letter (D:) and then OK. You should now find your external drive listed in Windows Explorer and see the files and folders you copied into it while it had been connected to your Mac.